
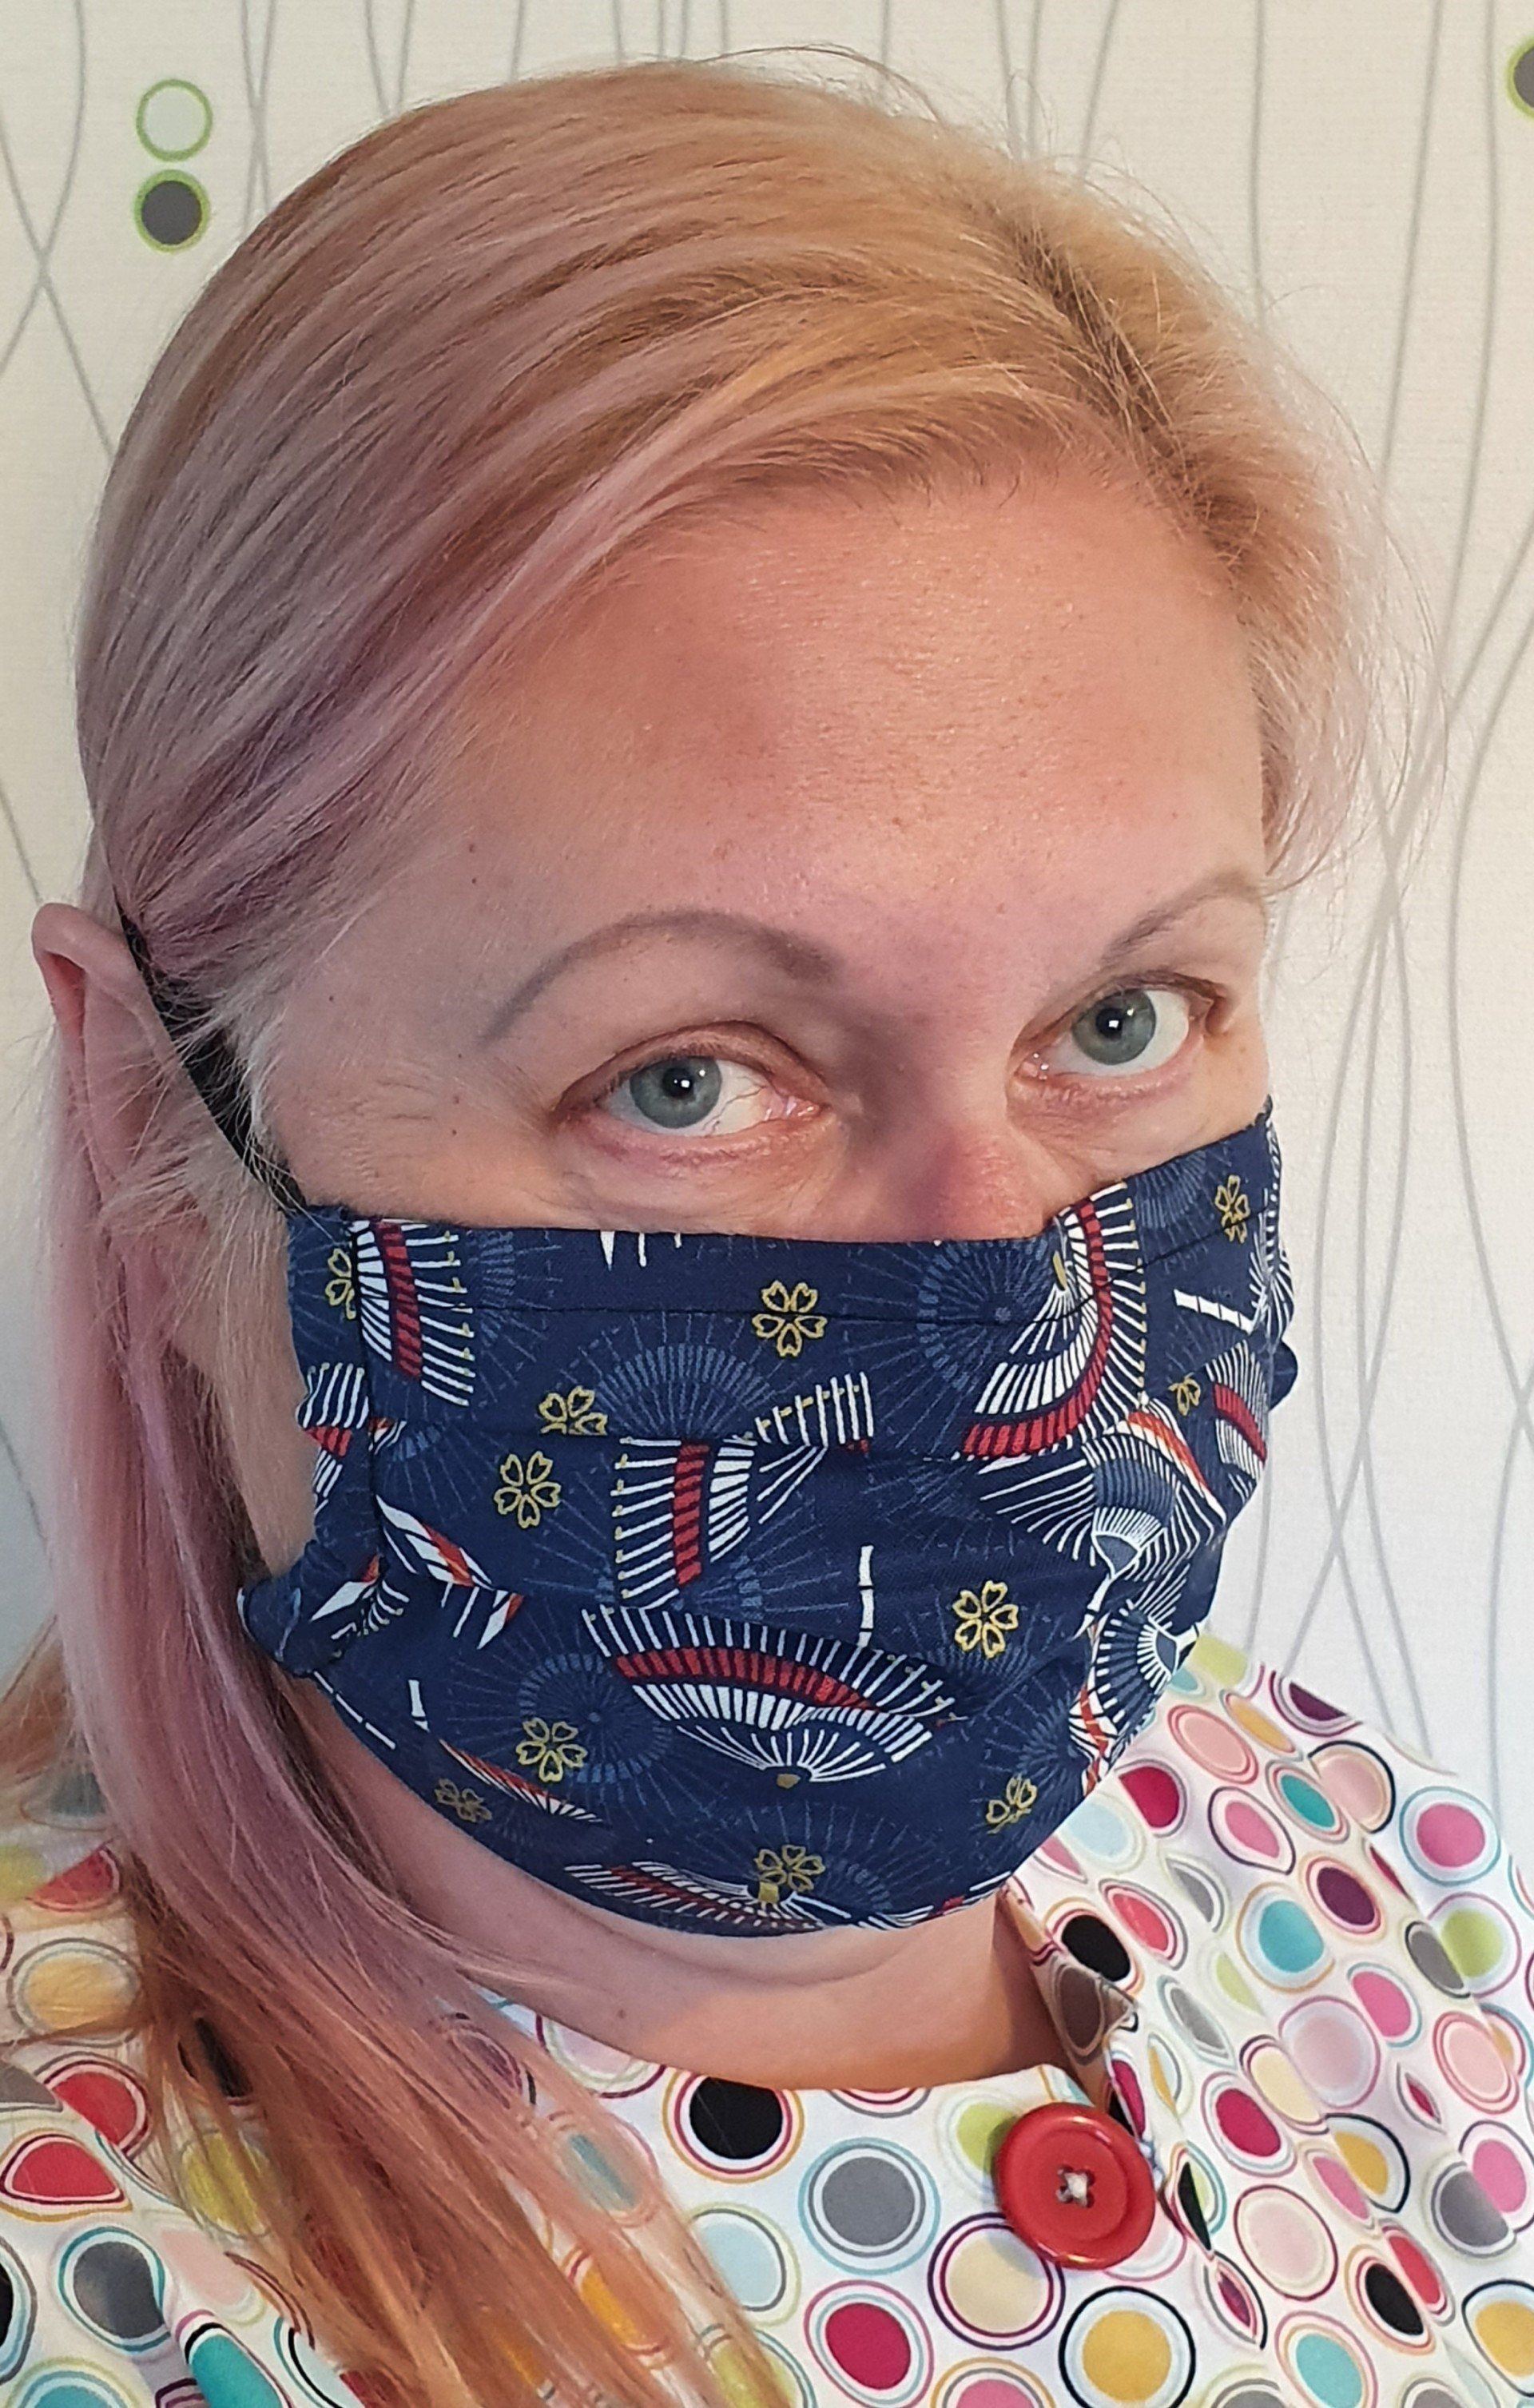
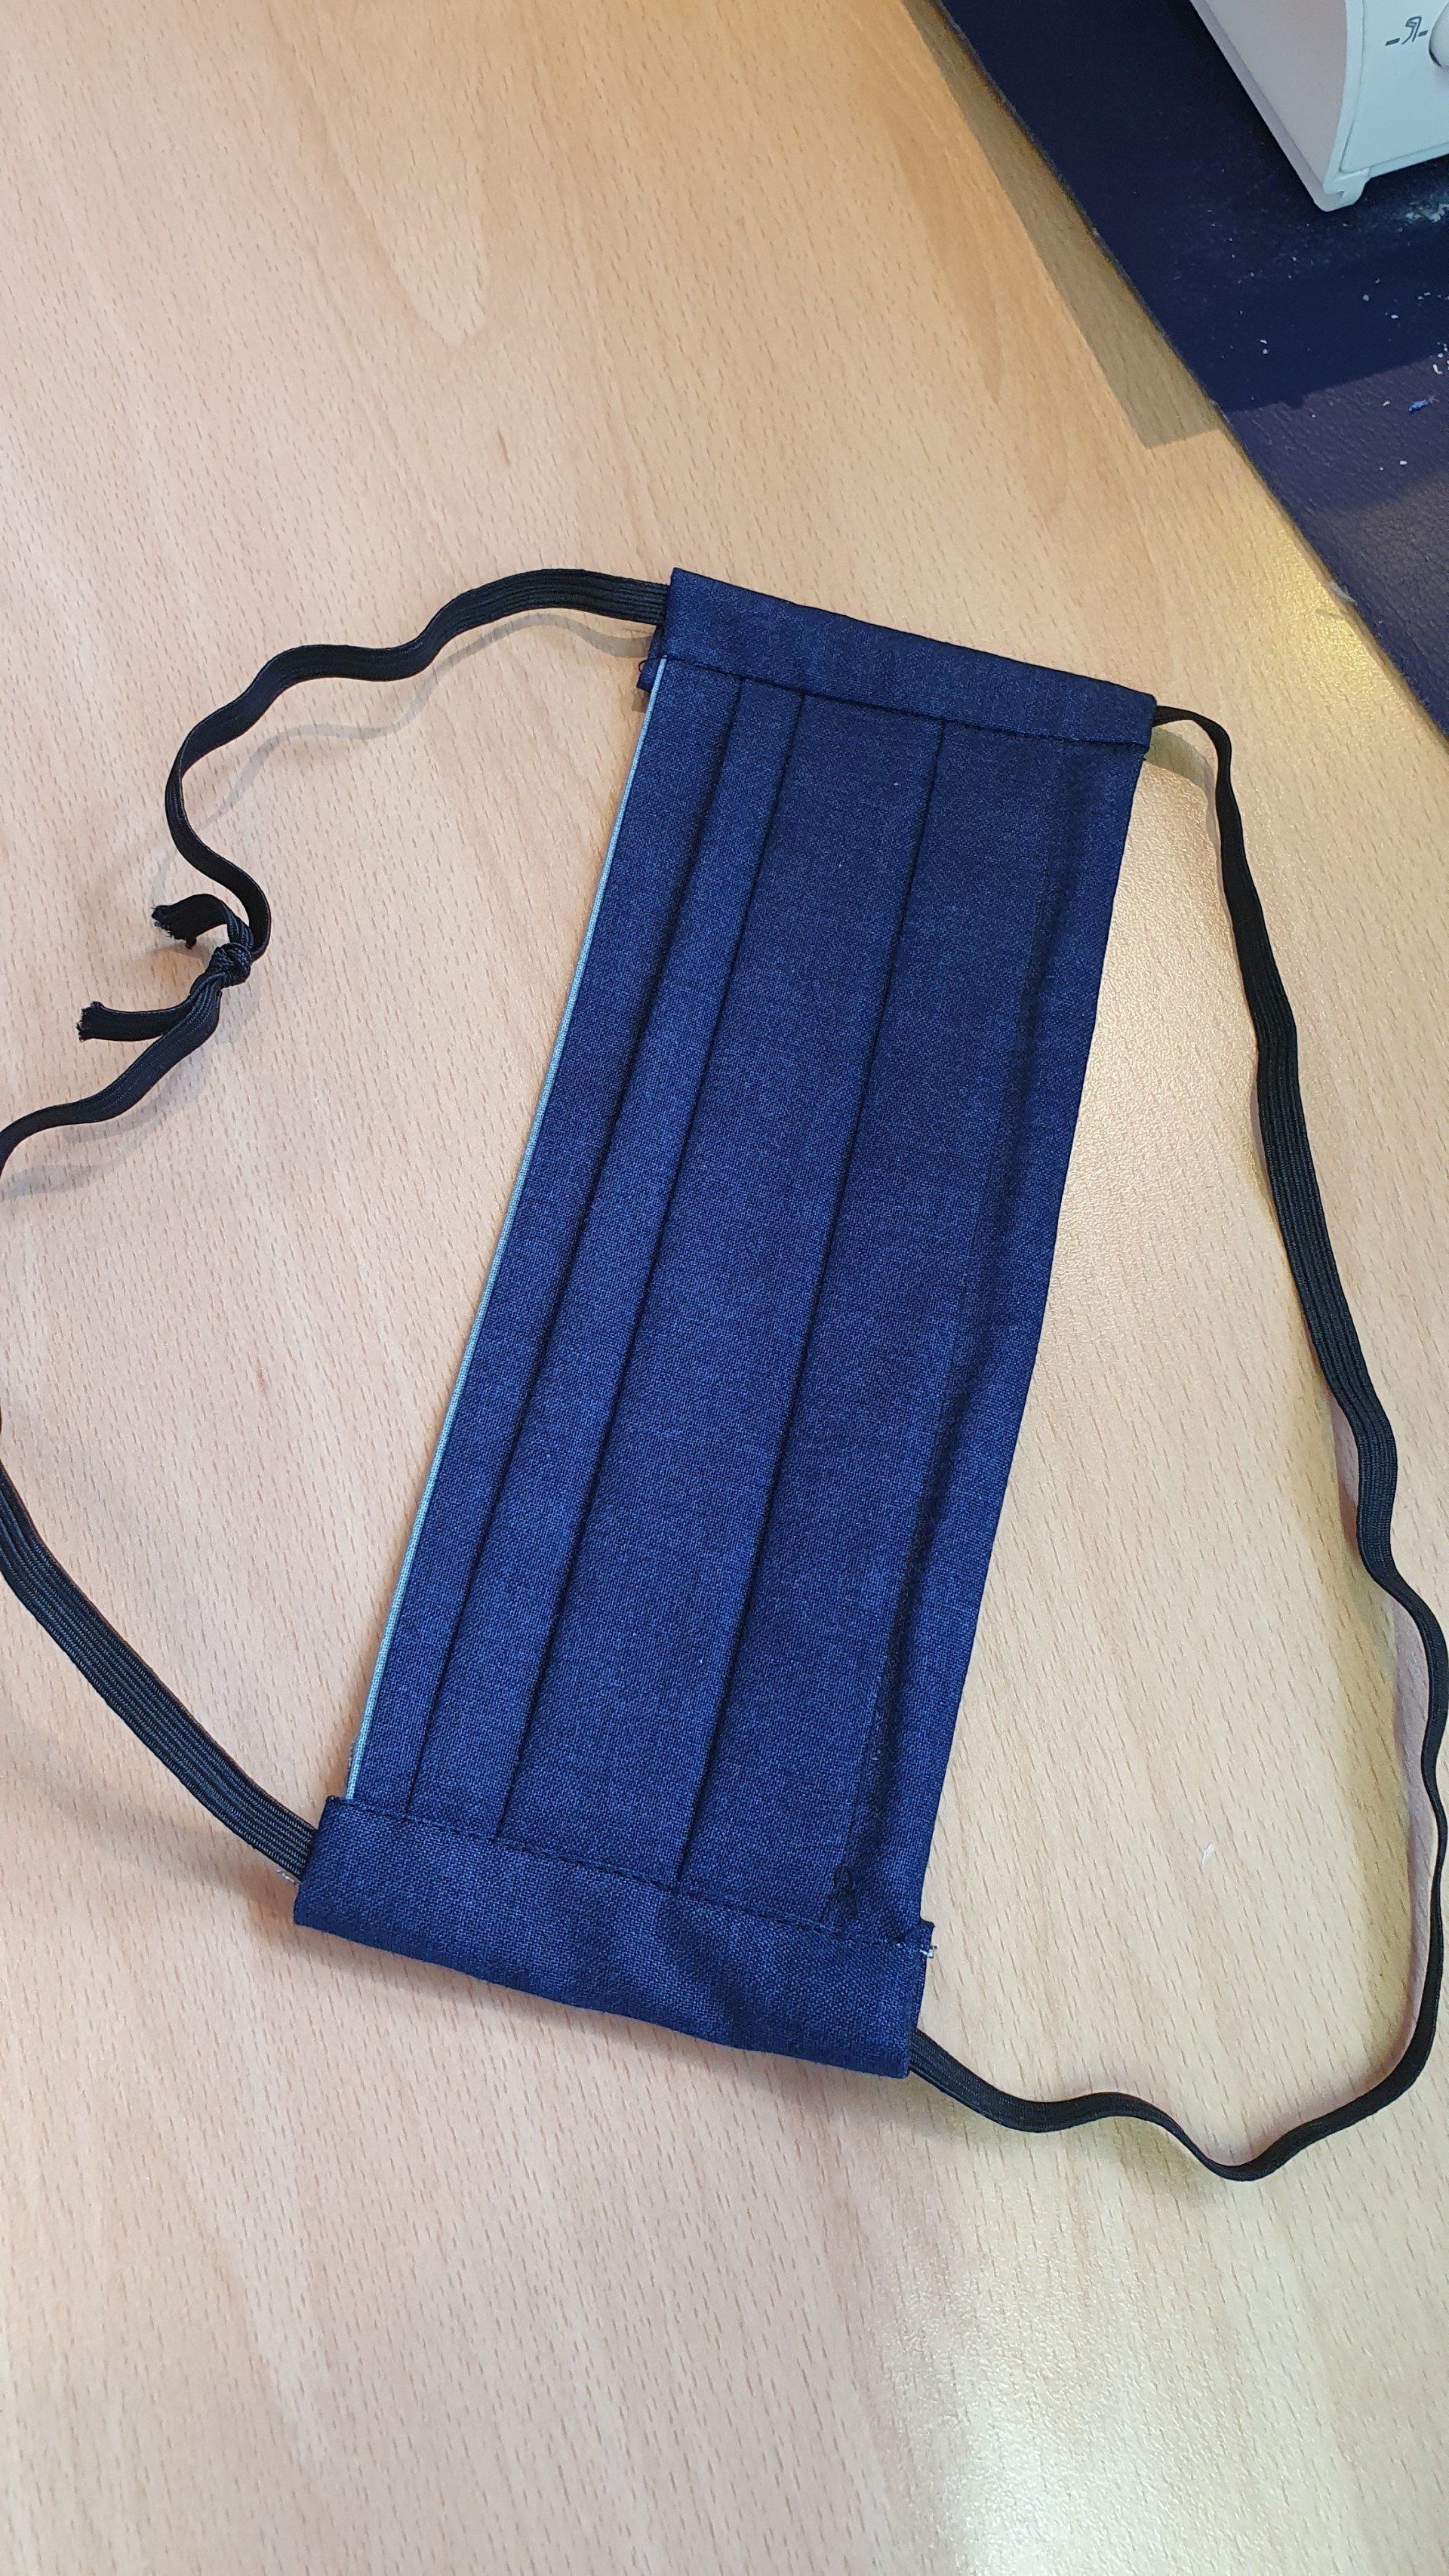
This tutorial is for a face covering with a wired nose piece, for a more snug fit
Now that we've been asked to wear face coverings, when in settings such as shops, the doctors and public transport, I thought a simple tutorial for one would be helpful.
This face covering has a wired nose piece, so that you can get a more snug fit. It also stops your glasses steaming up!
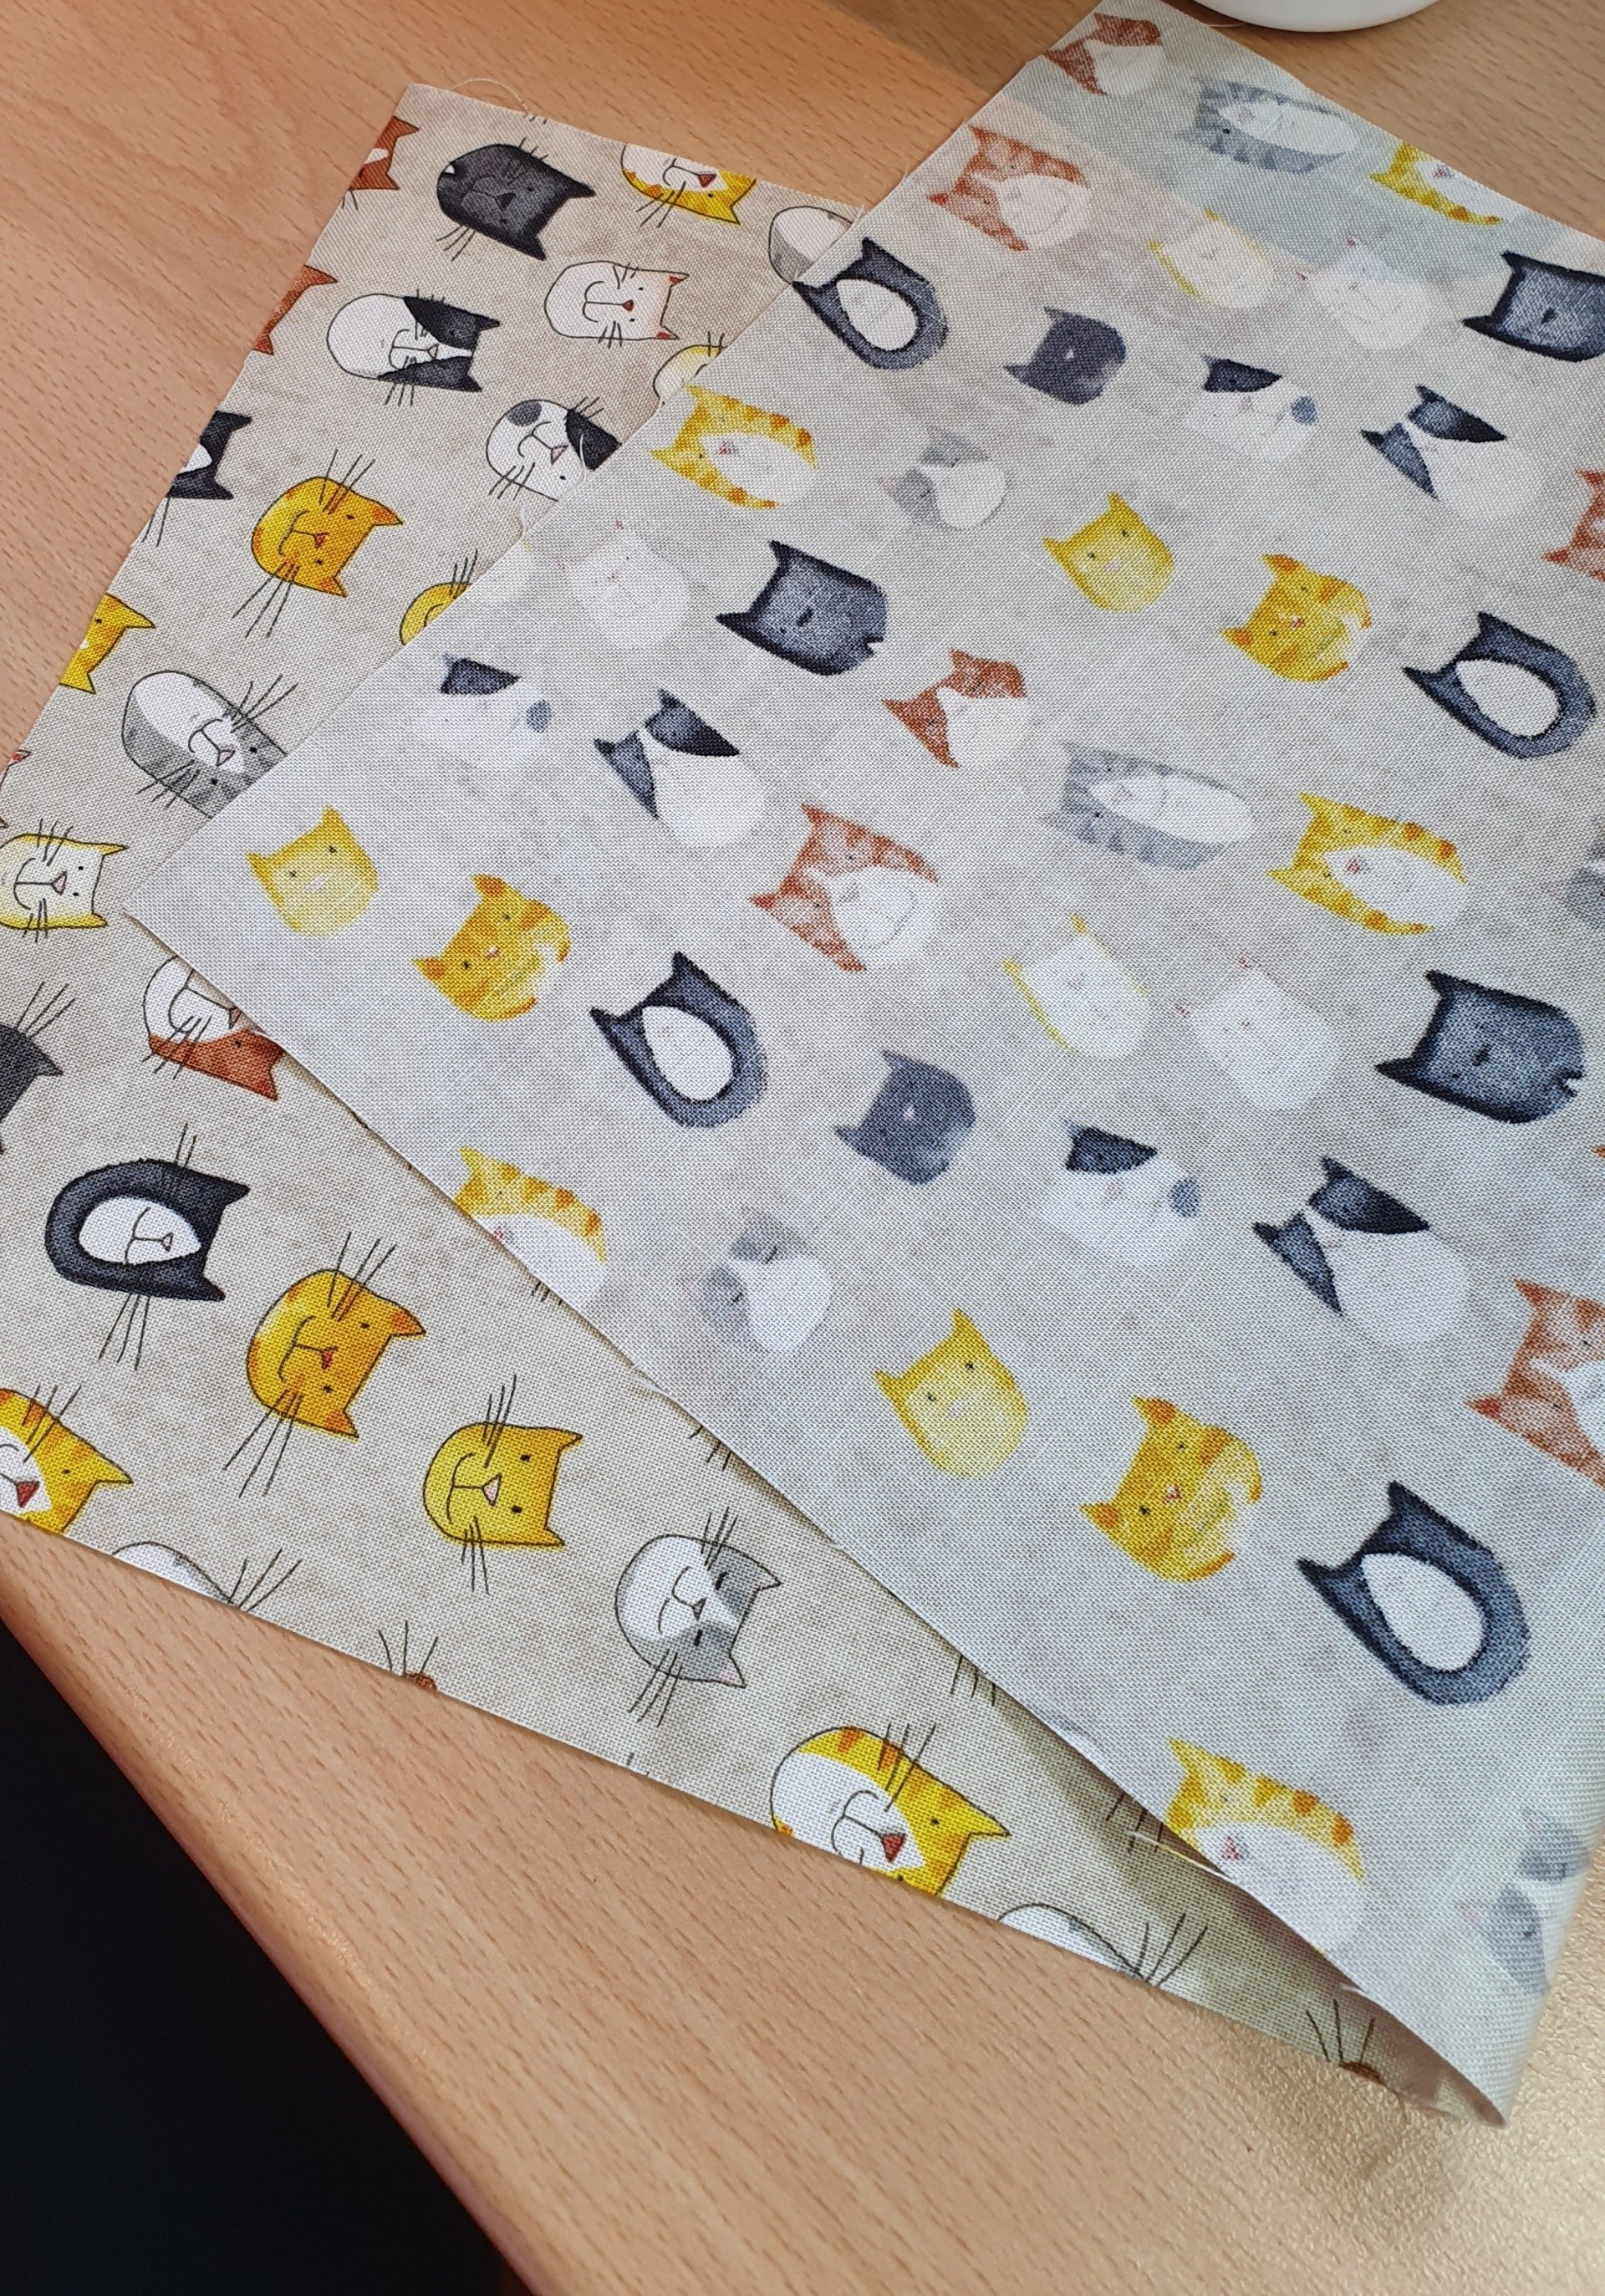
This is made from cotton, which is comfortable to breathe through and washes well. You can use a pillowcase or napkins if you don't have quilting cotton to hand. It doesn't use interfacing like some masks, as it makes it harder to breathe through and less comfortable.
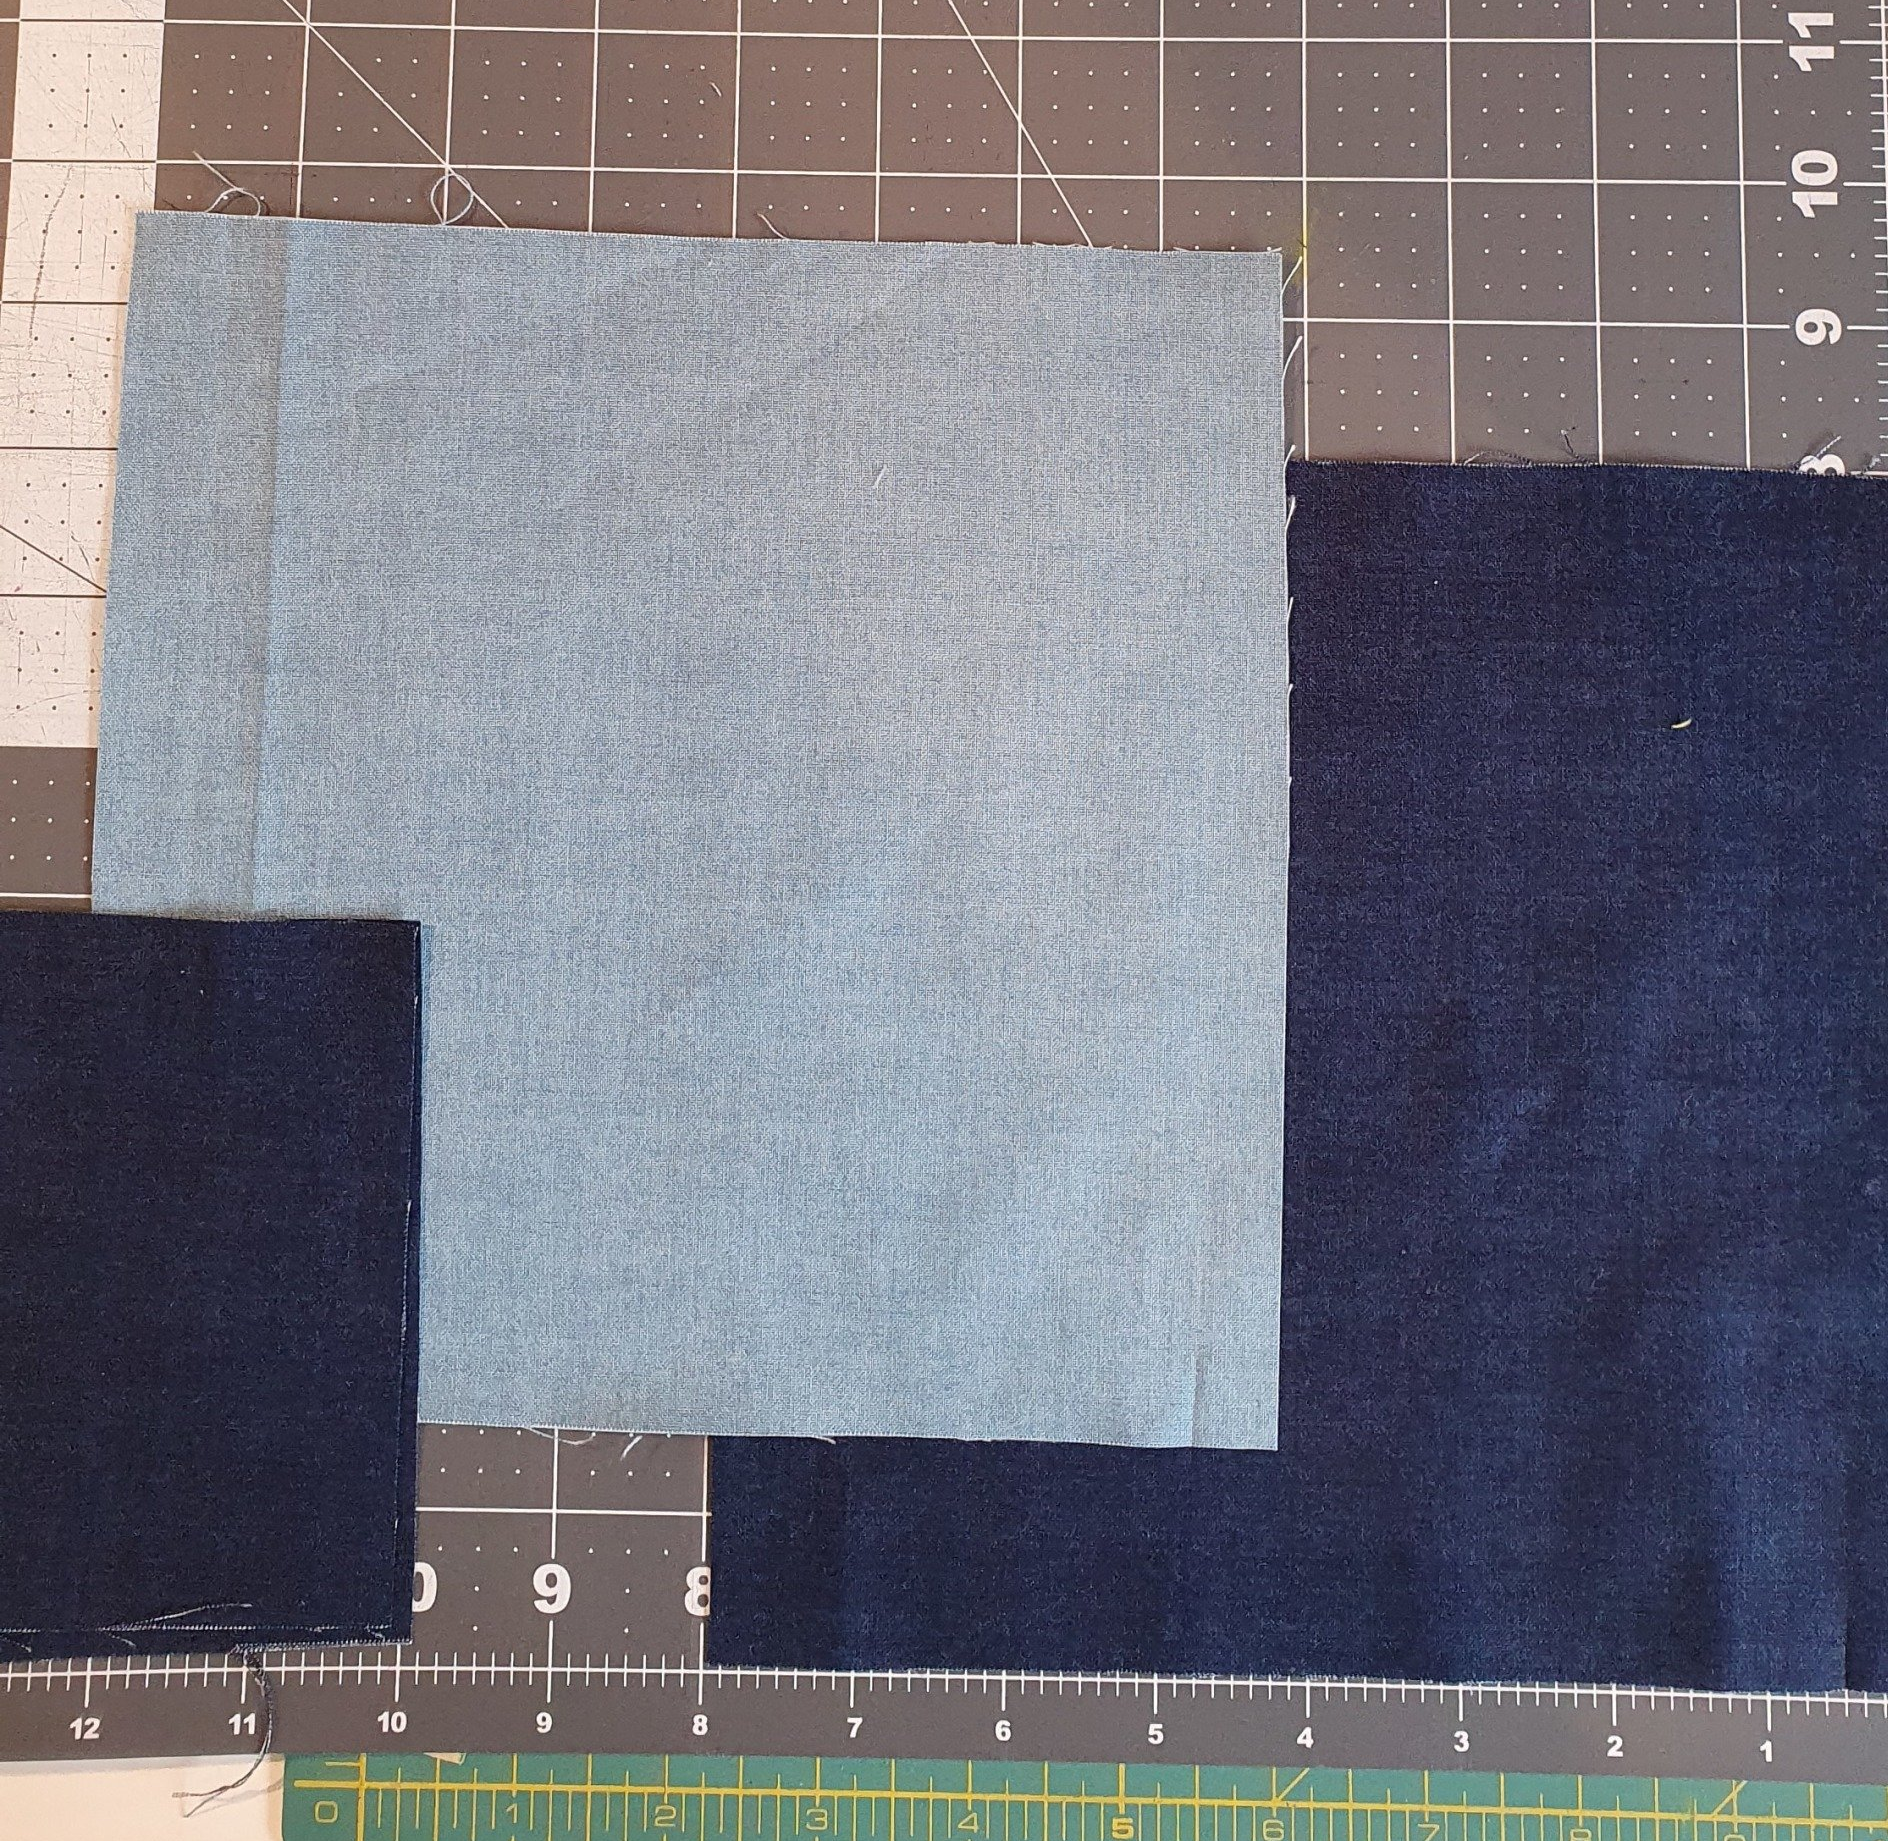
1. Cut 2 pieces 8" square from your cotton. plus 2 small pieces 3" wide and at least
4.5" long, doesn't matter of they are a bit more, just make the best from your fabric.
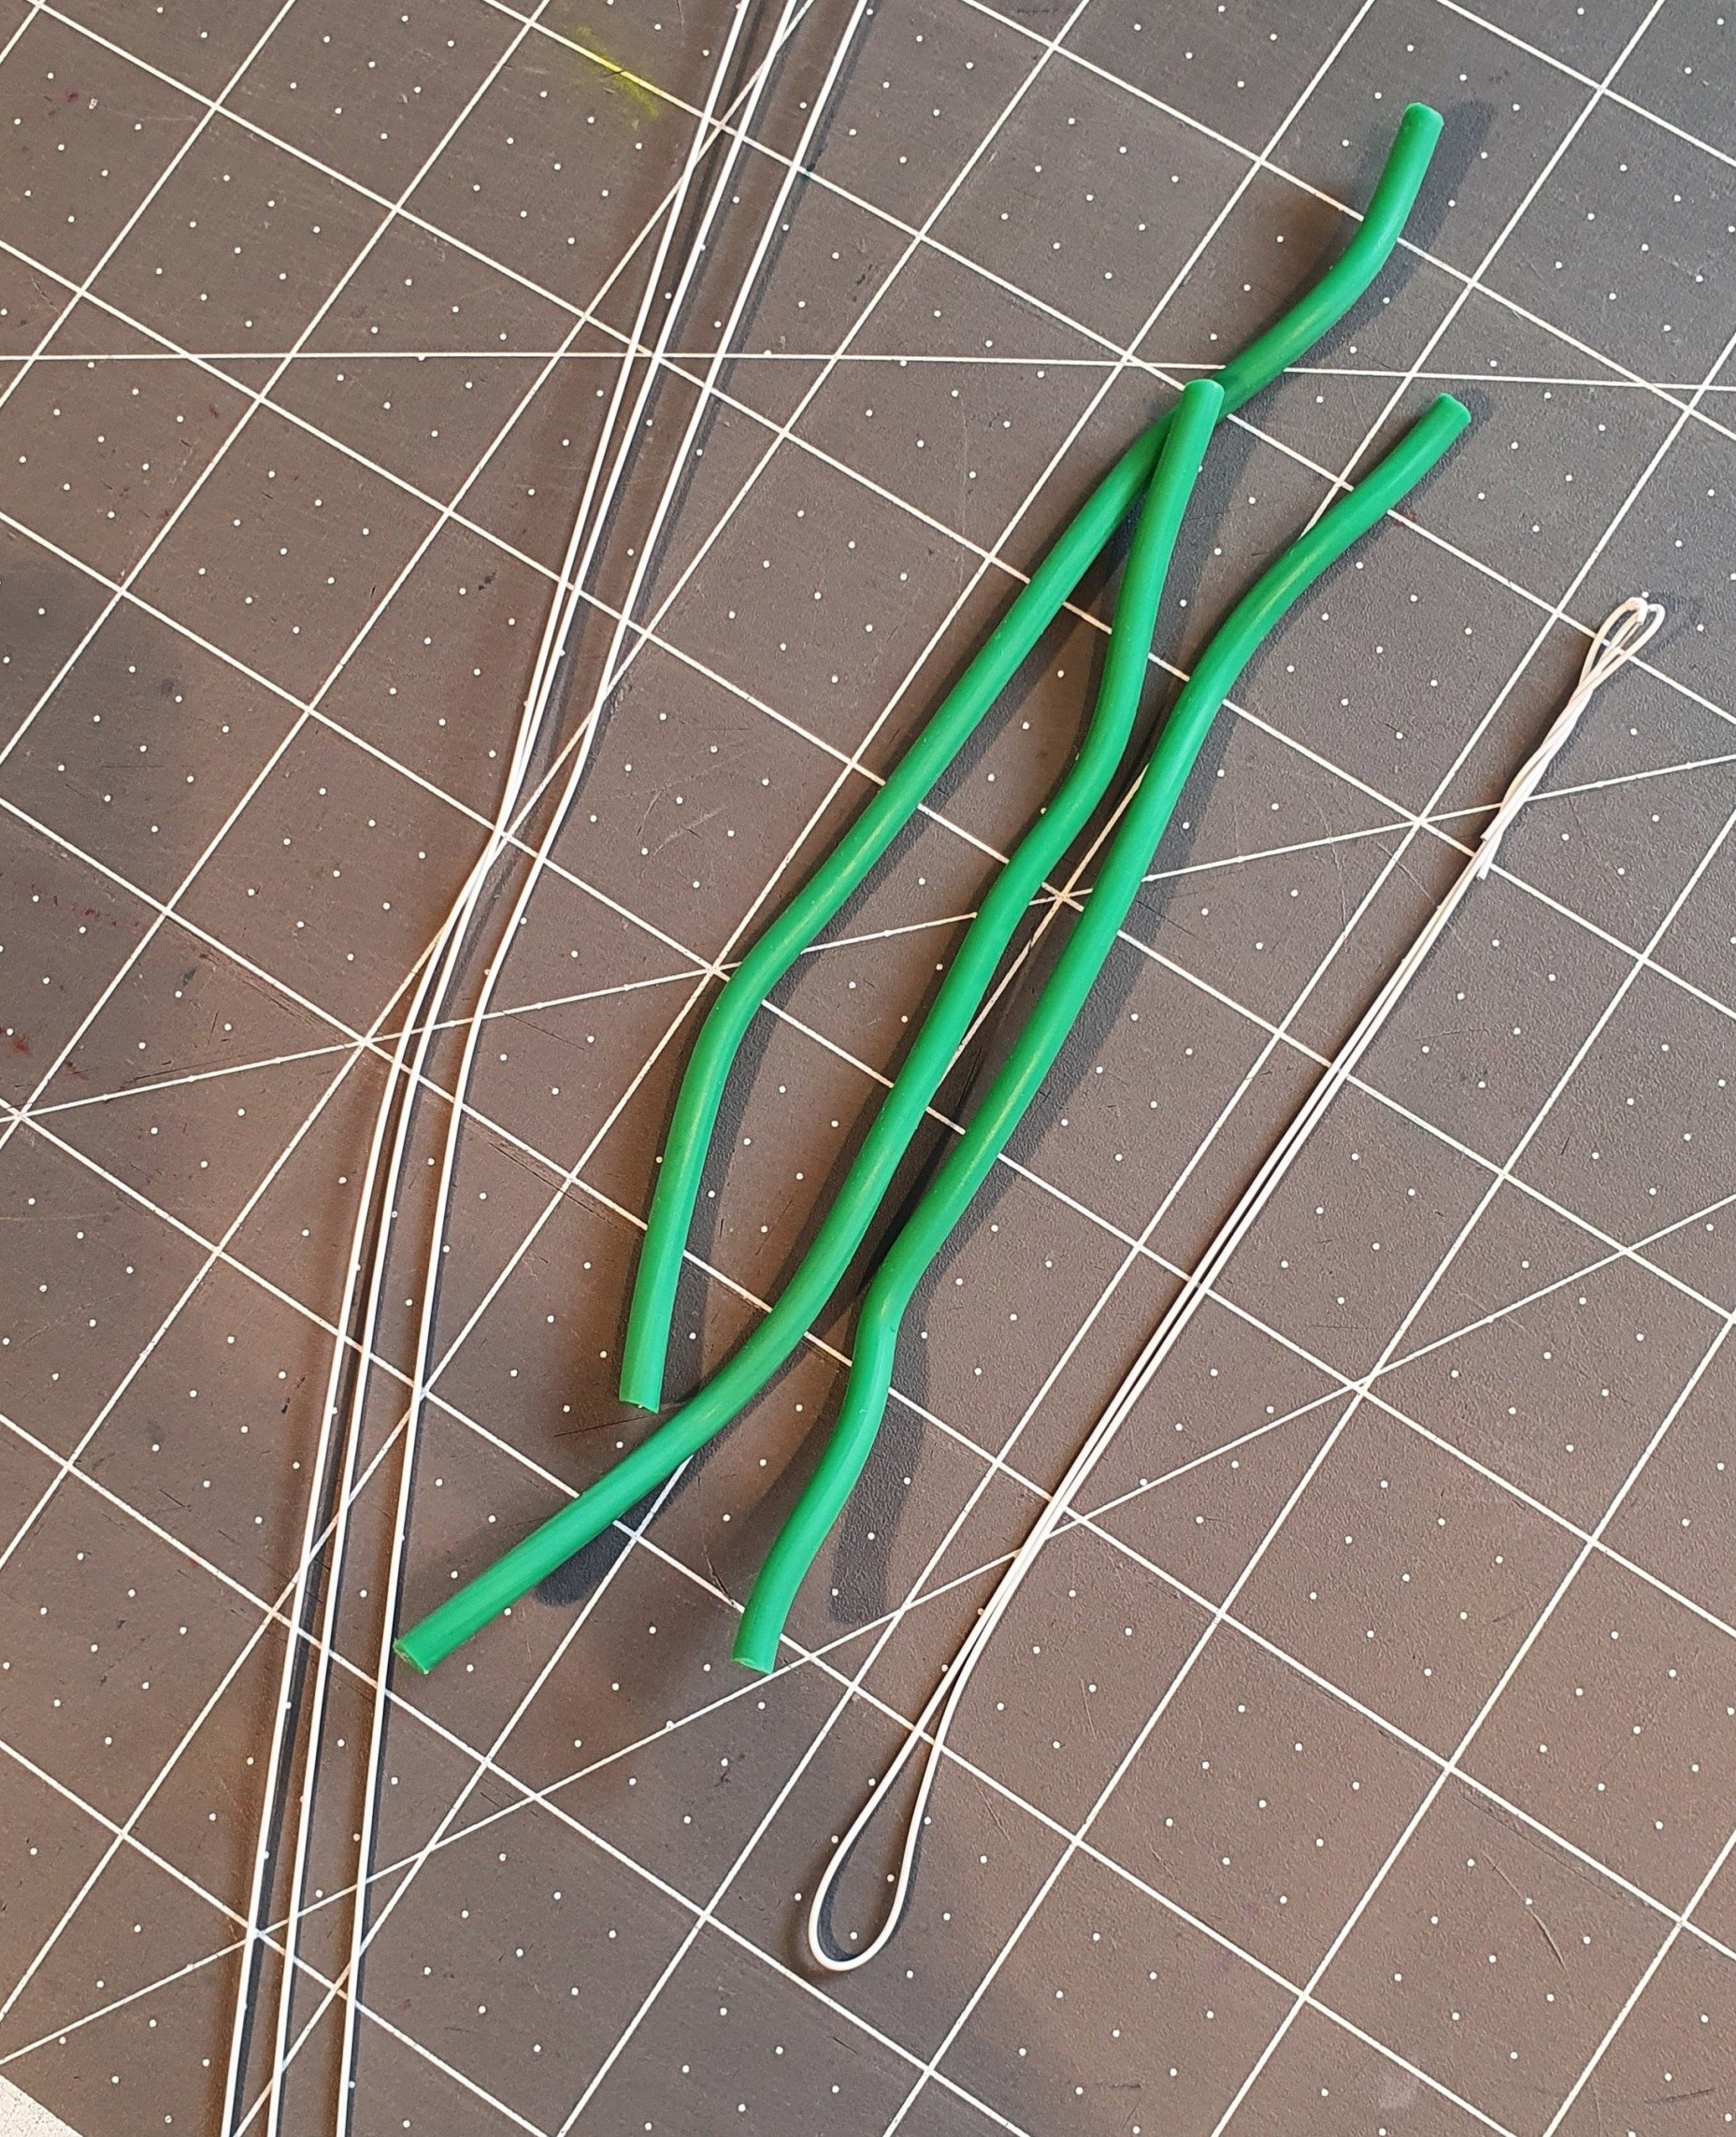
you'll also need some wire, about 6" long, again doesn't matter if it's a little less, just use what you've got. Florist wire is good, doubled over, or the green rubber coated wire for tying plants, you could also use those twisty ties that come around electrical cables.
You'll need 32" of 1cm elastic to fit around your head or
2 x 11" pieces for over your ears.
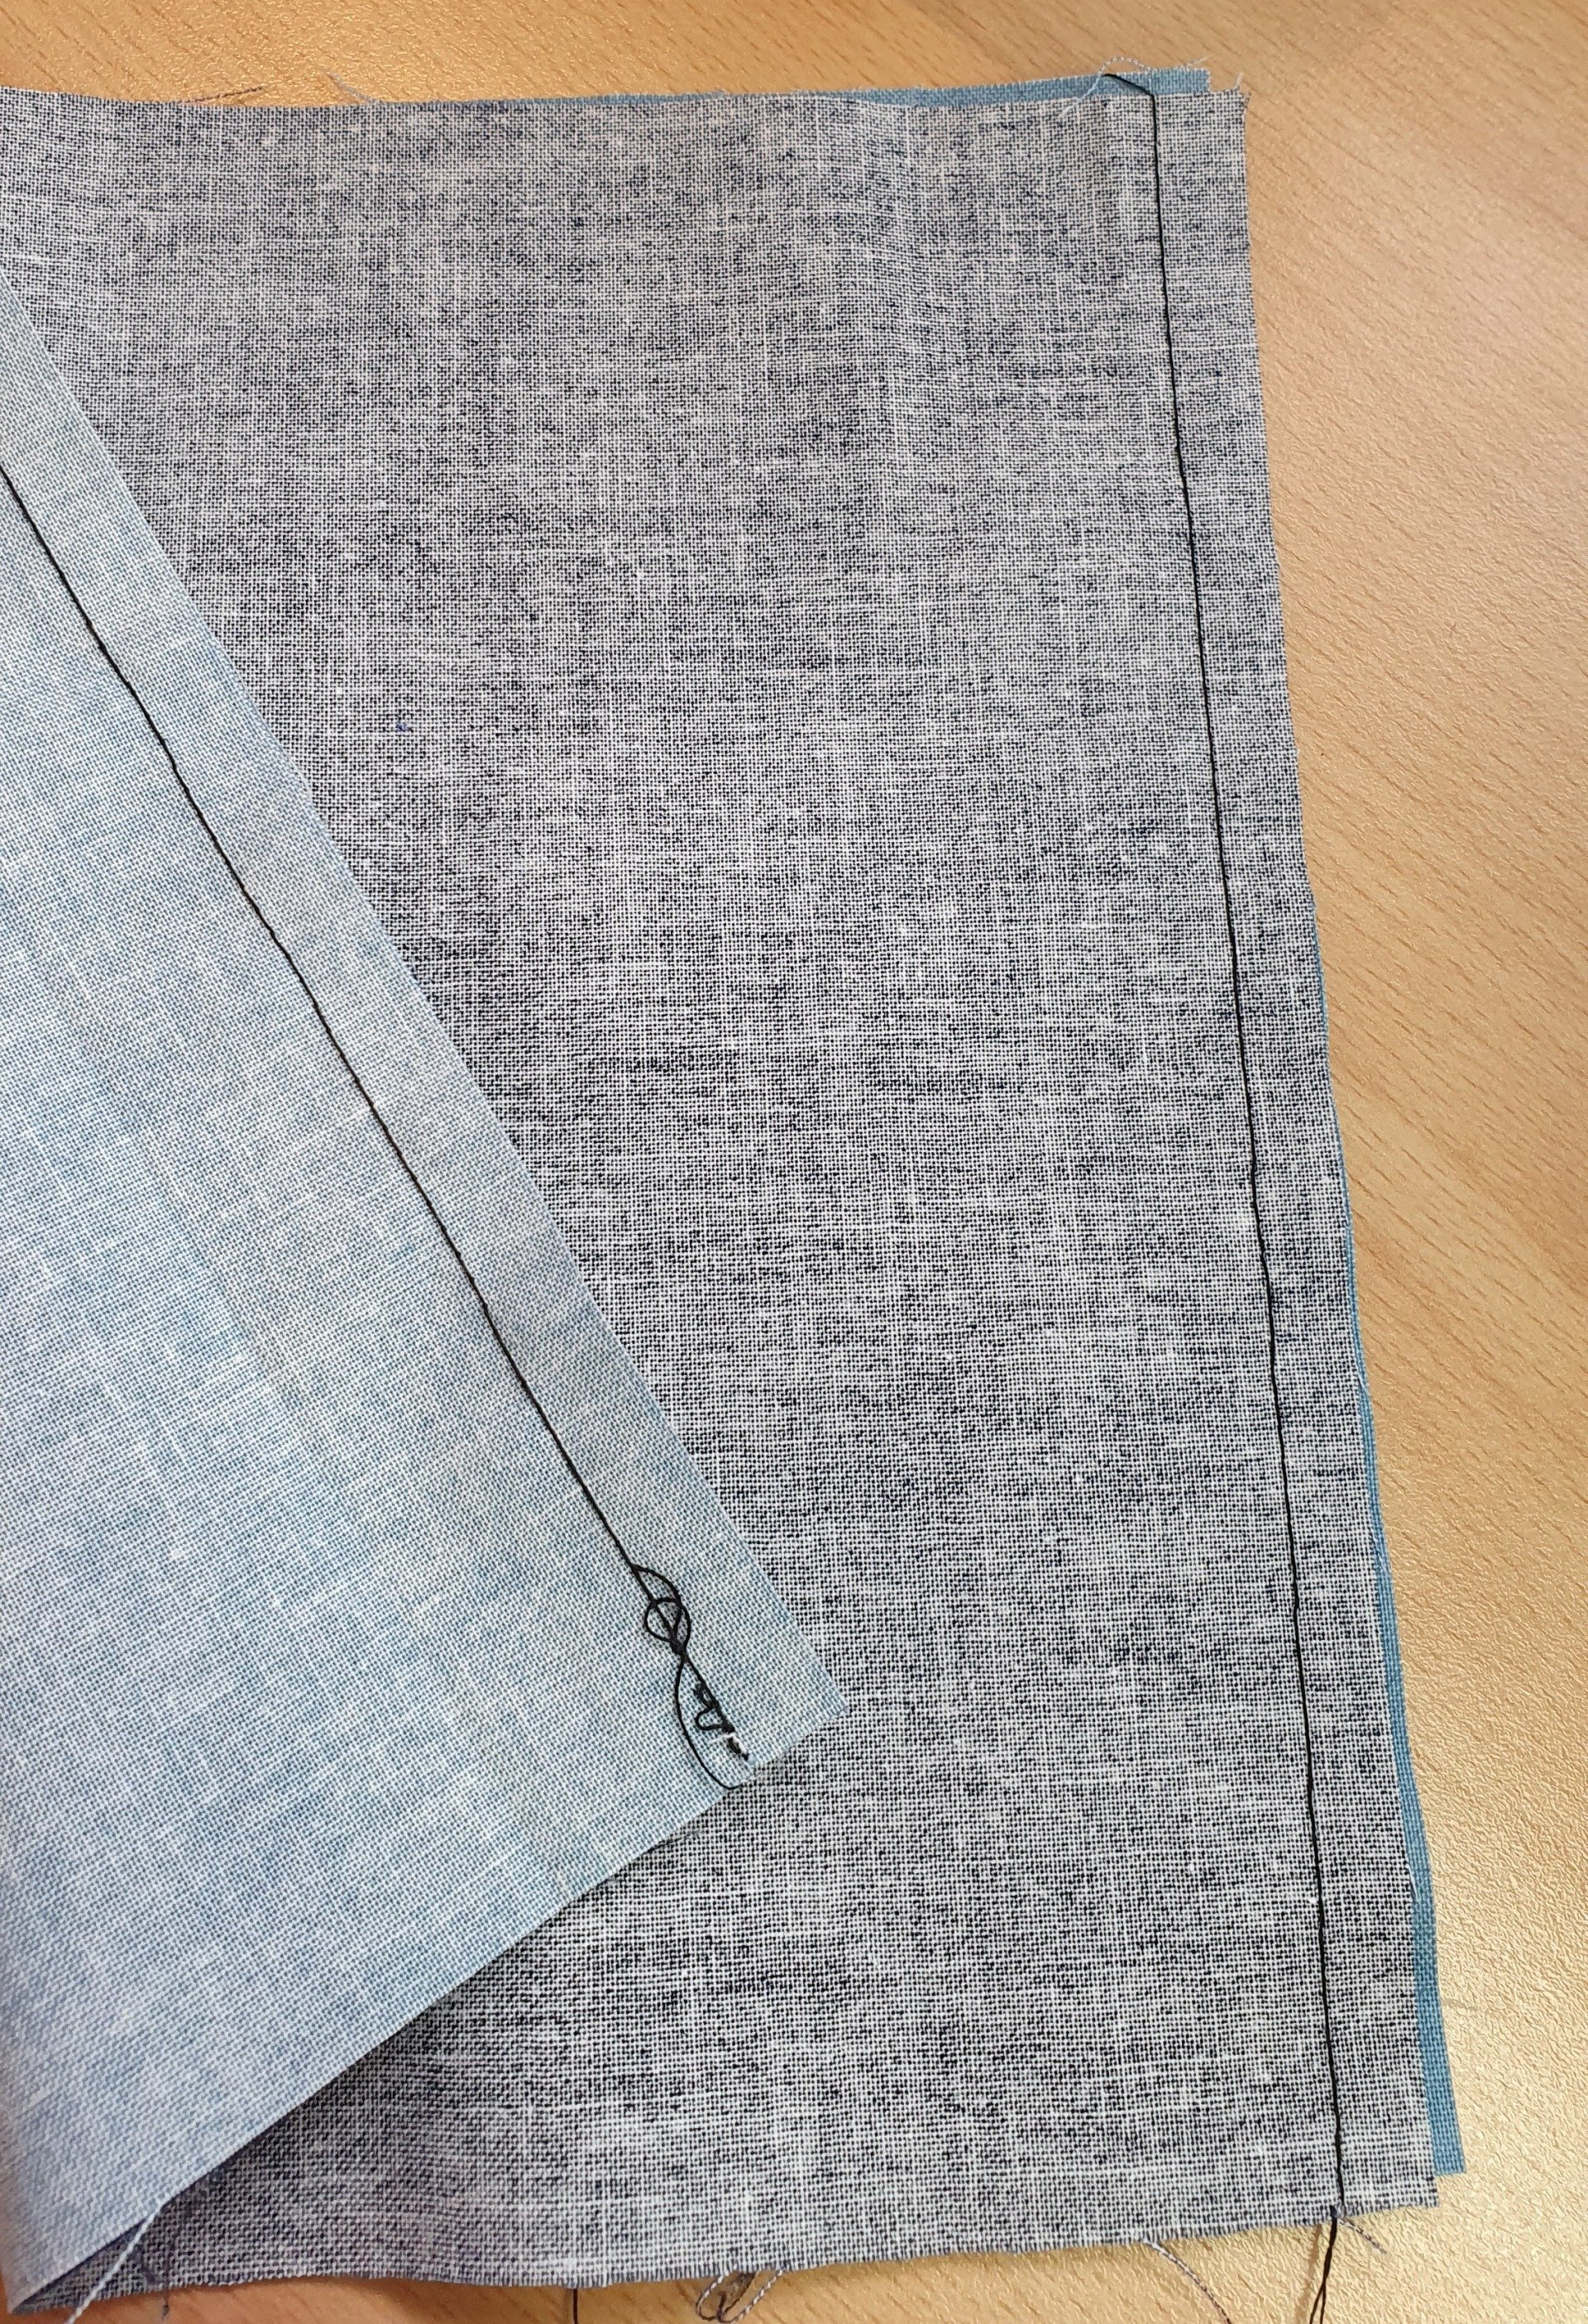
2. Right sides together, sew the 2 squares together with a 1cm seam allowance along the top and bottom edge
Turn to the right side and press
3. Sew a 1cm channel along the top edge
I've got 2 different colours of fabric for this mask, to make it easier to follow. In this one the dark blue will be the front.

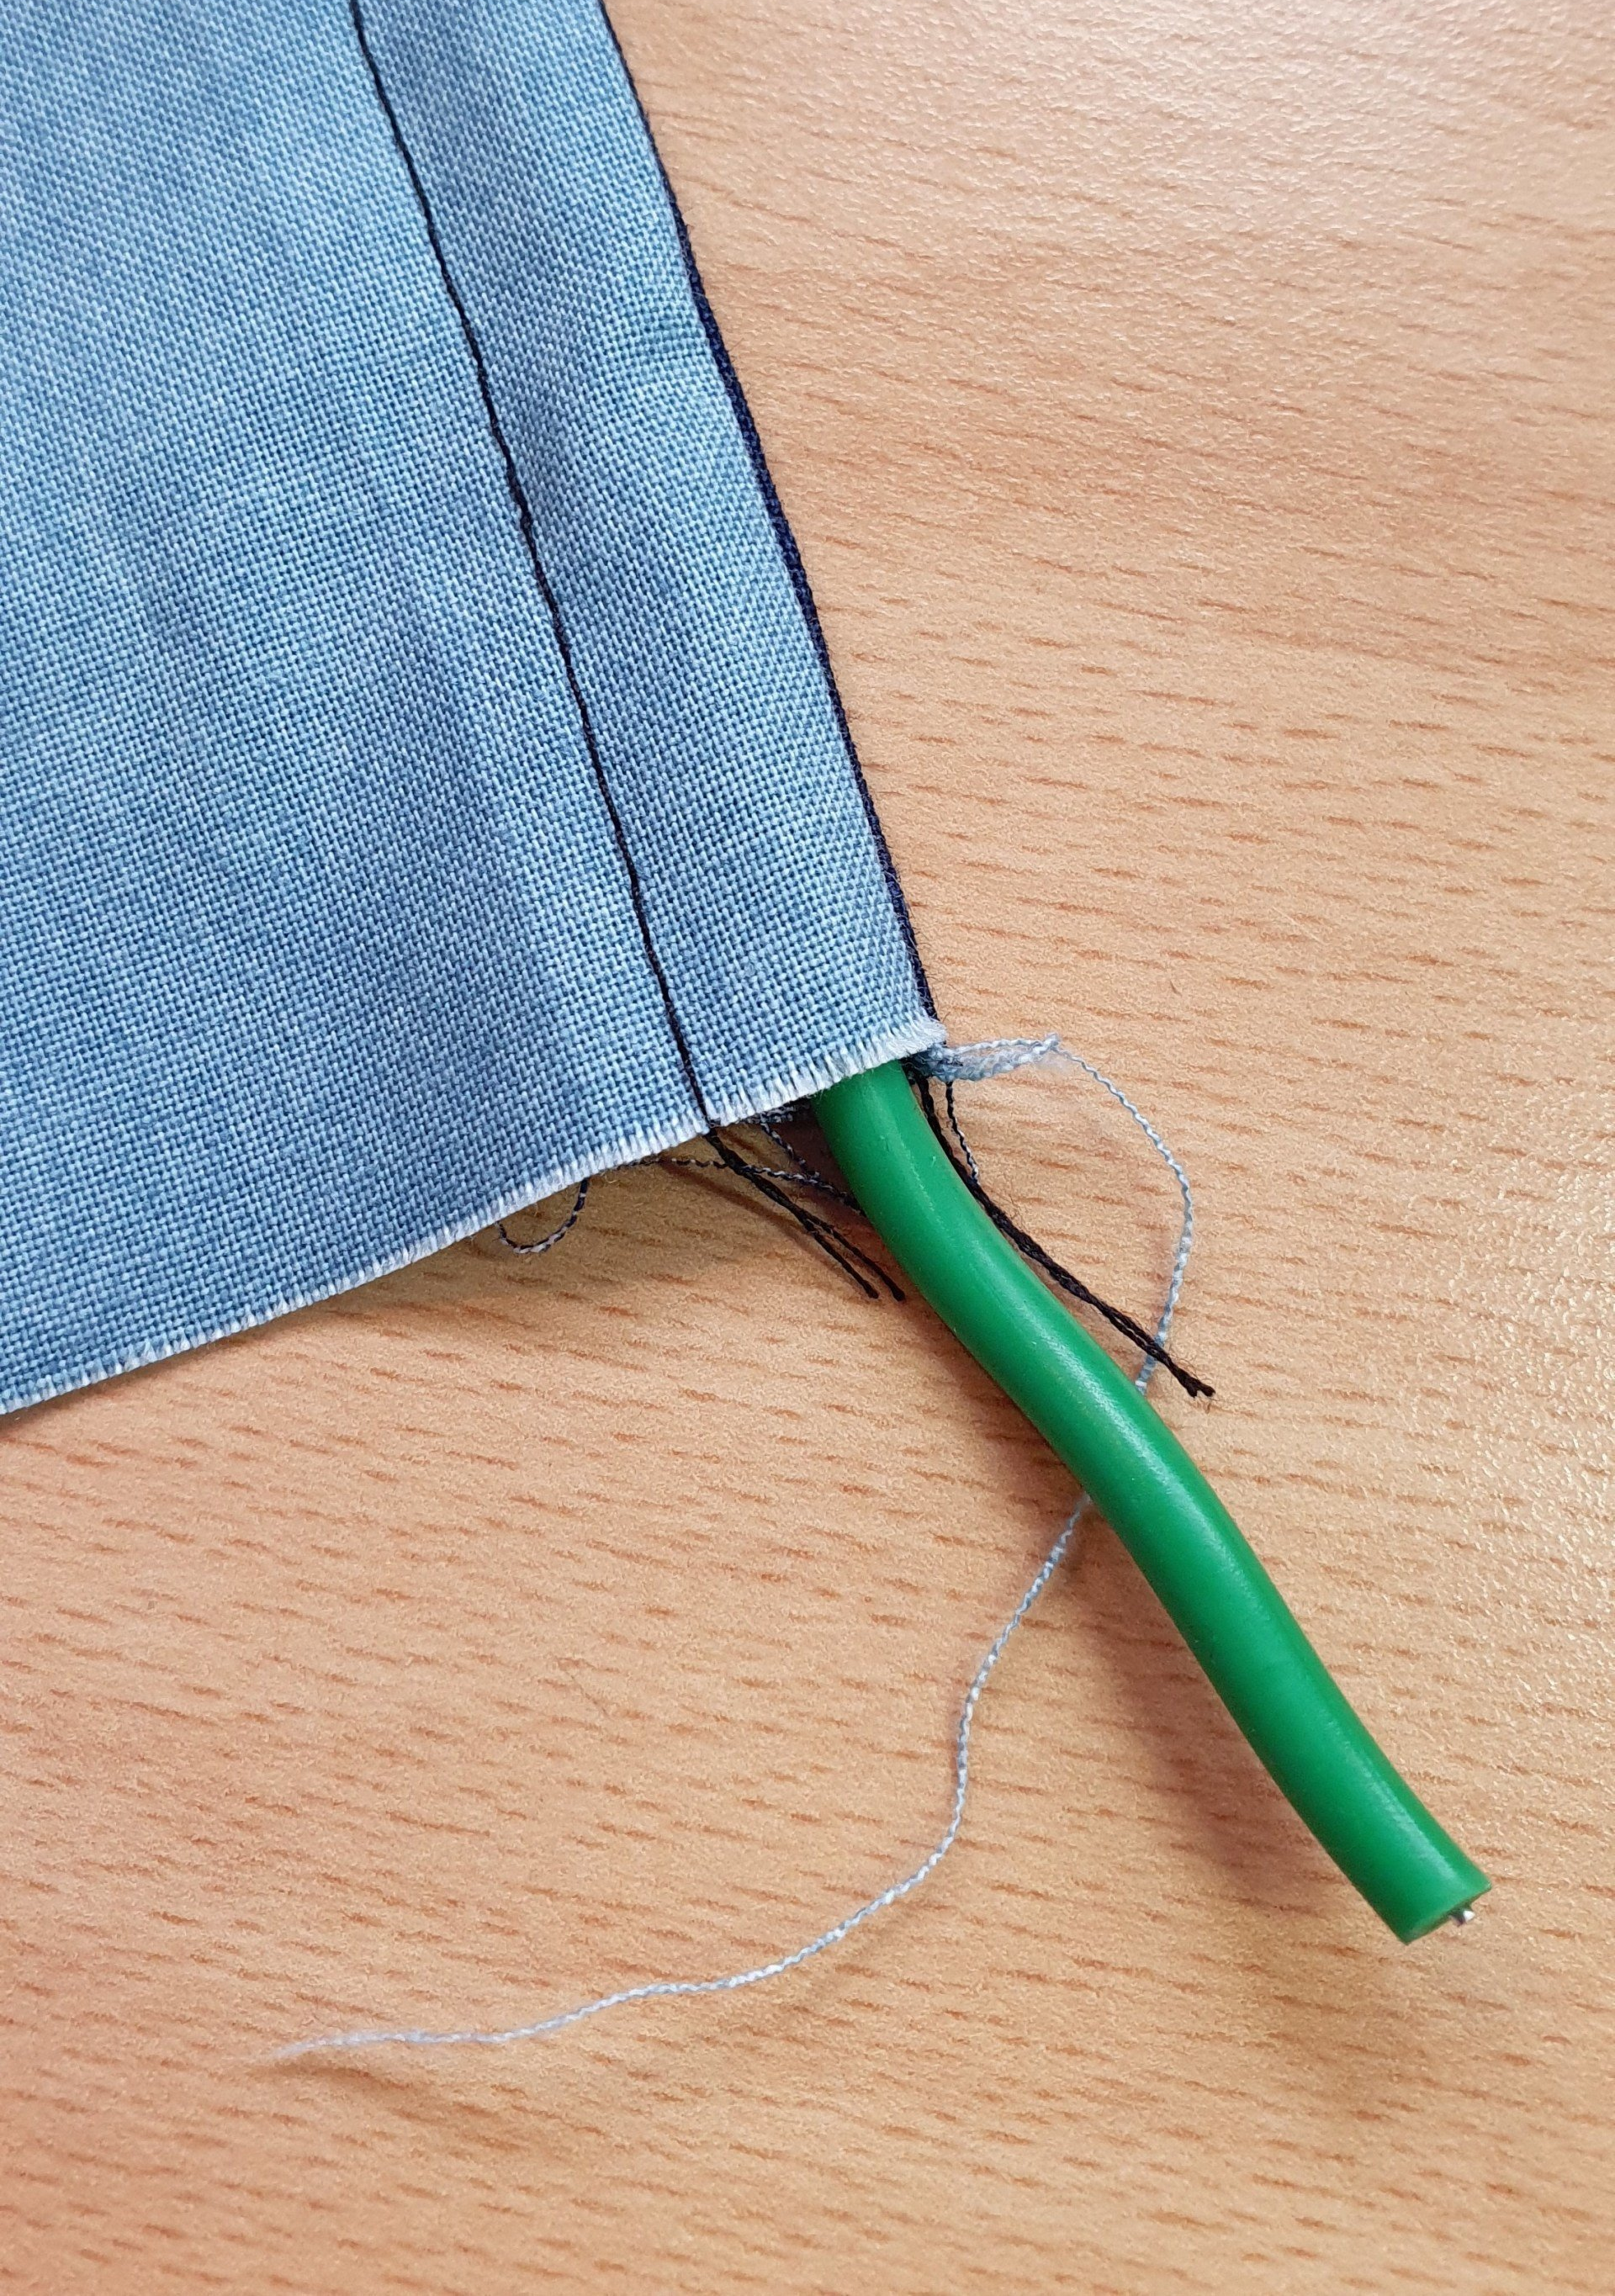
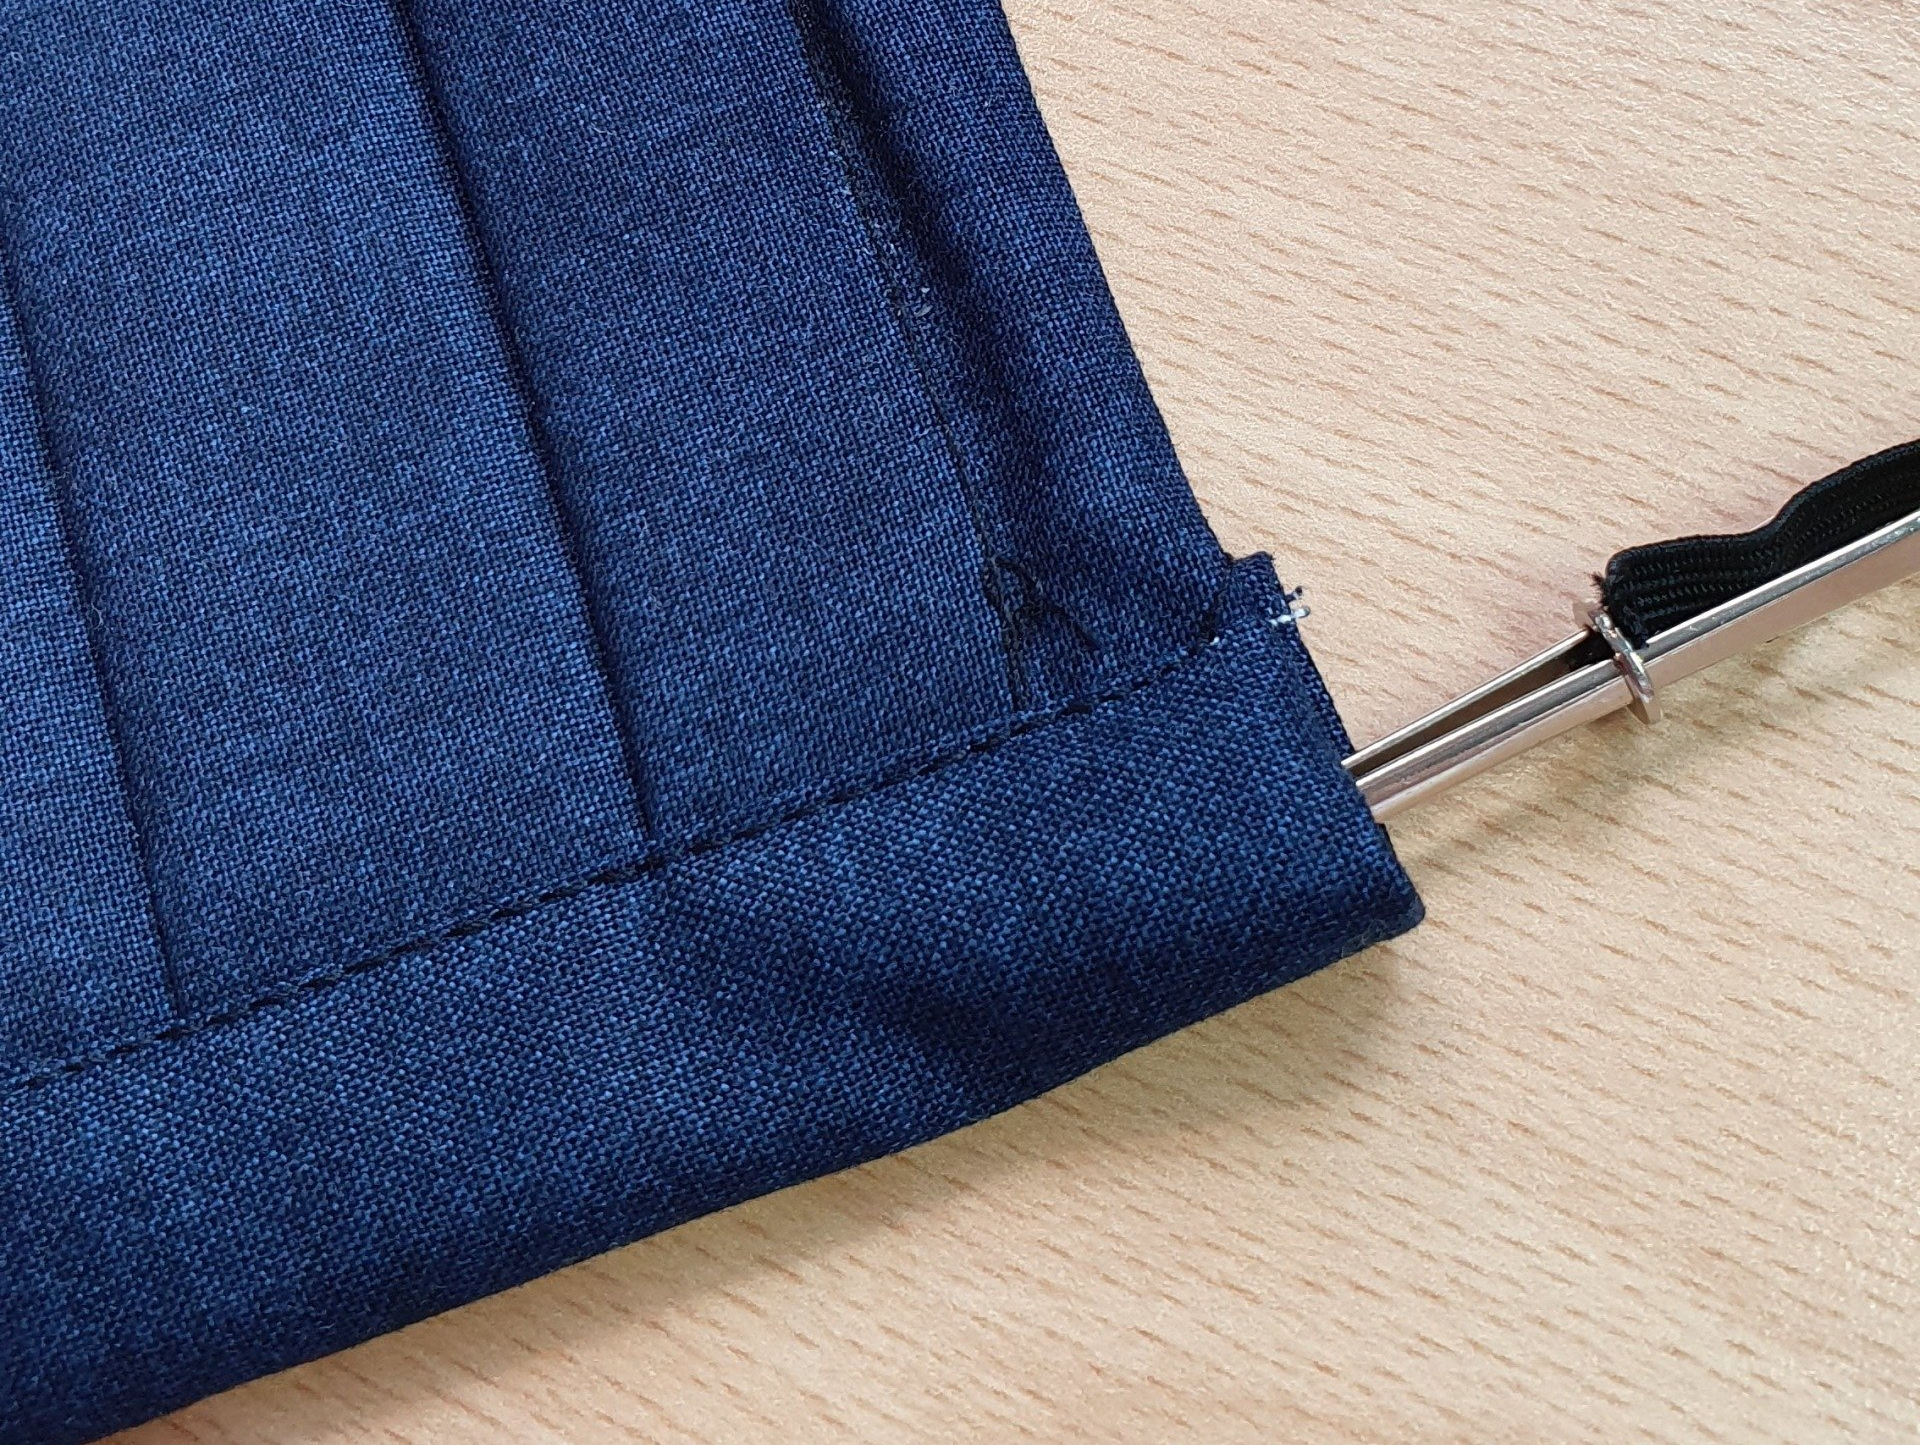
4. Insert your wire into the channel, push it all the way in, so there is no wire near the edges, where you'll be sewing.
You can instead, use a piece 16" X 8" in which case you'll only need to sew one seam and then the channel.
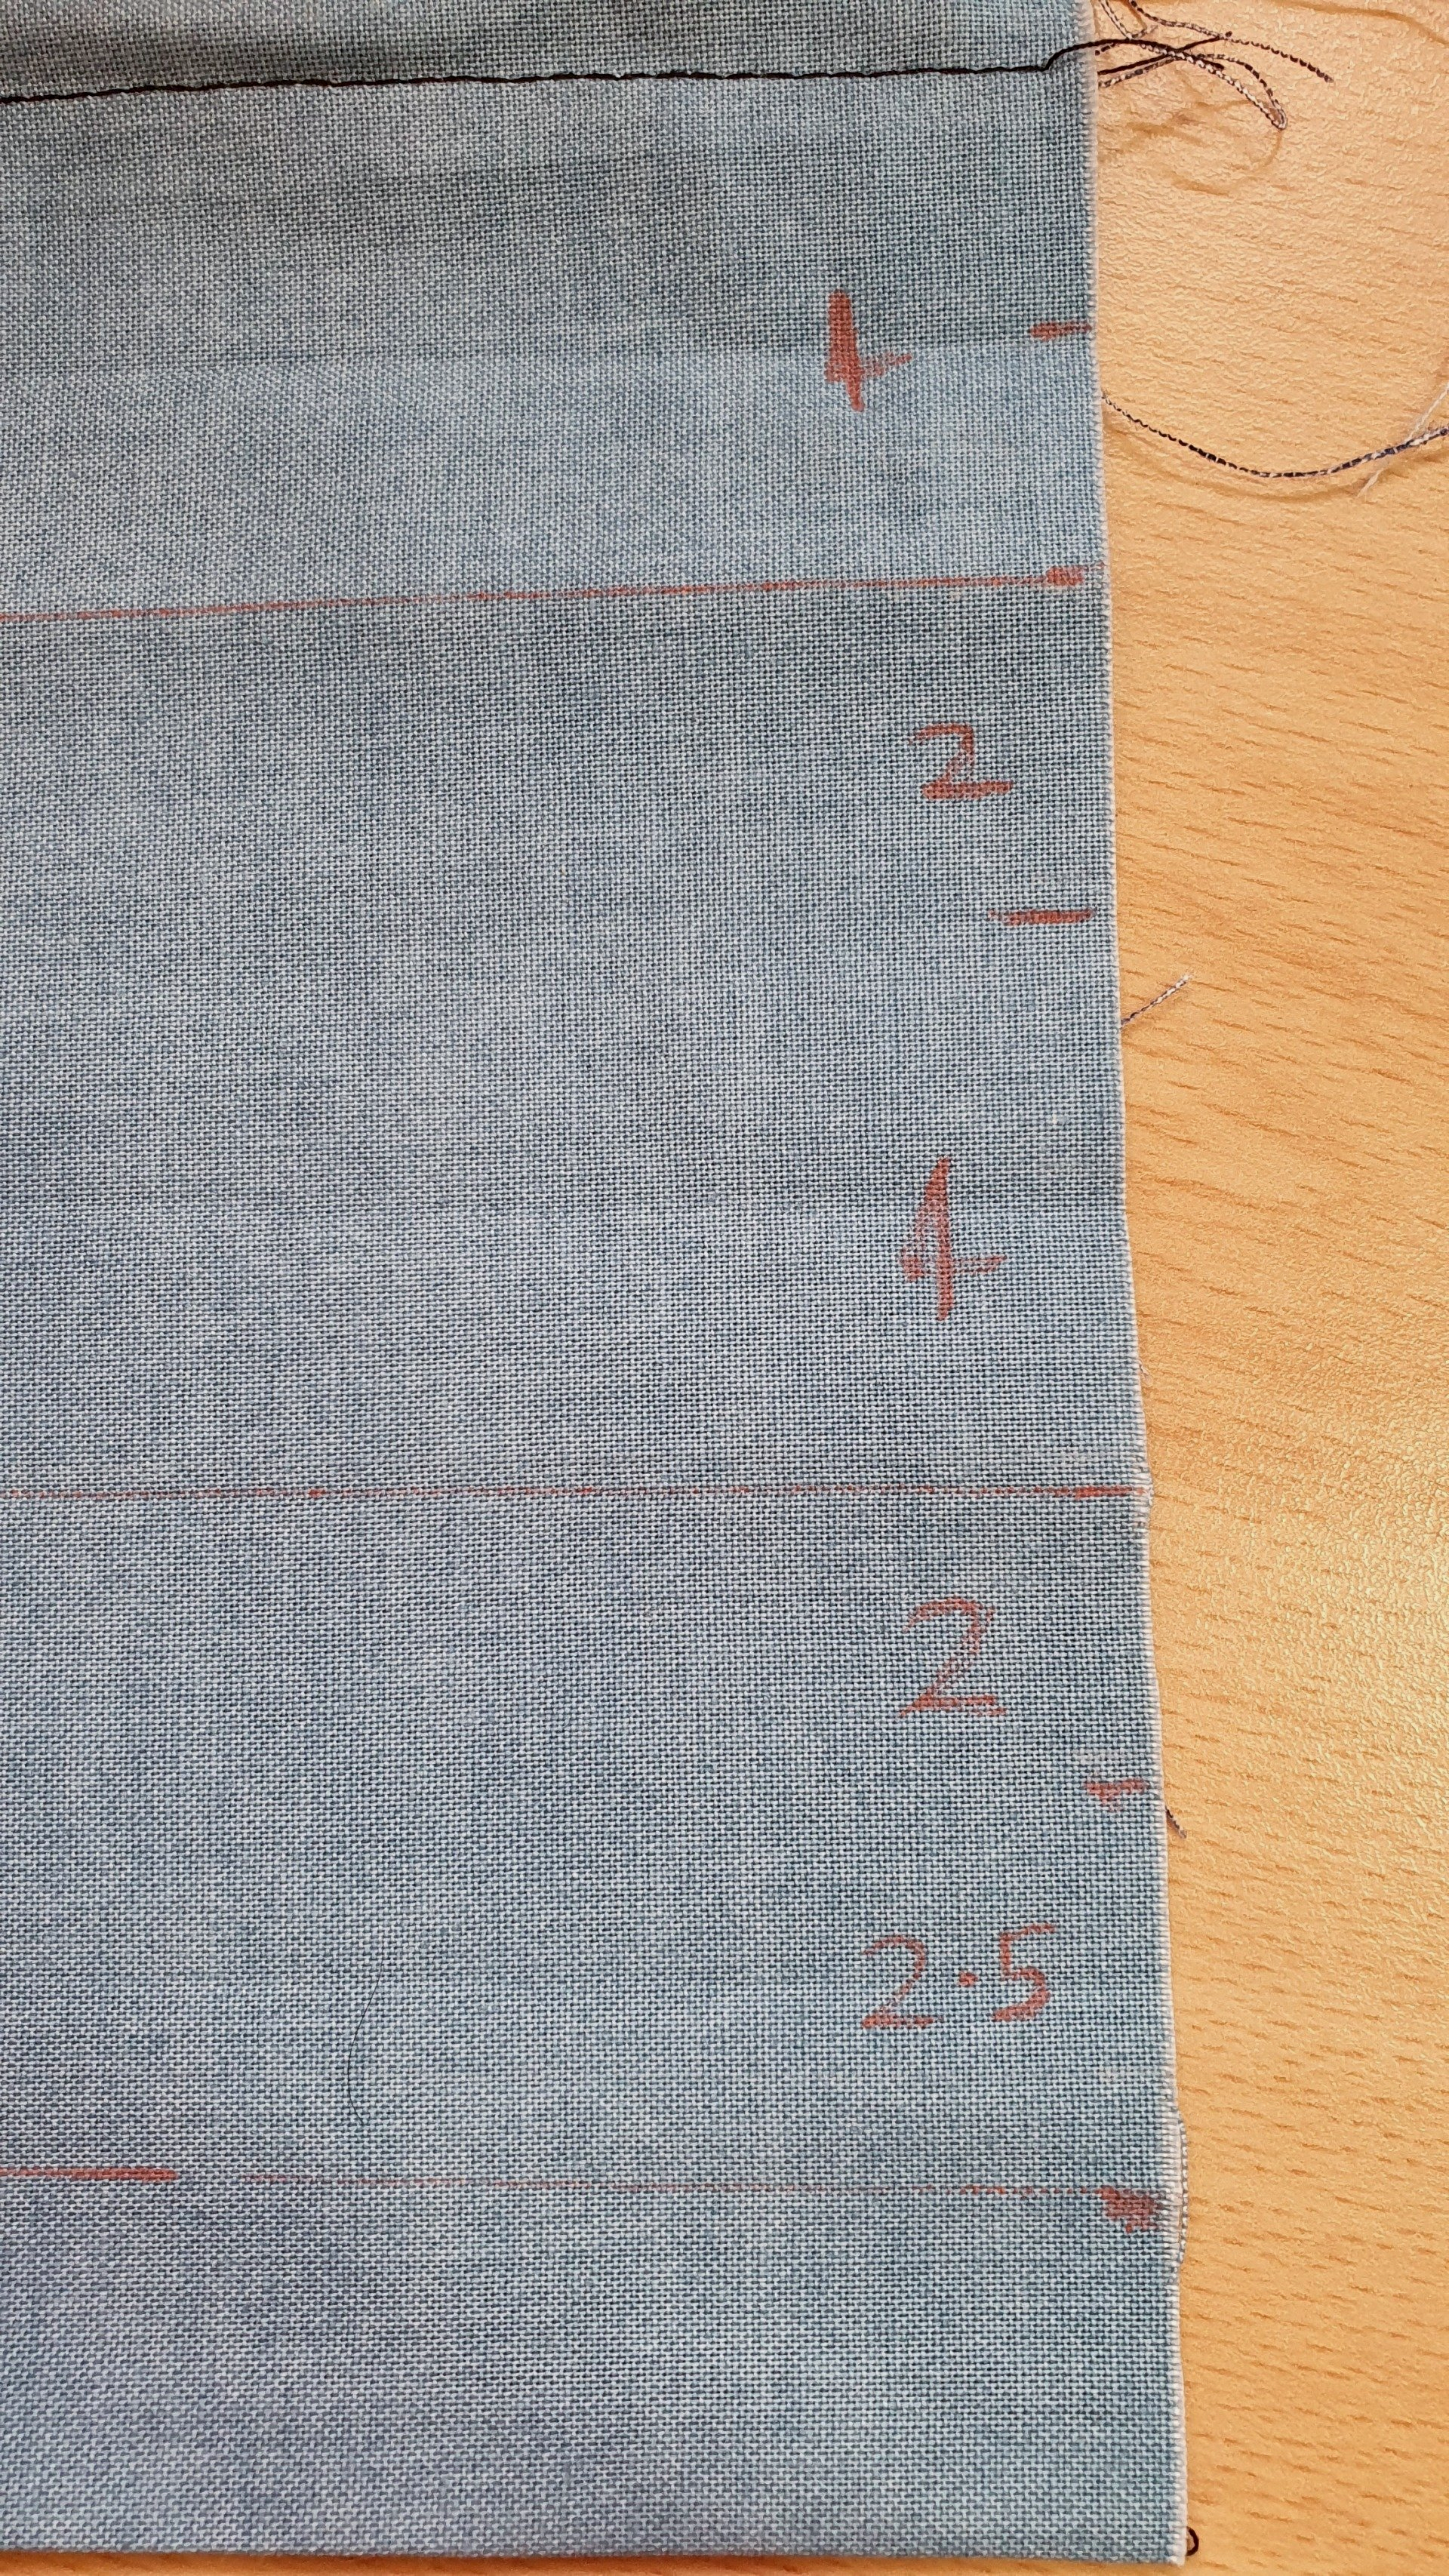
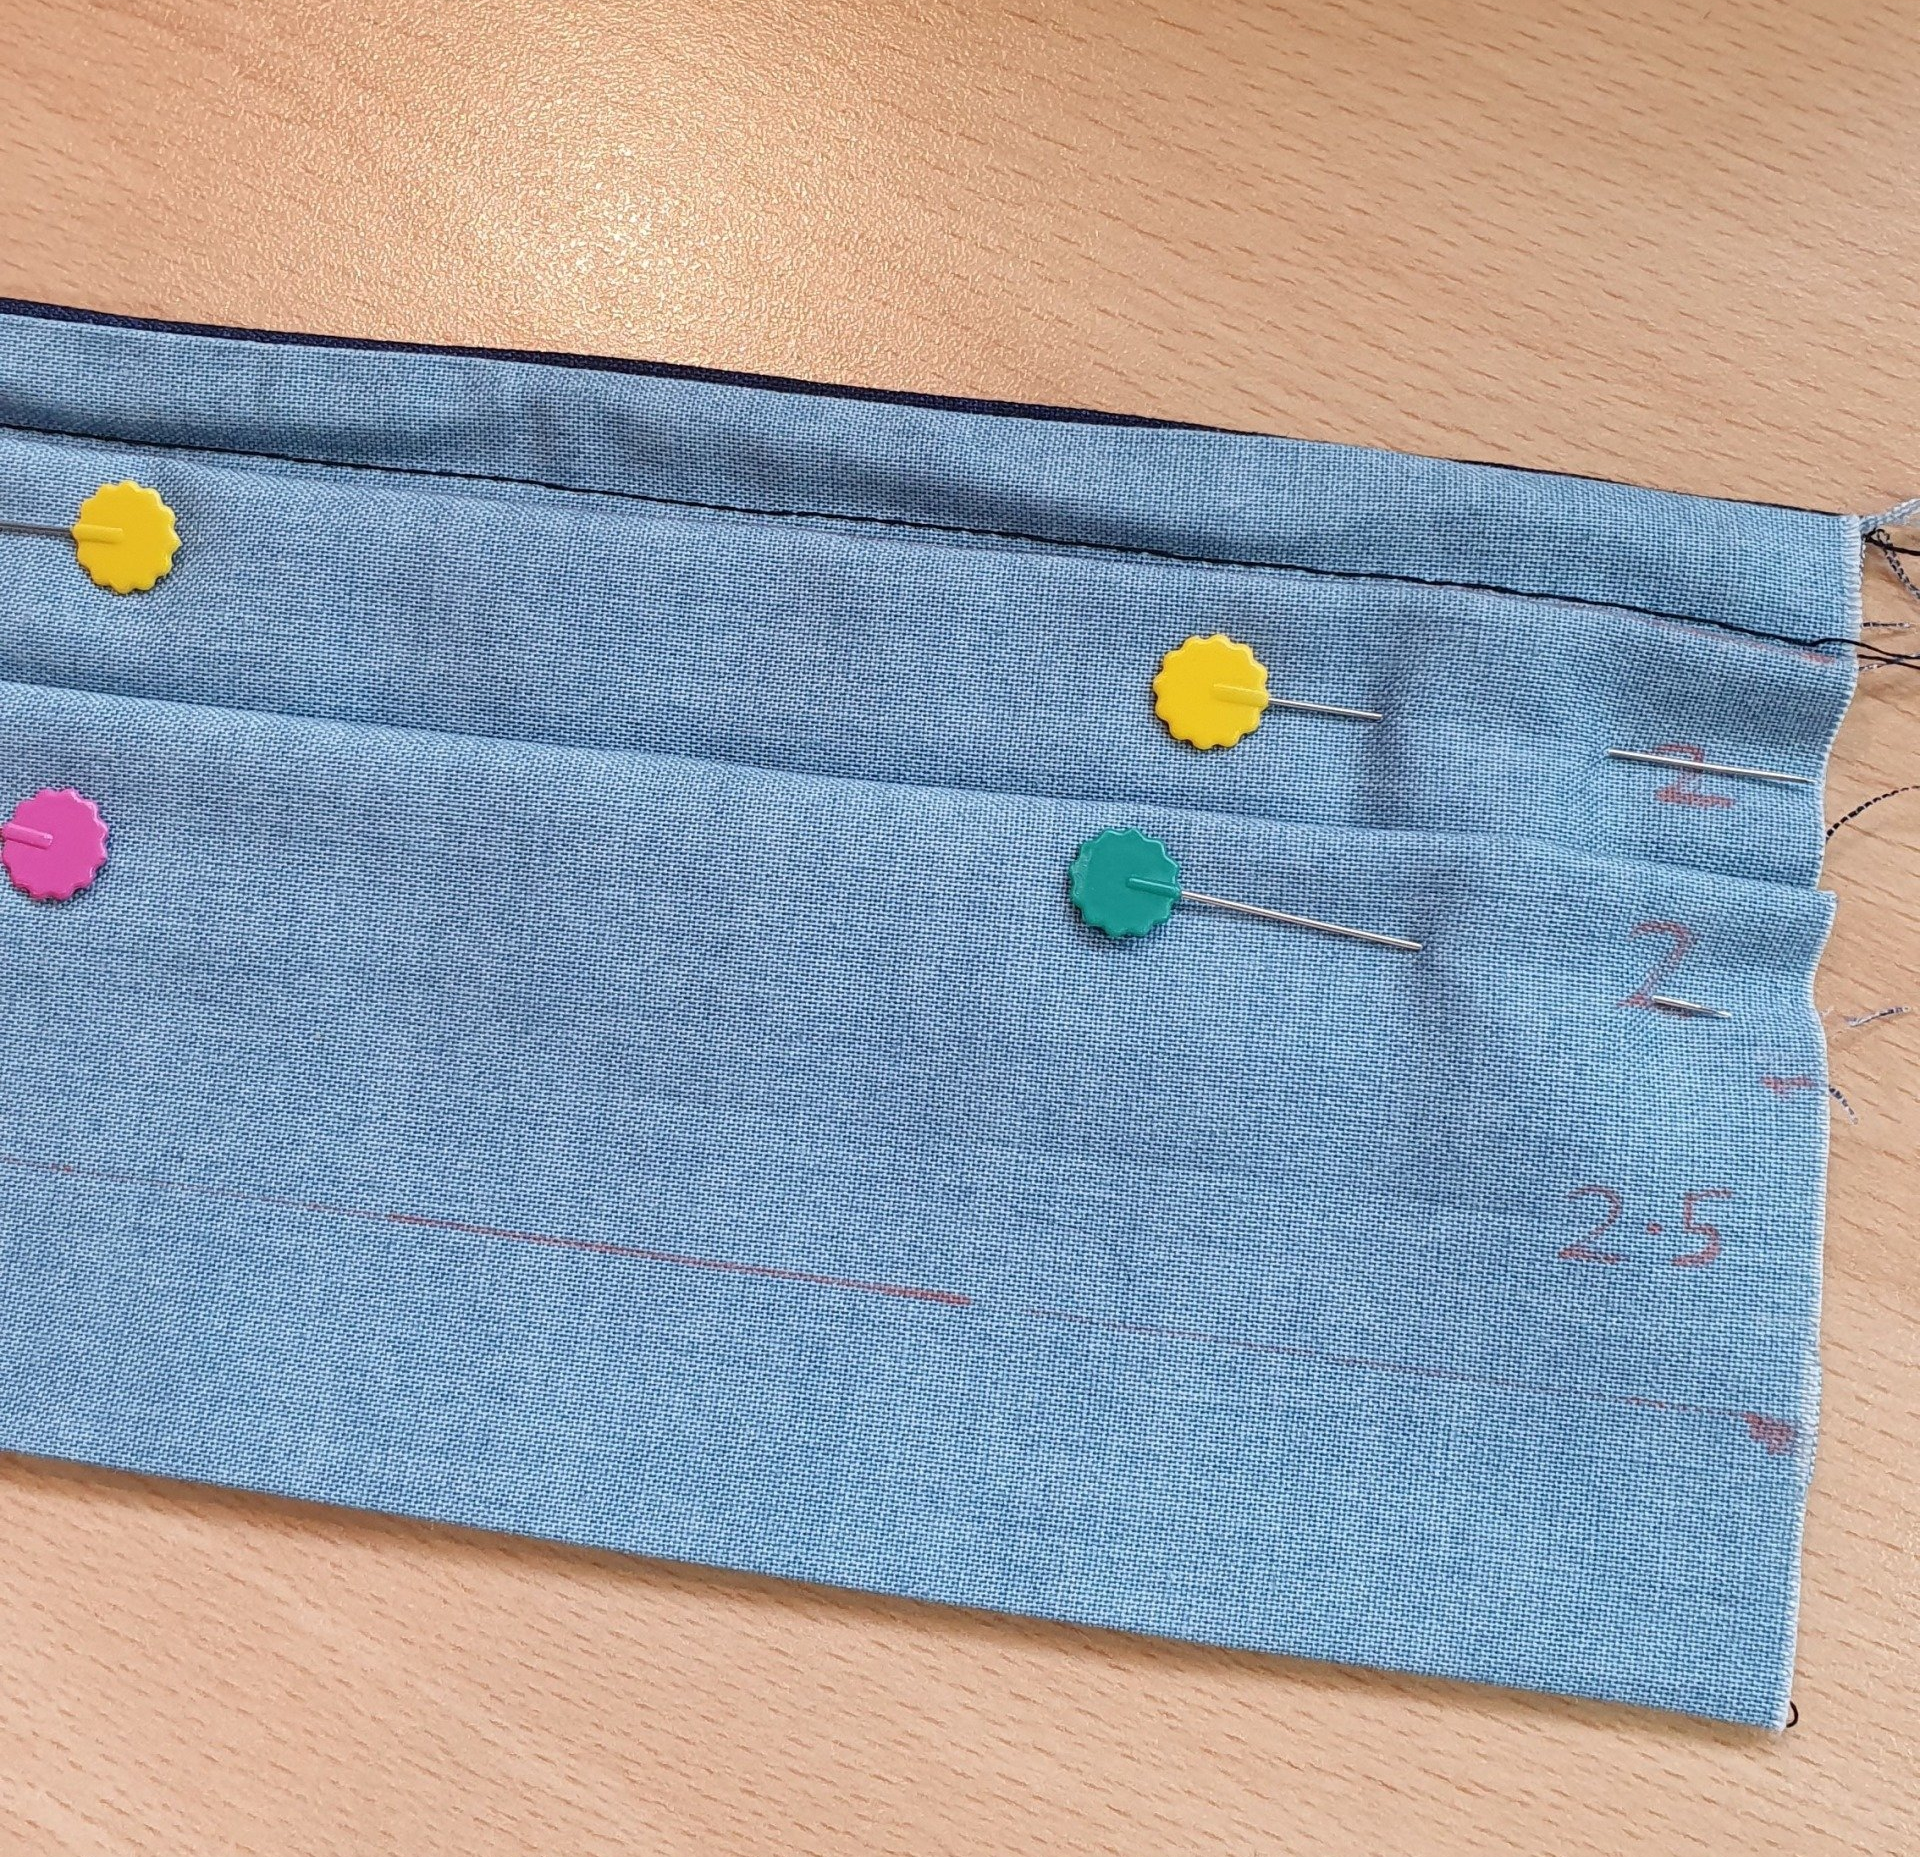
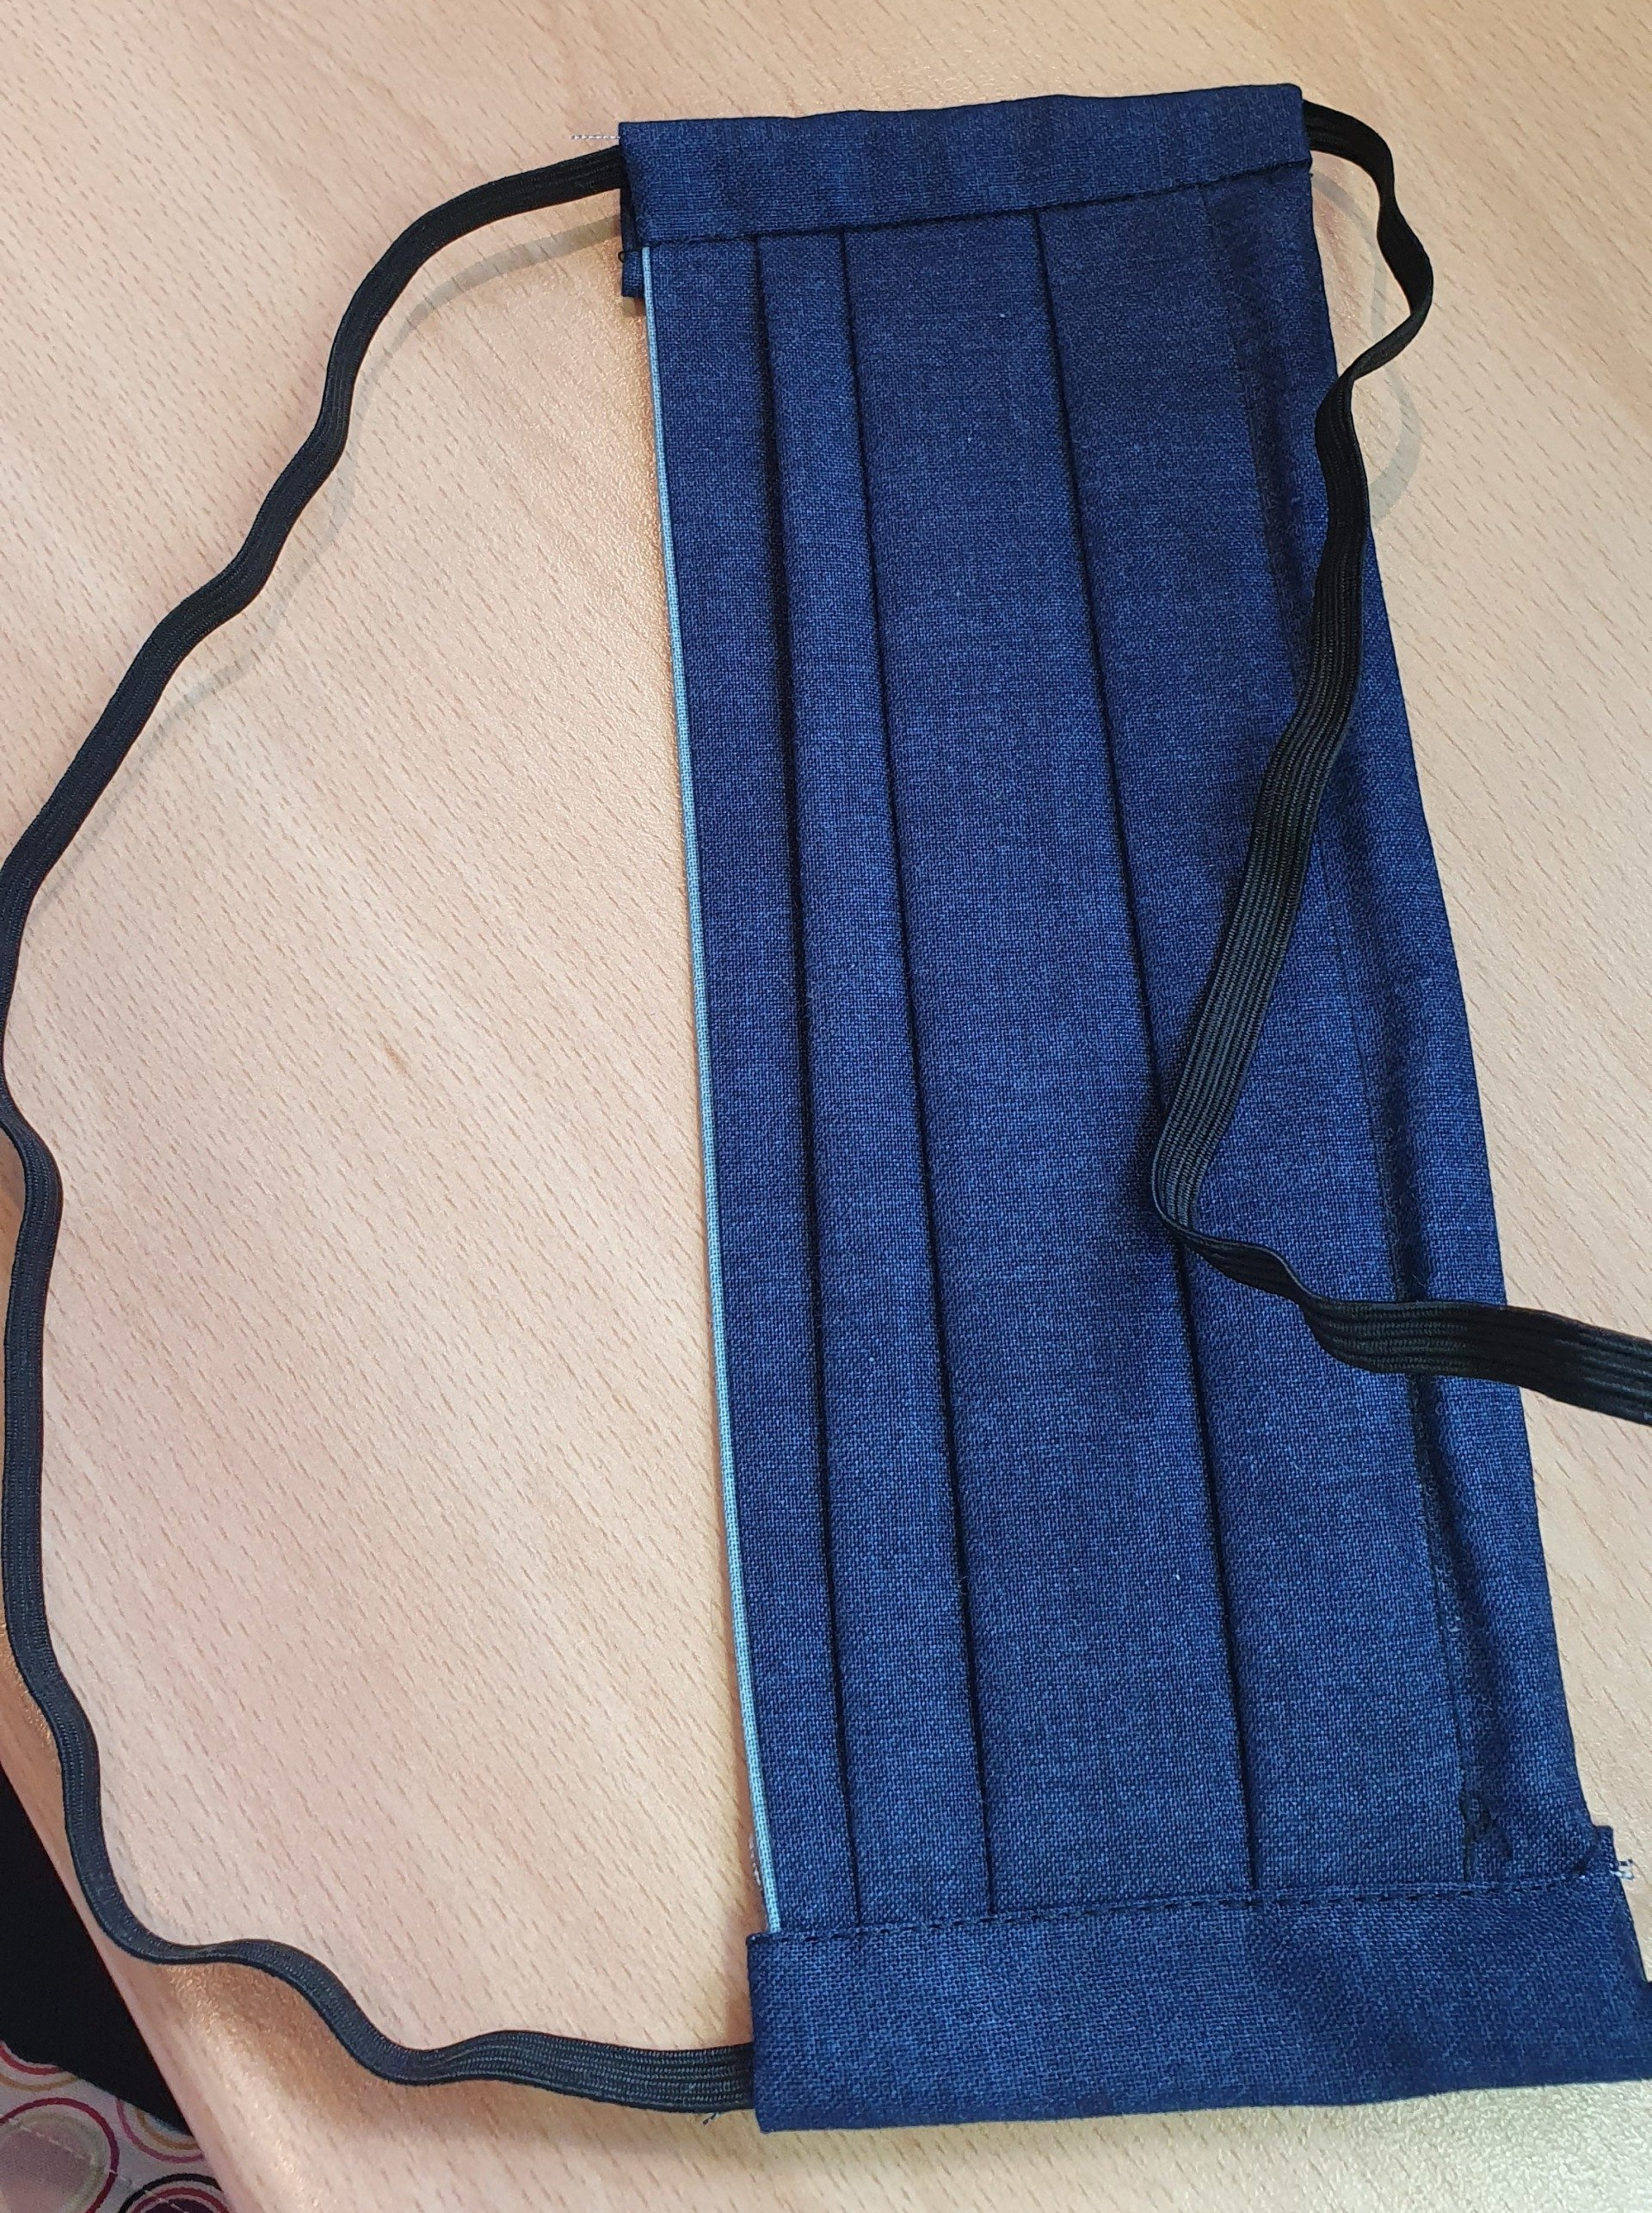
5. Mark the distances for the pleats. The measurements on the picture are in cms
I've used a pilot Frixon pen that will disappear when ironed but a pencil will work fine. You should be working on the back of your mask.
Draw a line to indicate the top edge of the pleat. My spacing is in cms 4,2,4,2,2.5
After you've made a couple you will just be able to eyeball the pleats.
The measurements I've used are not set in stone, so if yours are slightly different, don't worry!
Just ensure the pleat does not overlap the one above, it should come just up to it.
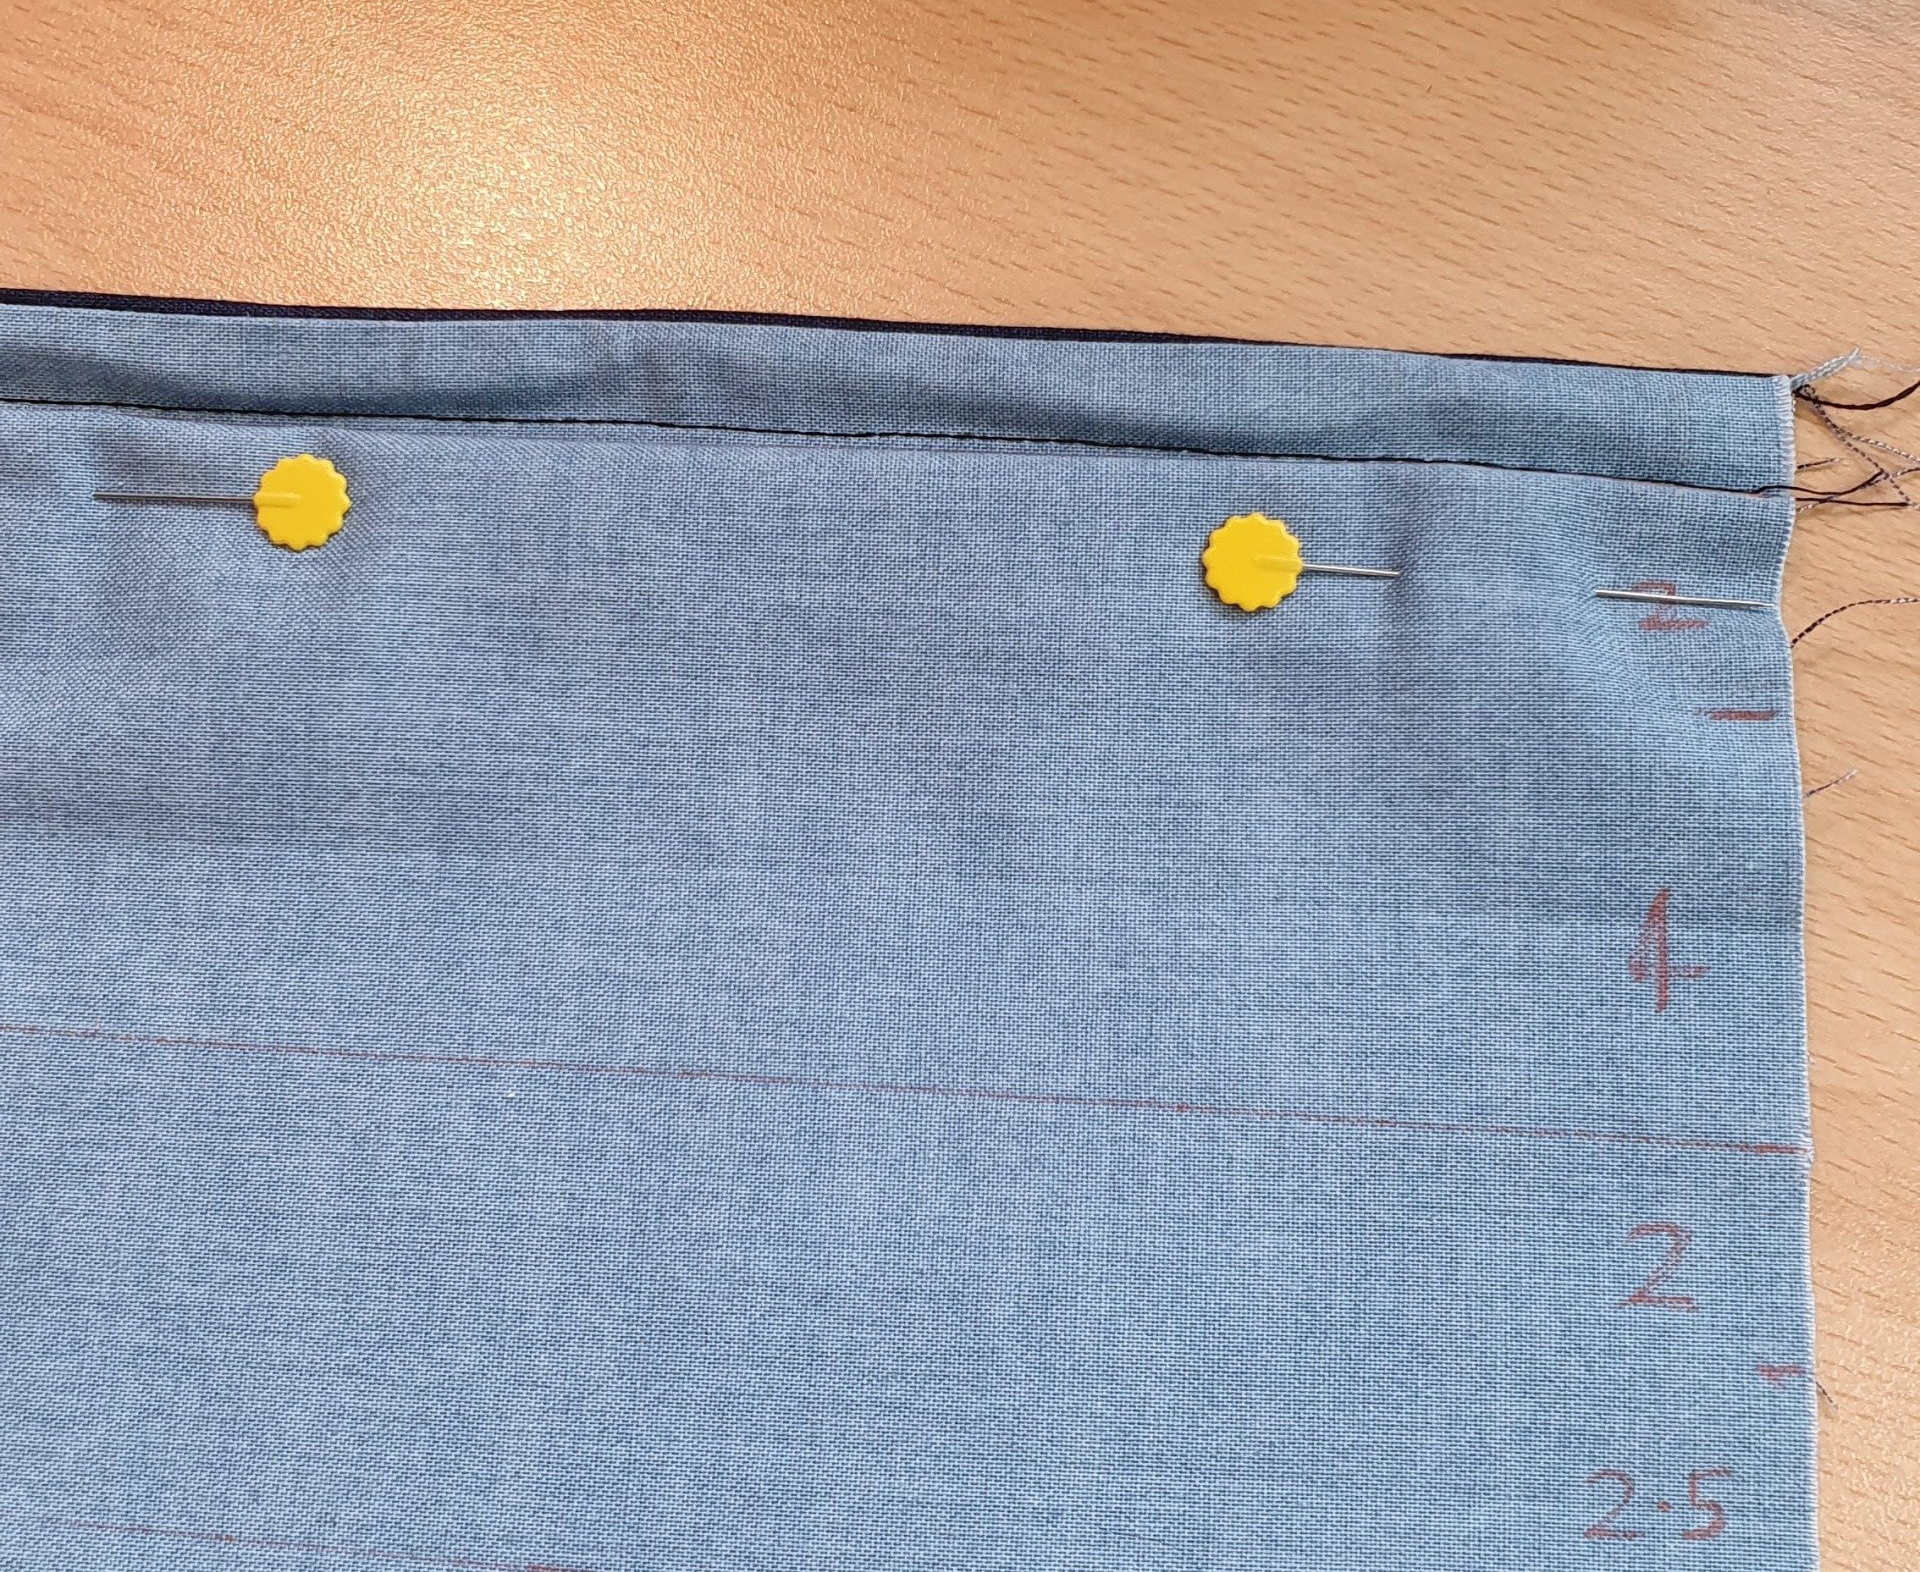
6. The first pleat edge lines up with the stitching line for the wire channel, the next pleat lines up with bottom of the one above and so on.
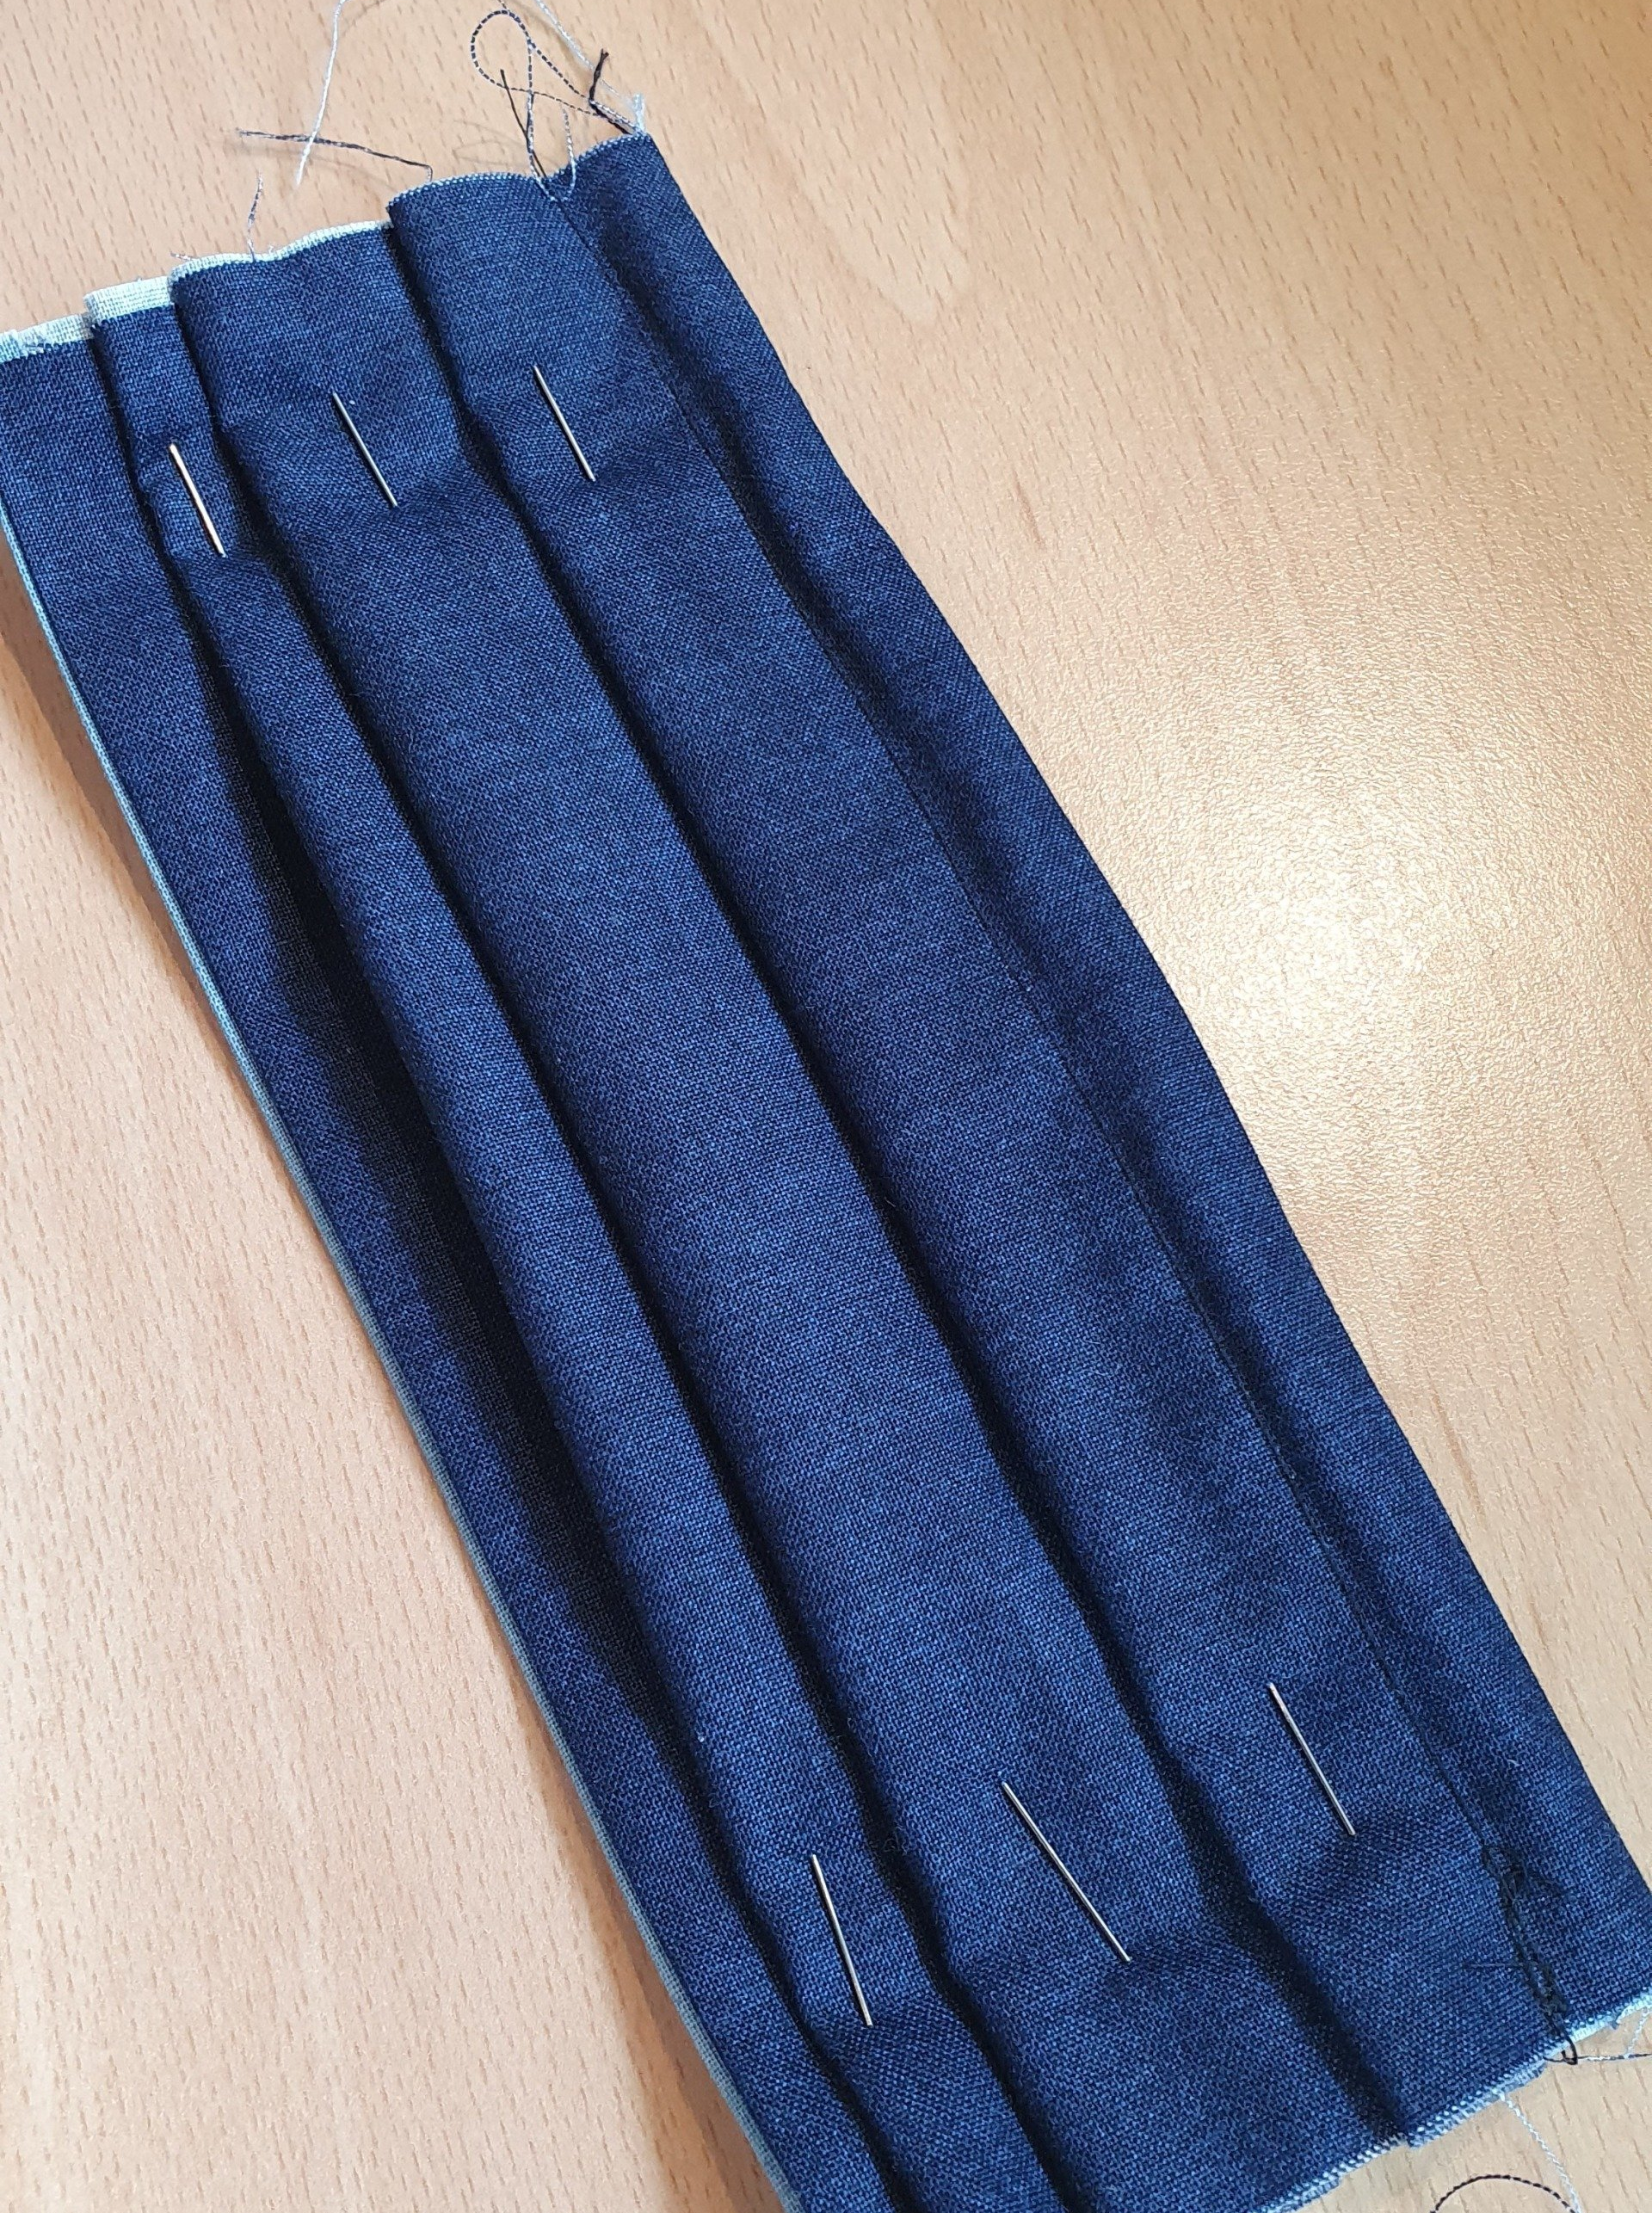
Remember you are working on the back so the pleats are facing upwards to make them easier to fold. On the front they'll be facing downwards.
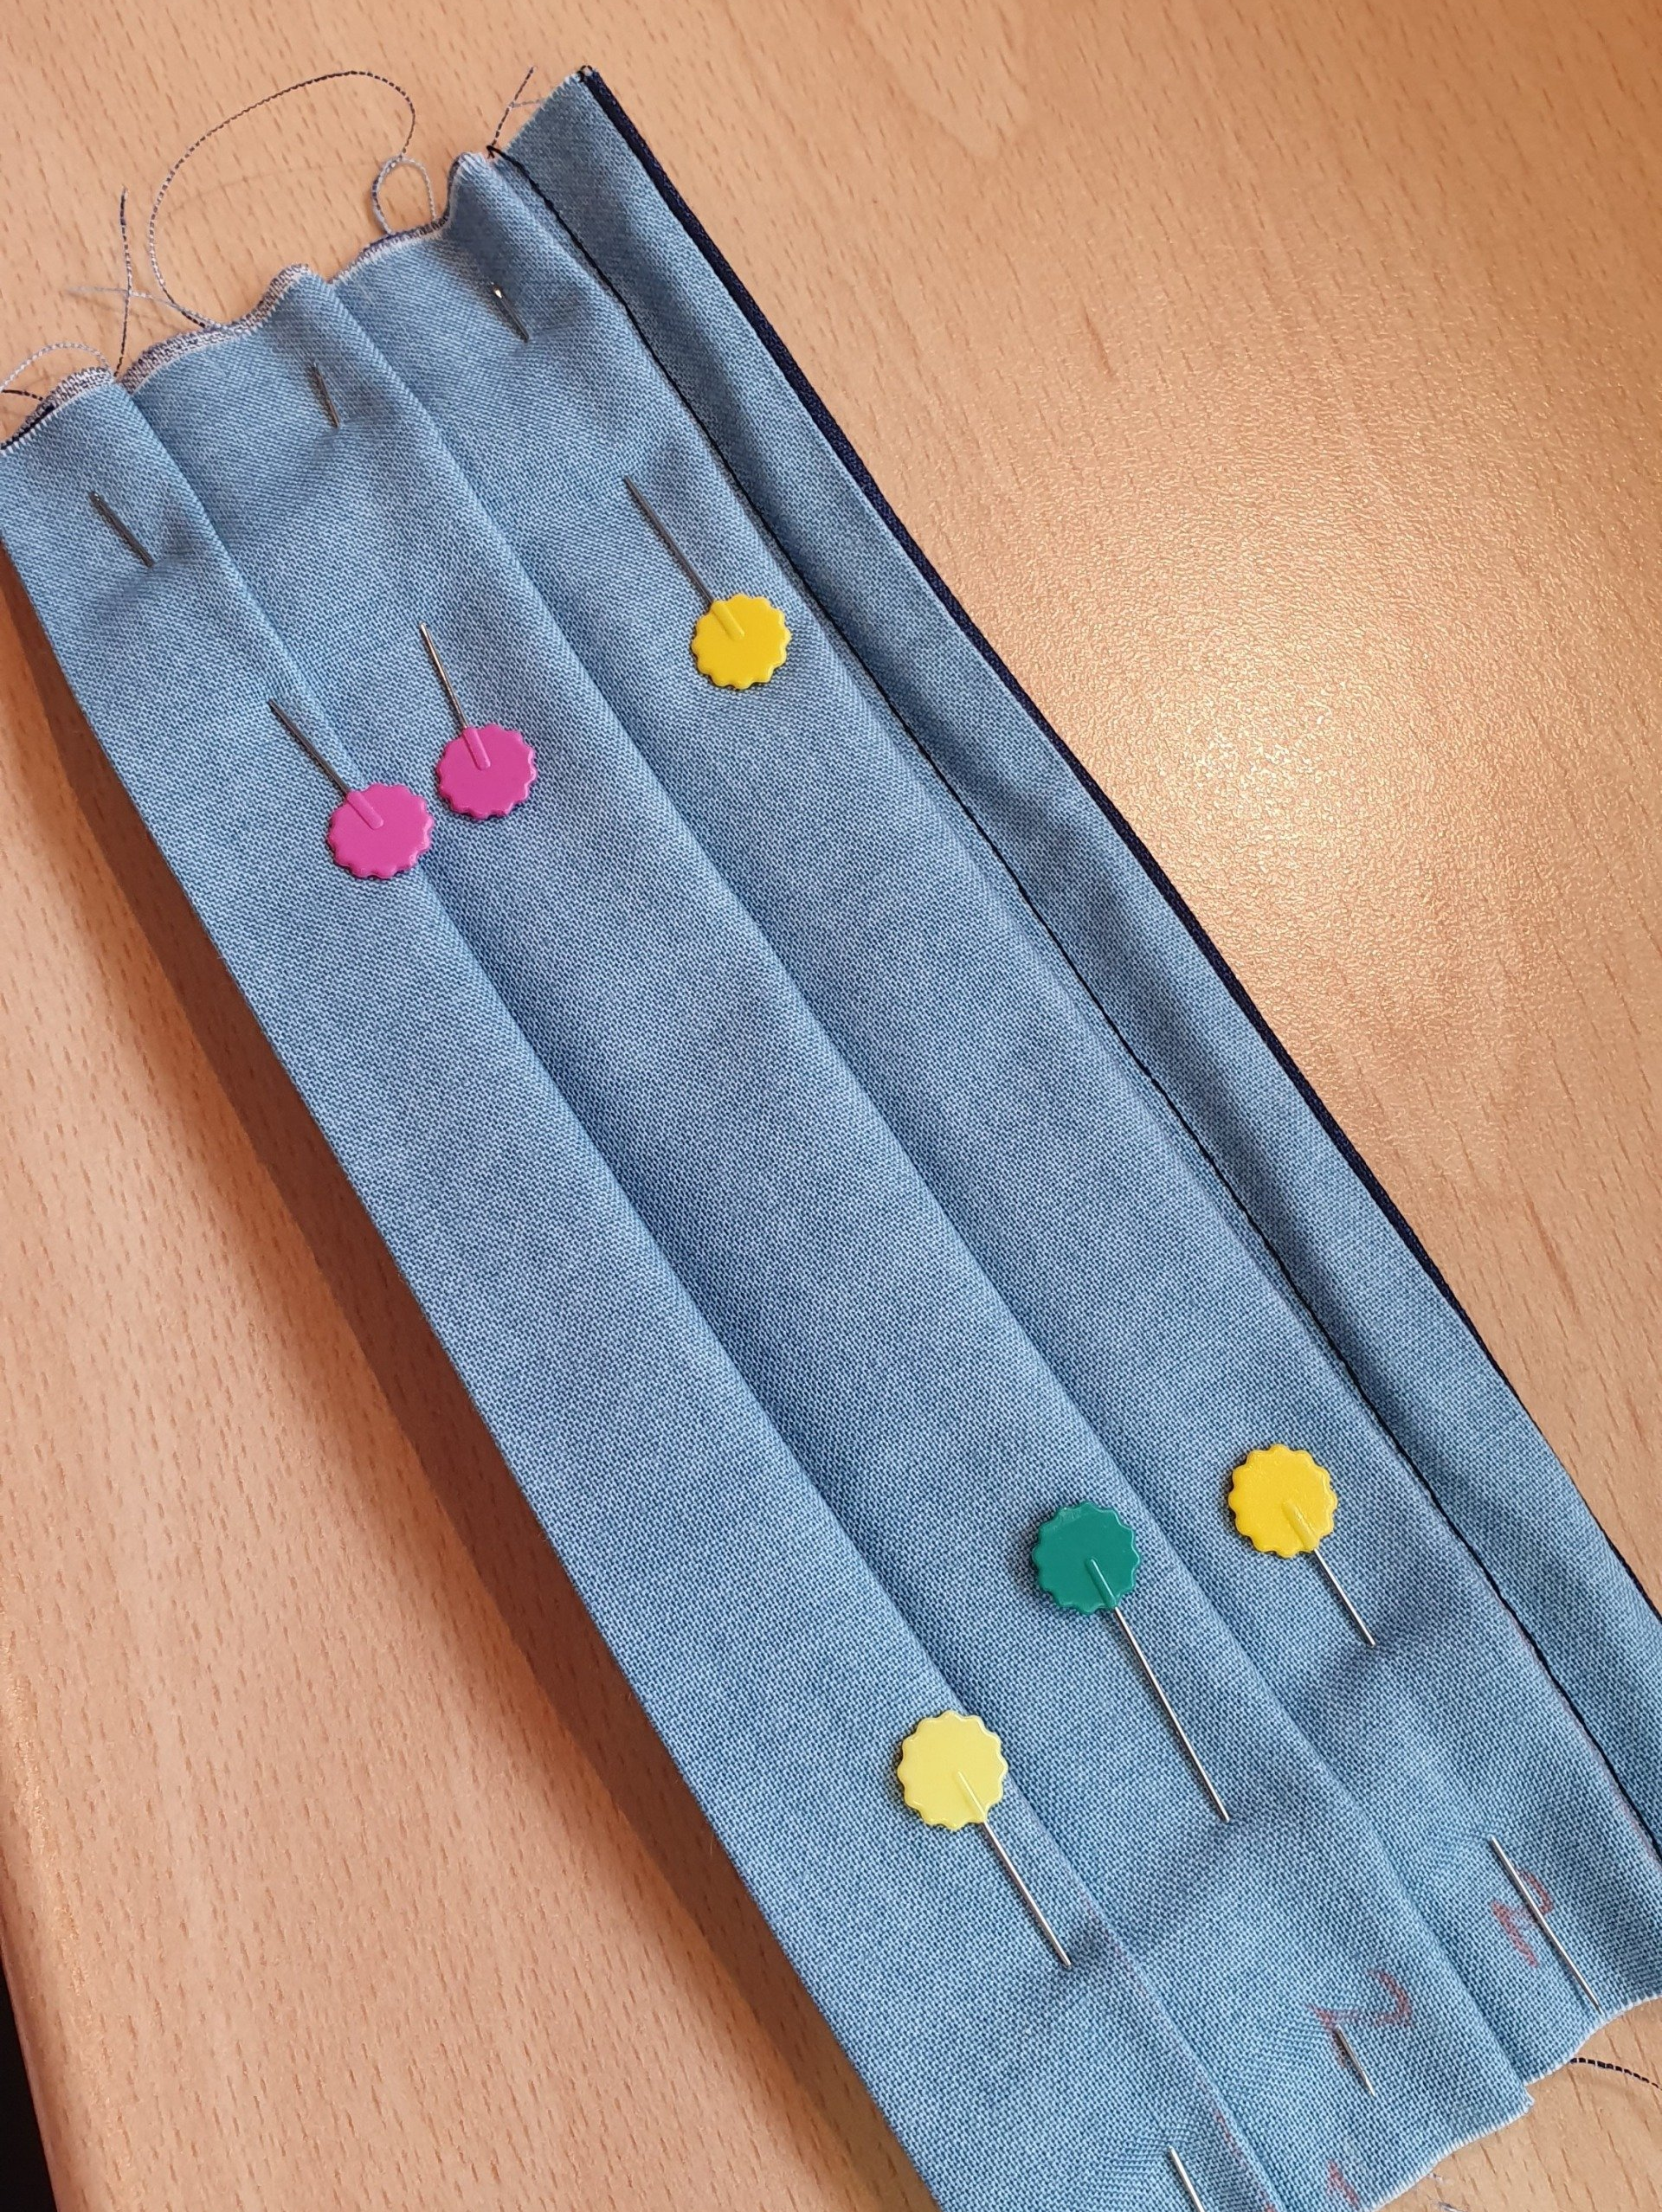
Don't worry if your pleats are not all the same size, it's not crucial. If you've made your mask from a 16" x 8" piece you won't have sewn a bottom seam so the lowest pleat can be a bit bigger.
7. Baste the edges of the pleats.
It's easier if you position the pleats facing towards you on the machine, that way they stay nice and flat as you sew.
Sew the other side the same way, by moving the mask to the inner part of your machine.

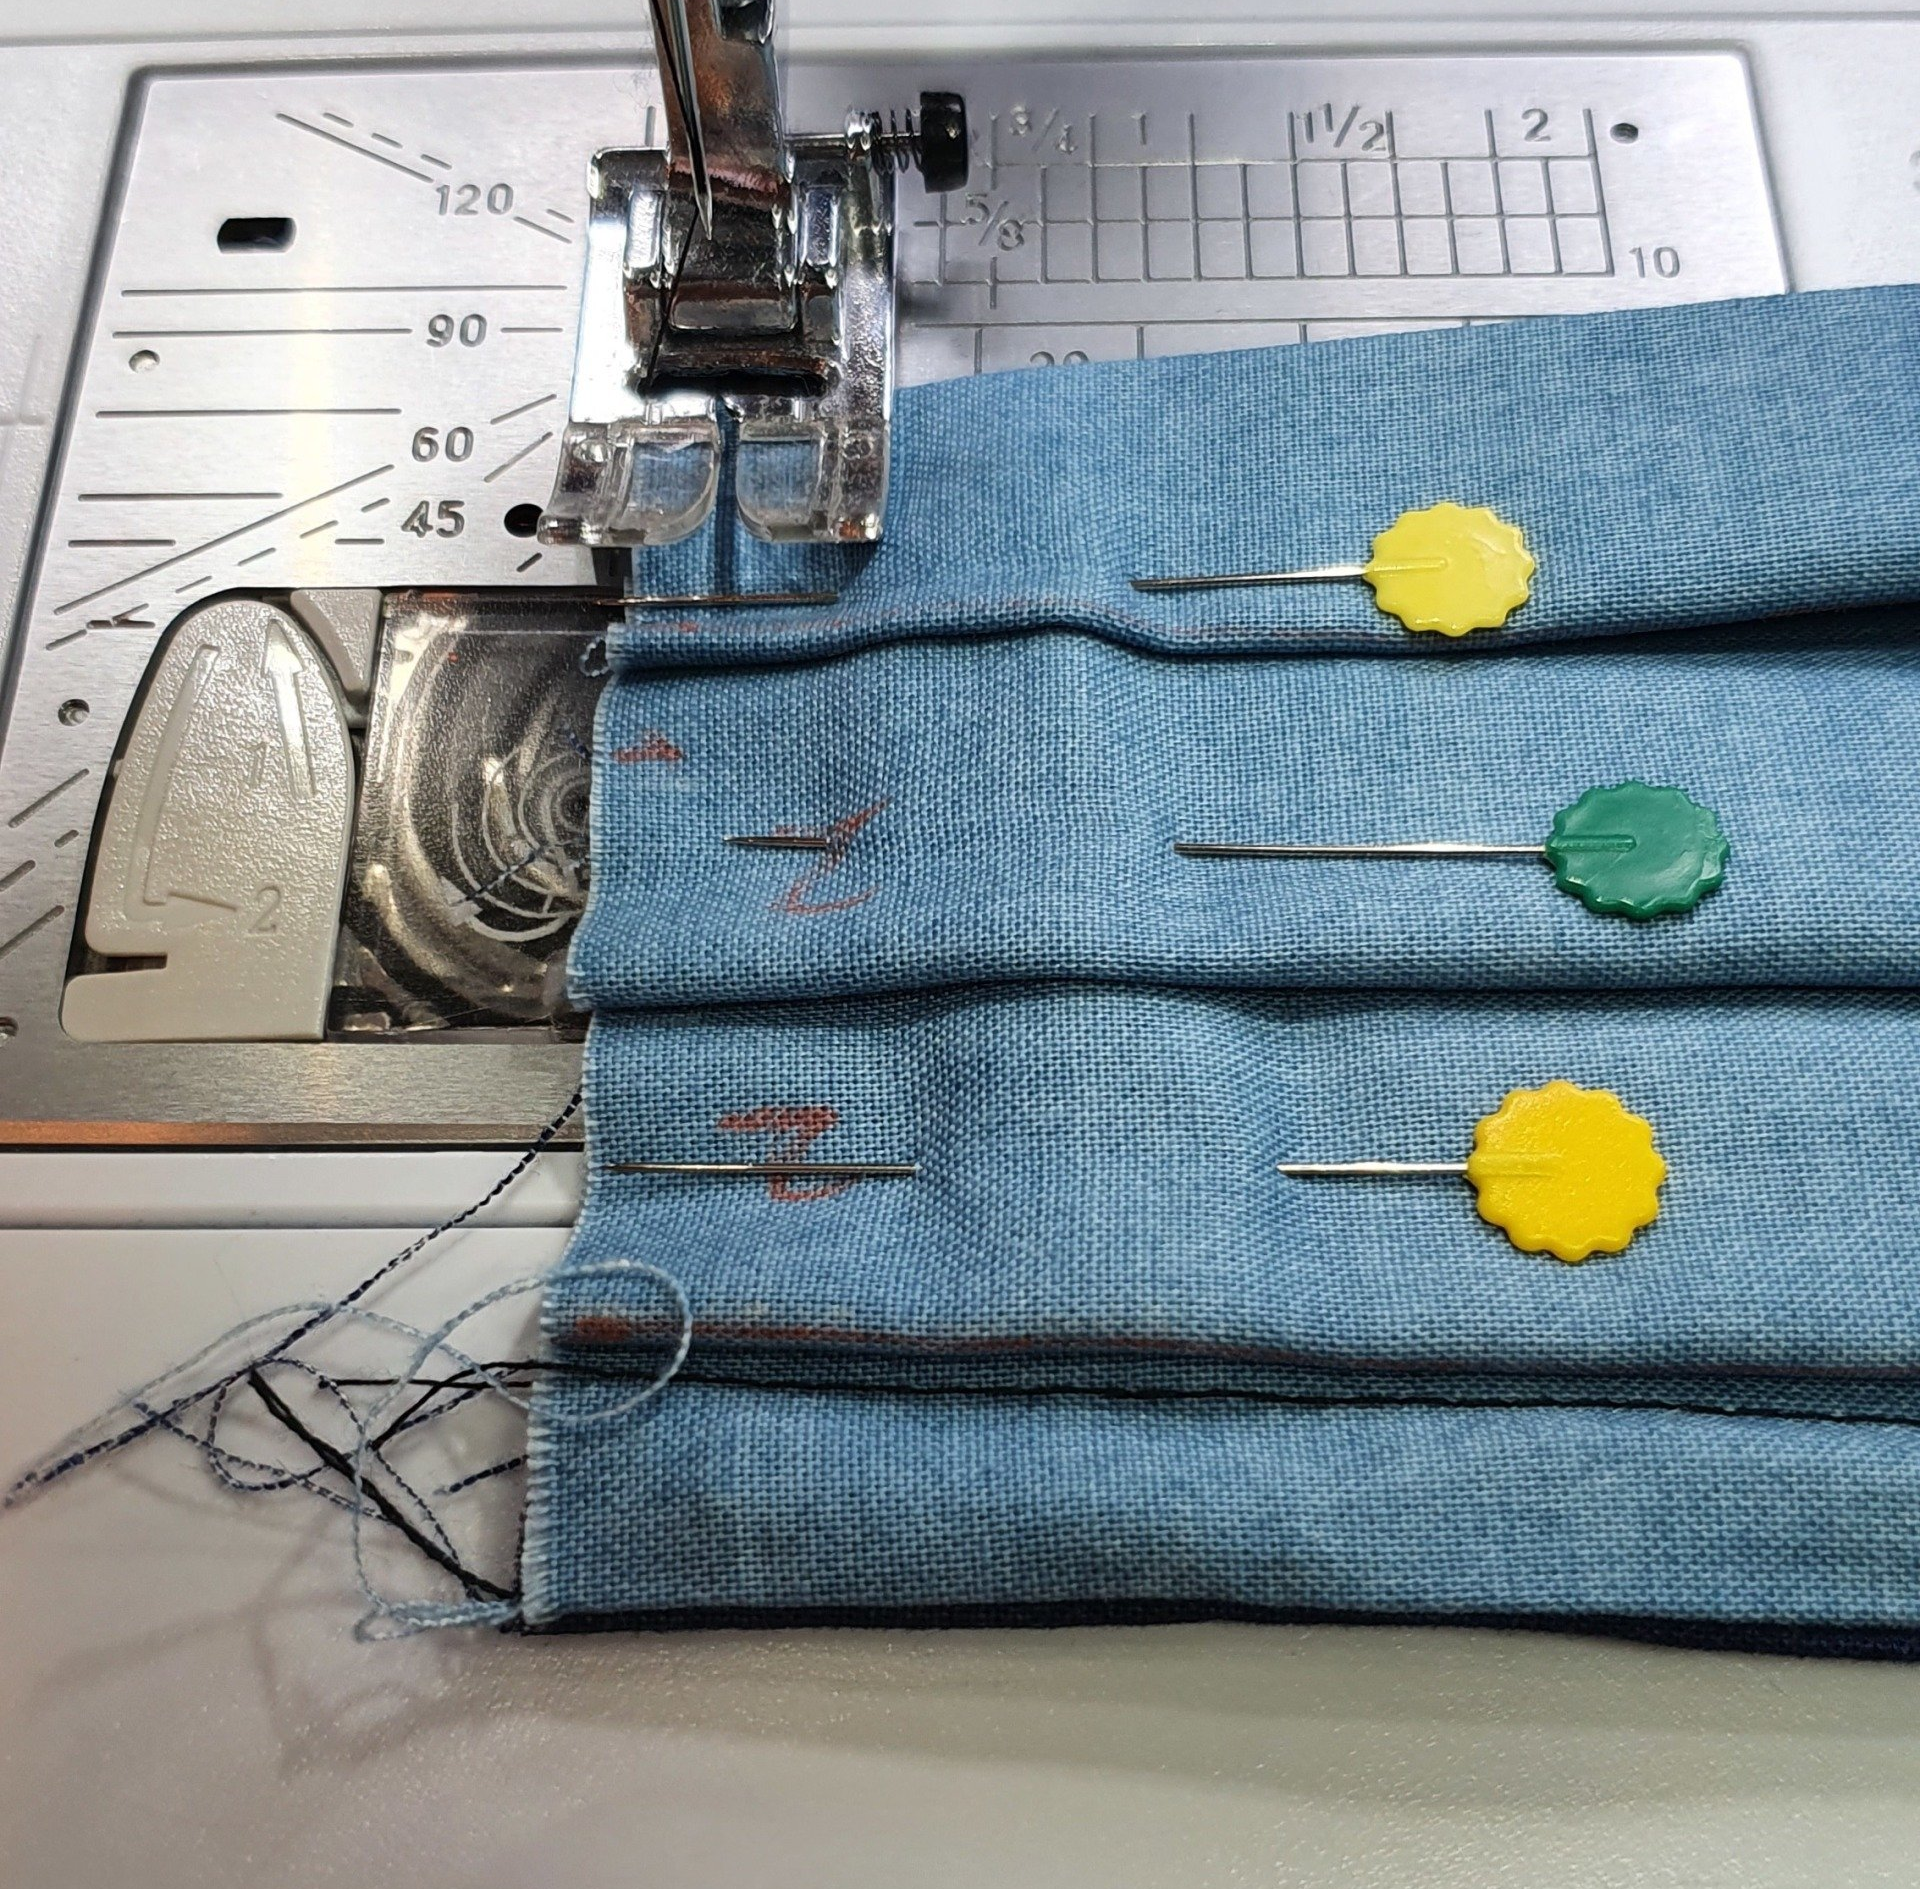
Once you've sewn both edges, press well.
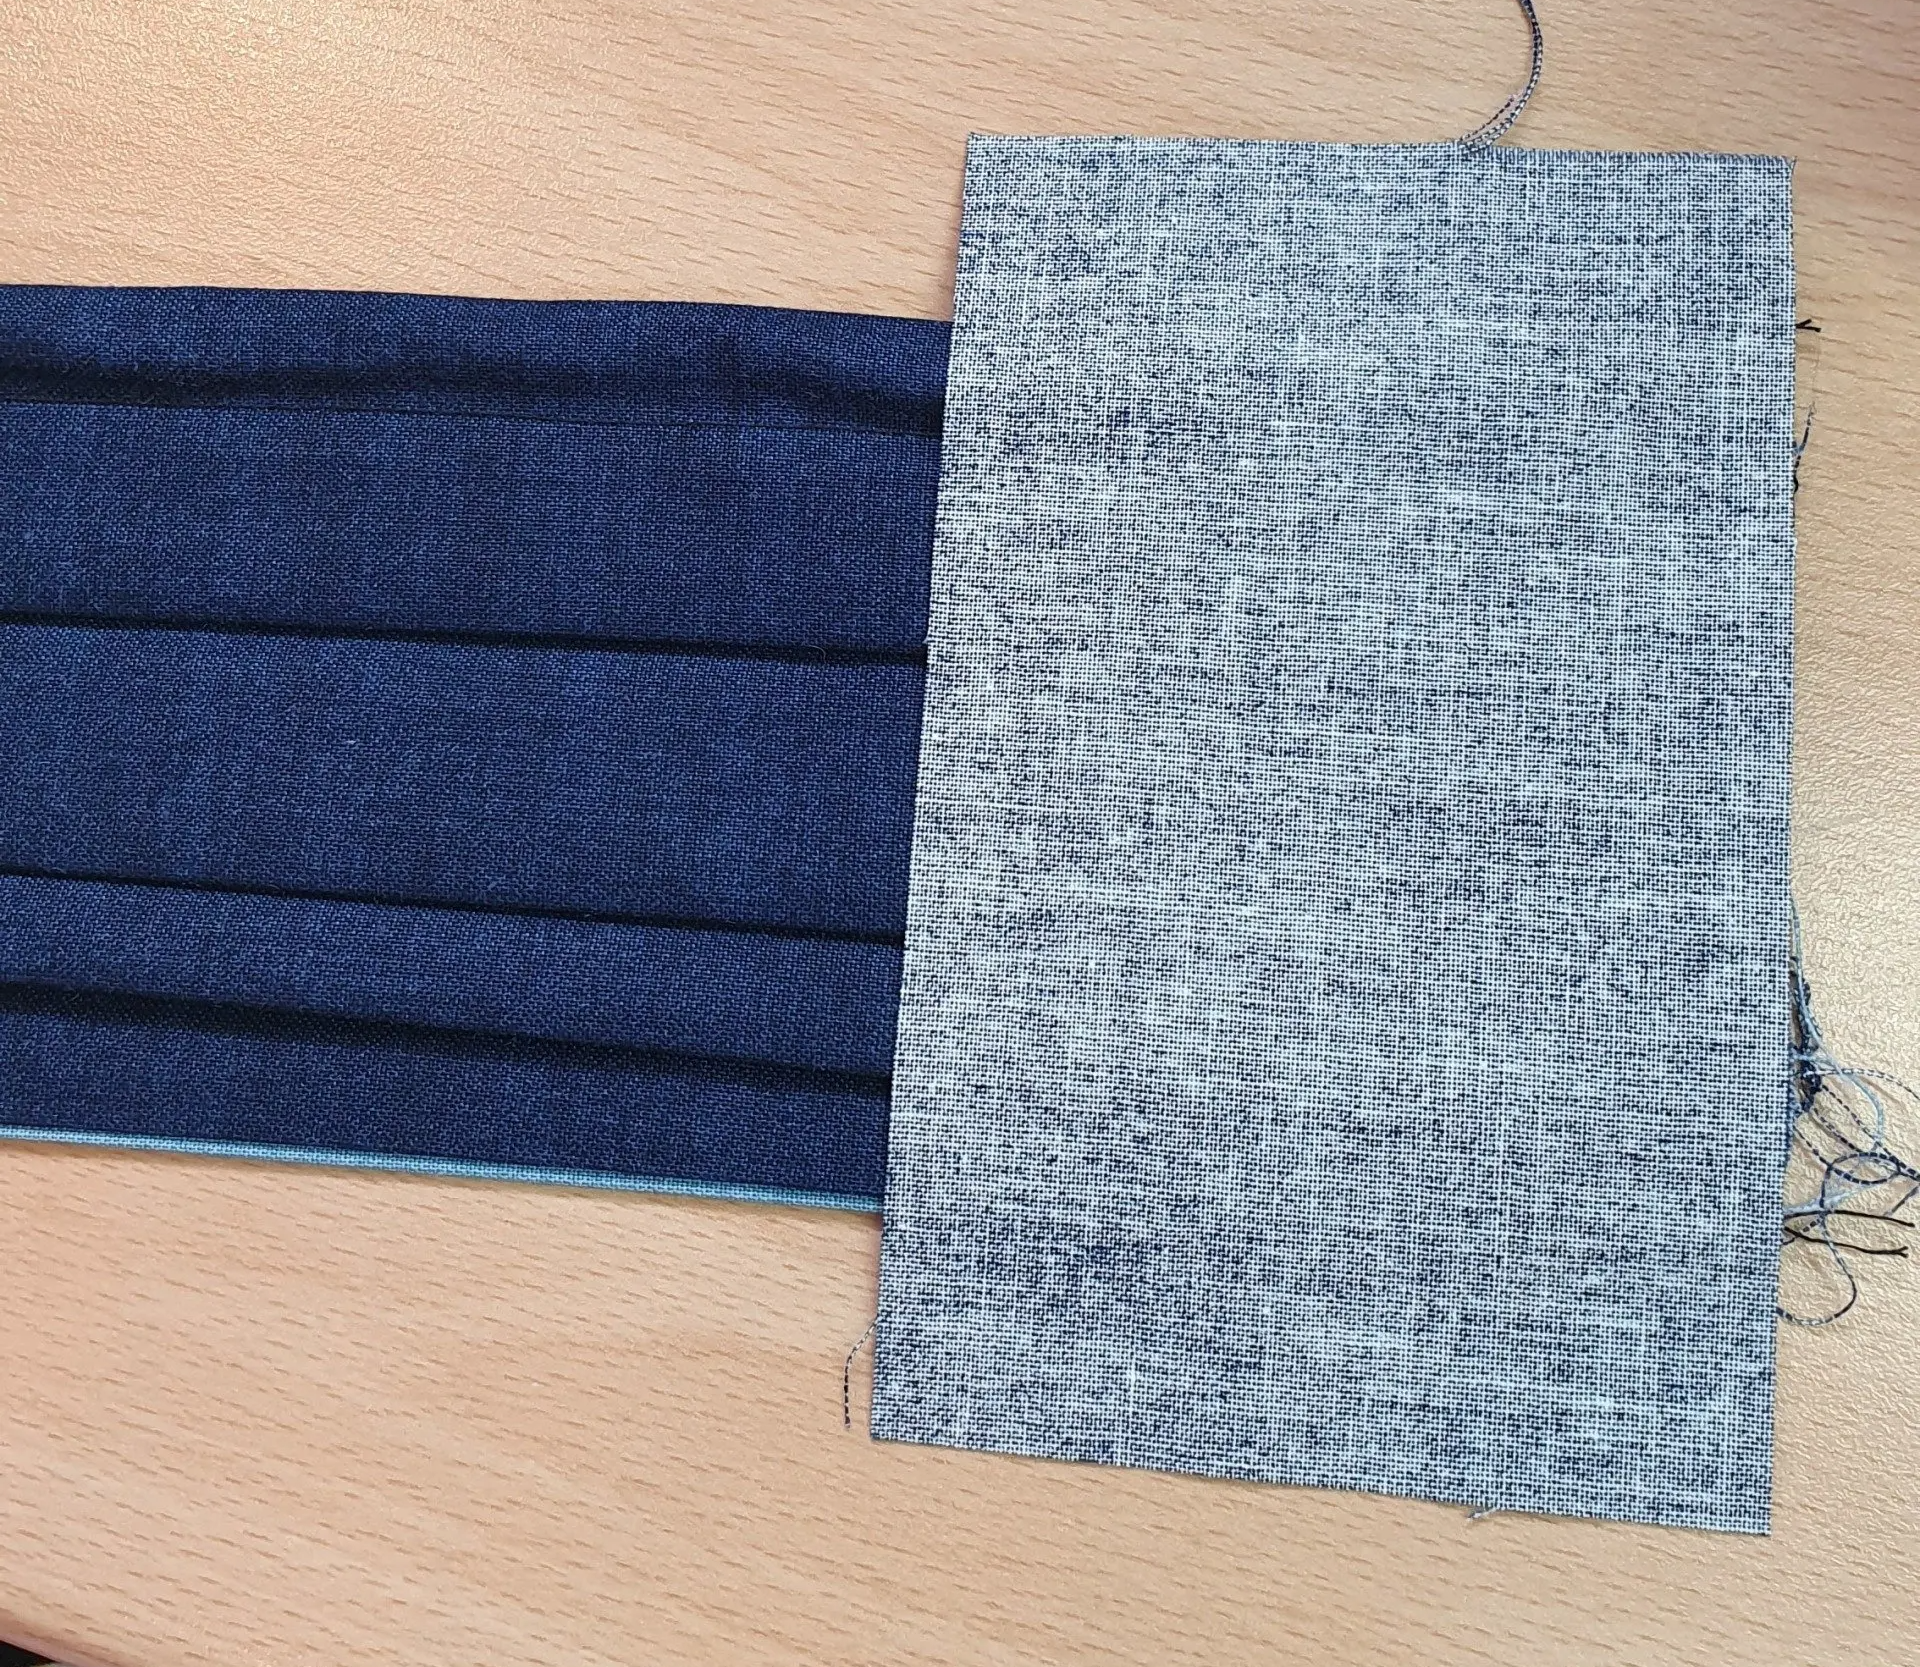
8. On the front place one of the small pieces of fabric against the pleated edge. Right sides together.
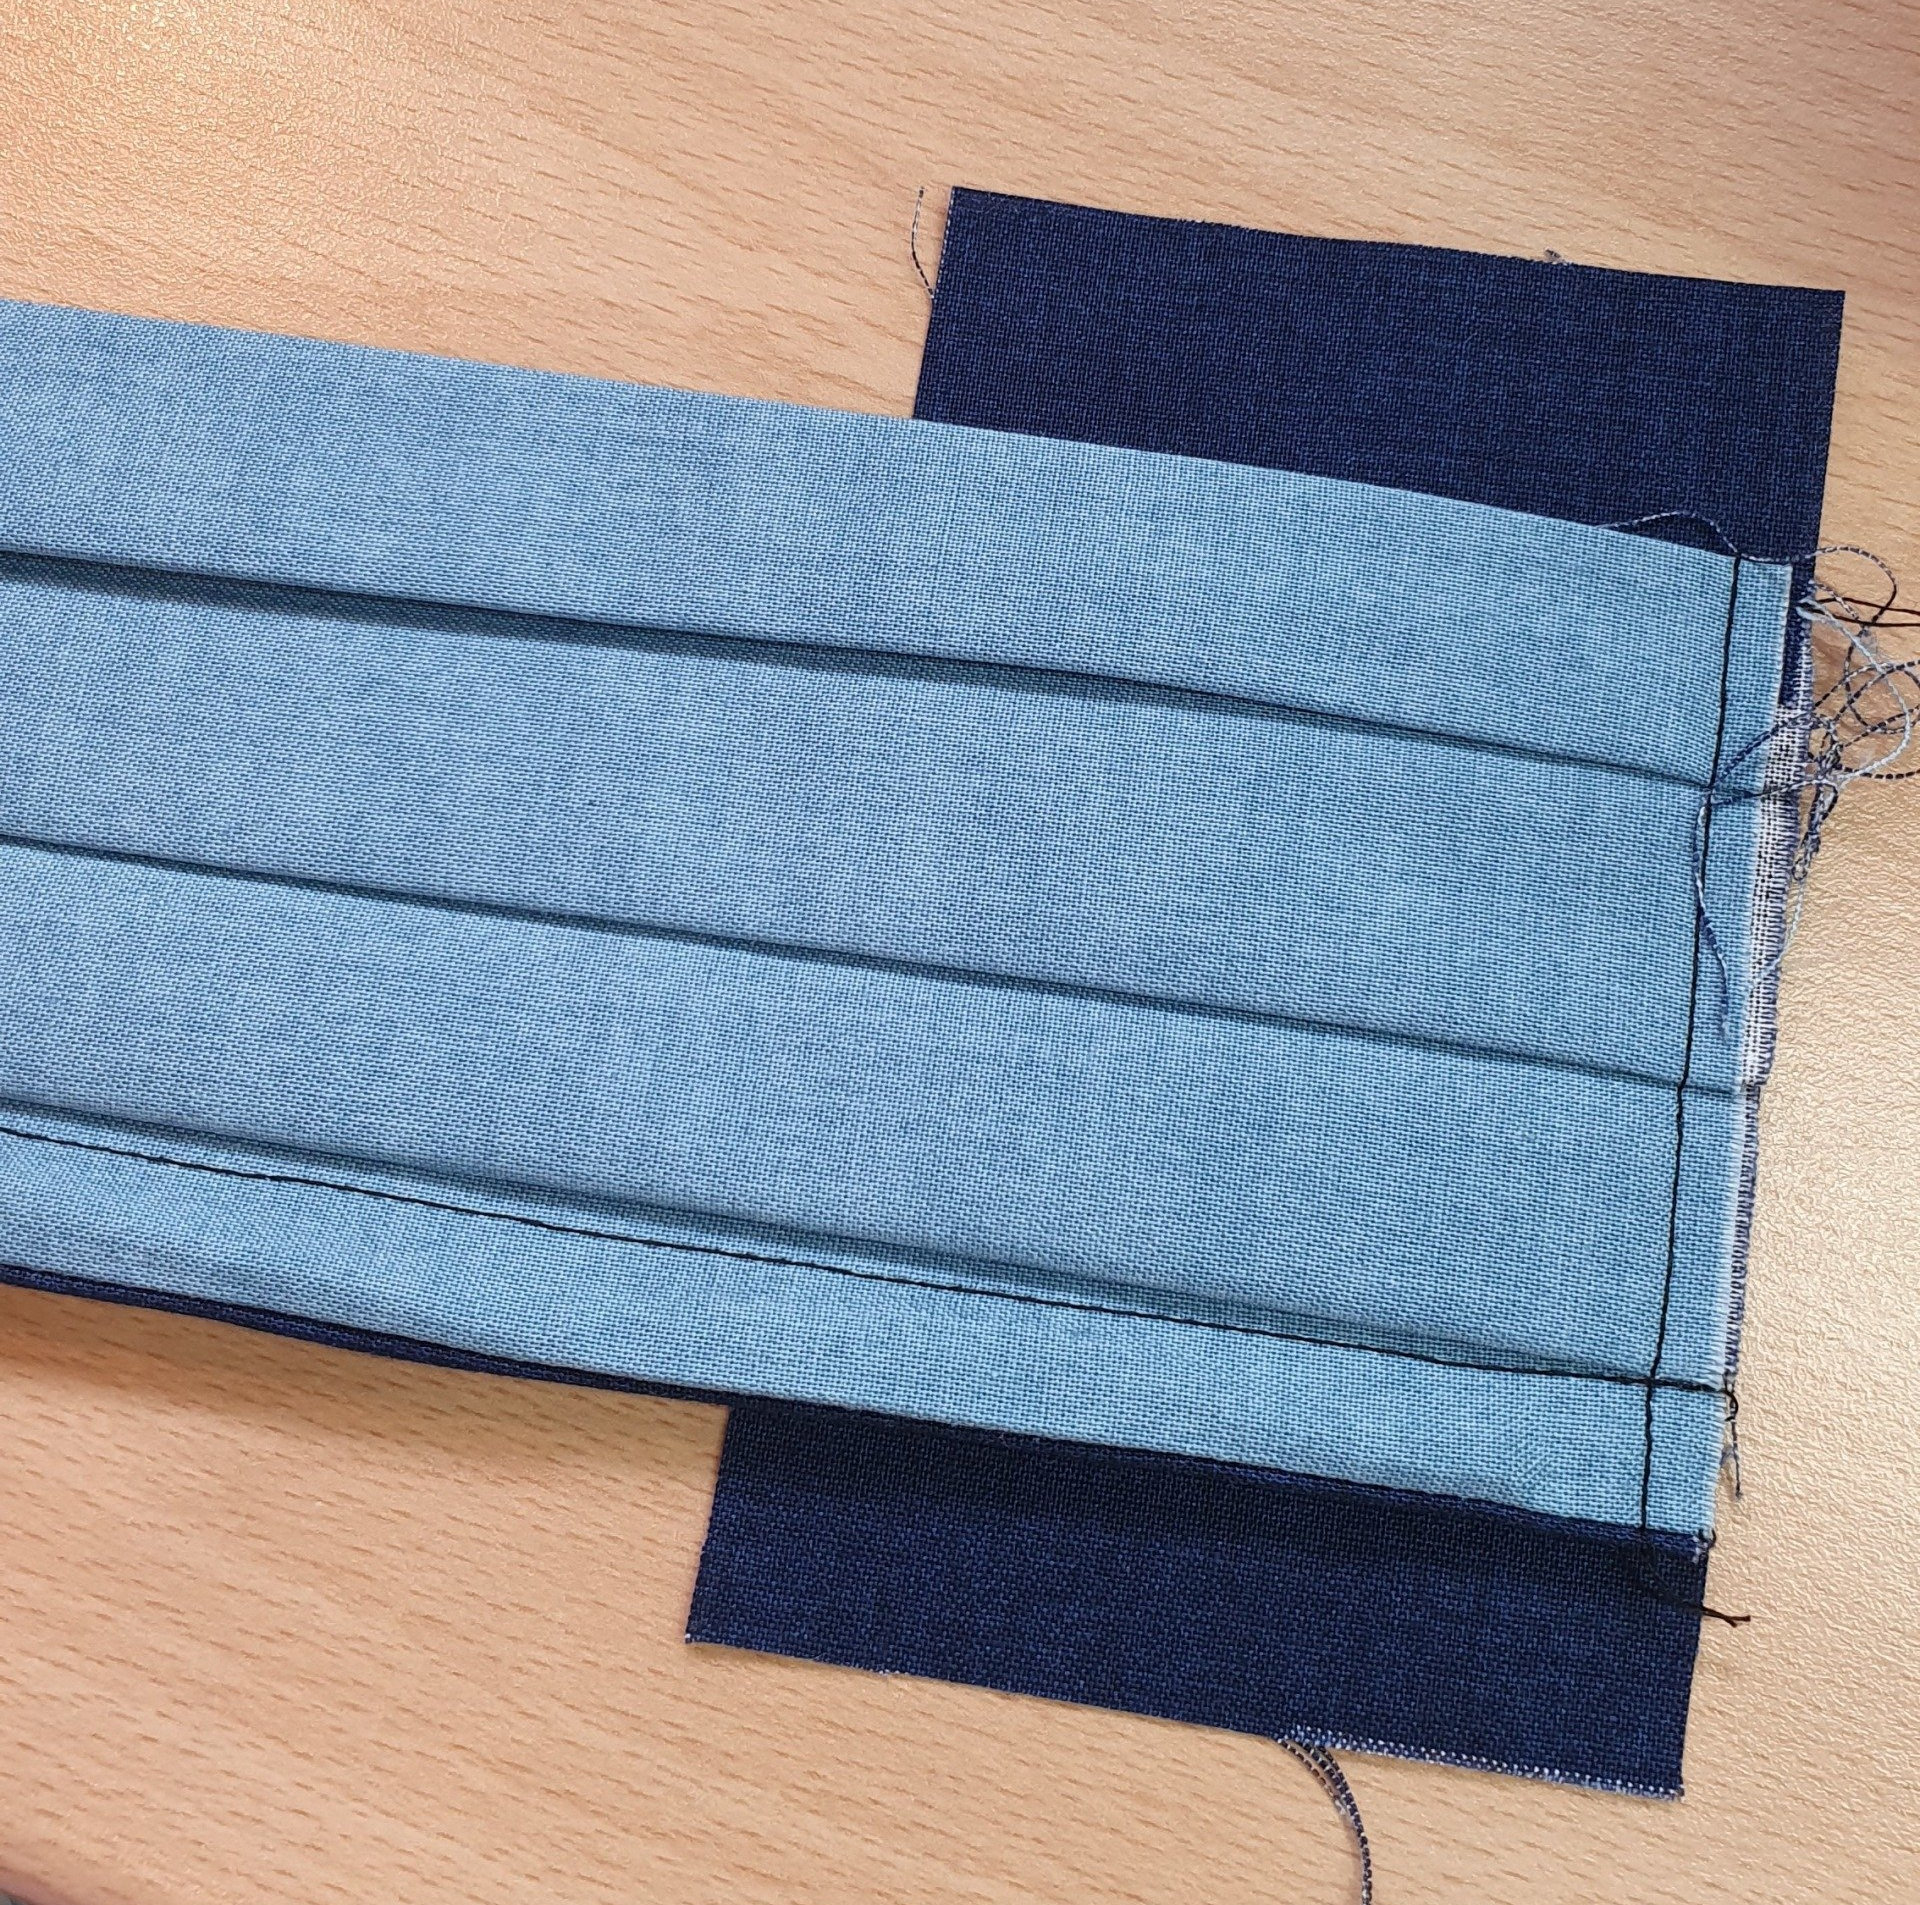
9. Flip the mask over to the back and fold the 2 extra sections over the back and pin
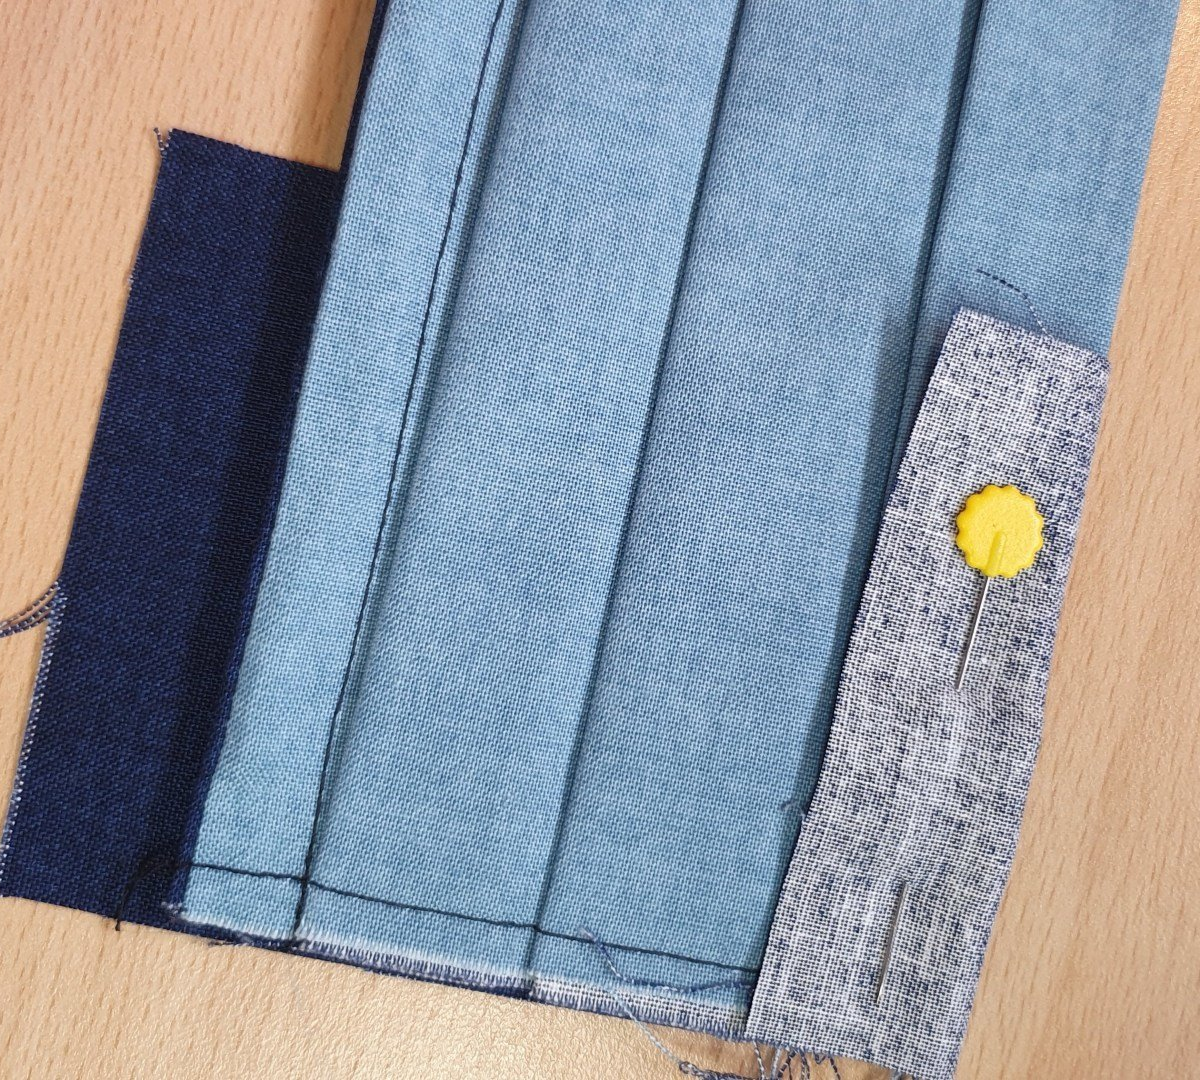
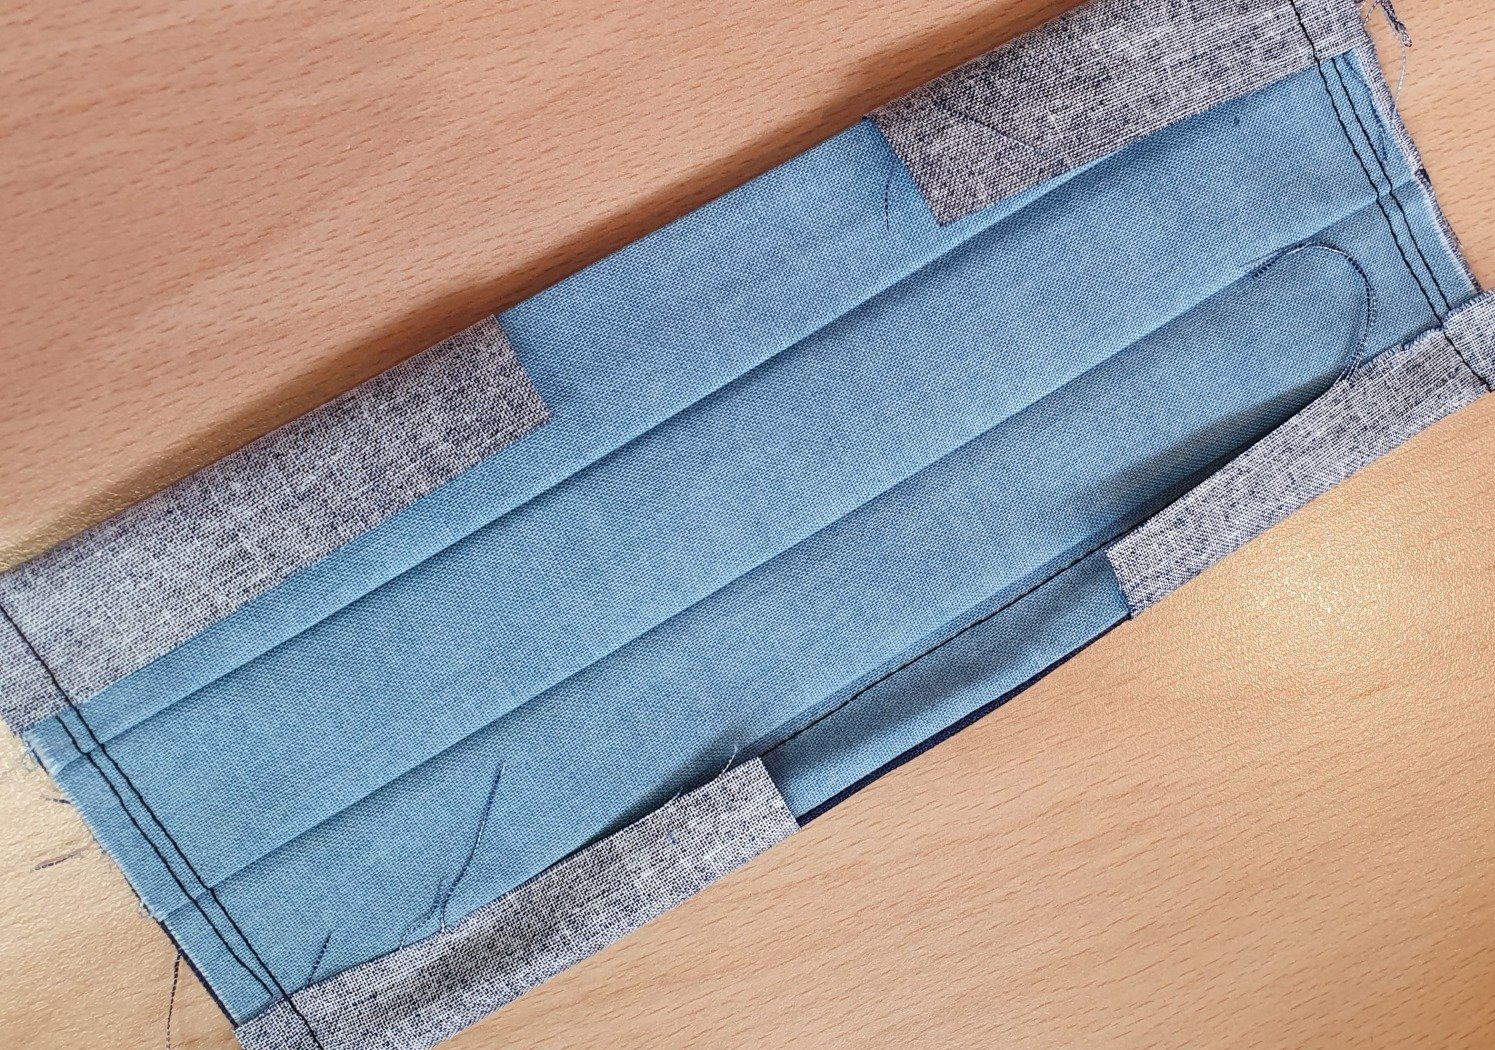
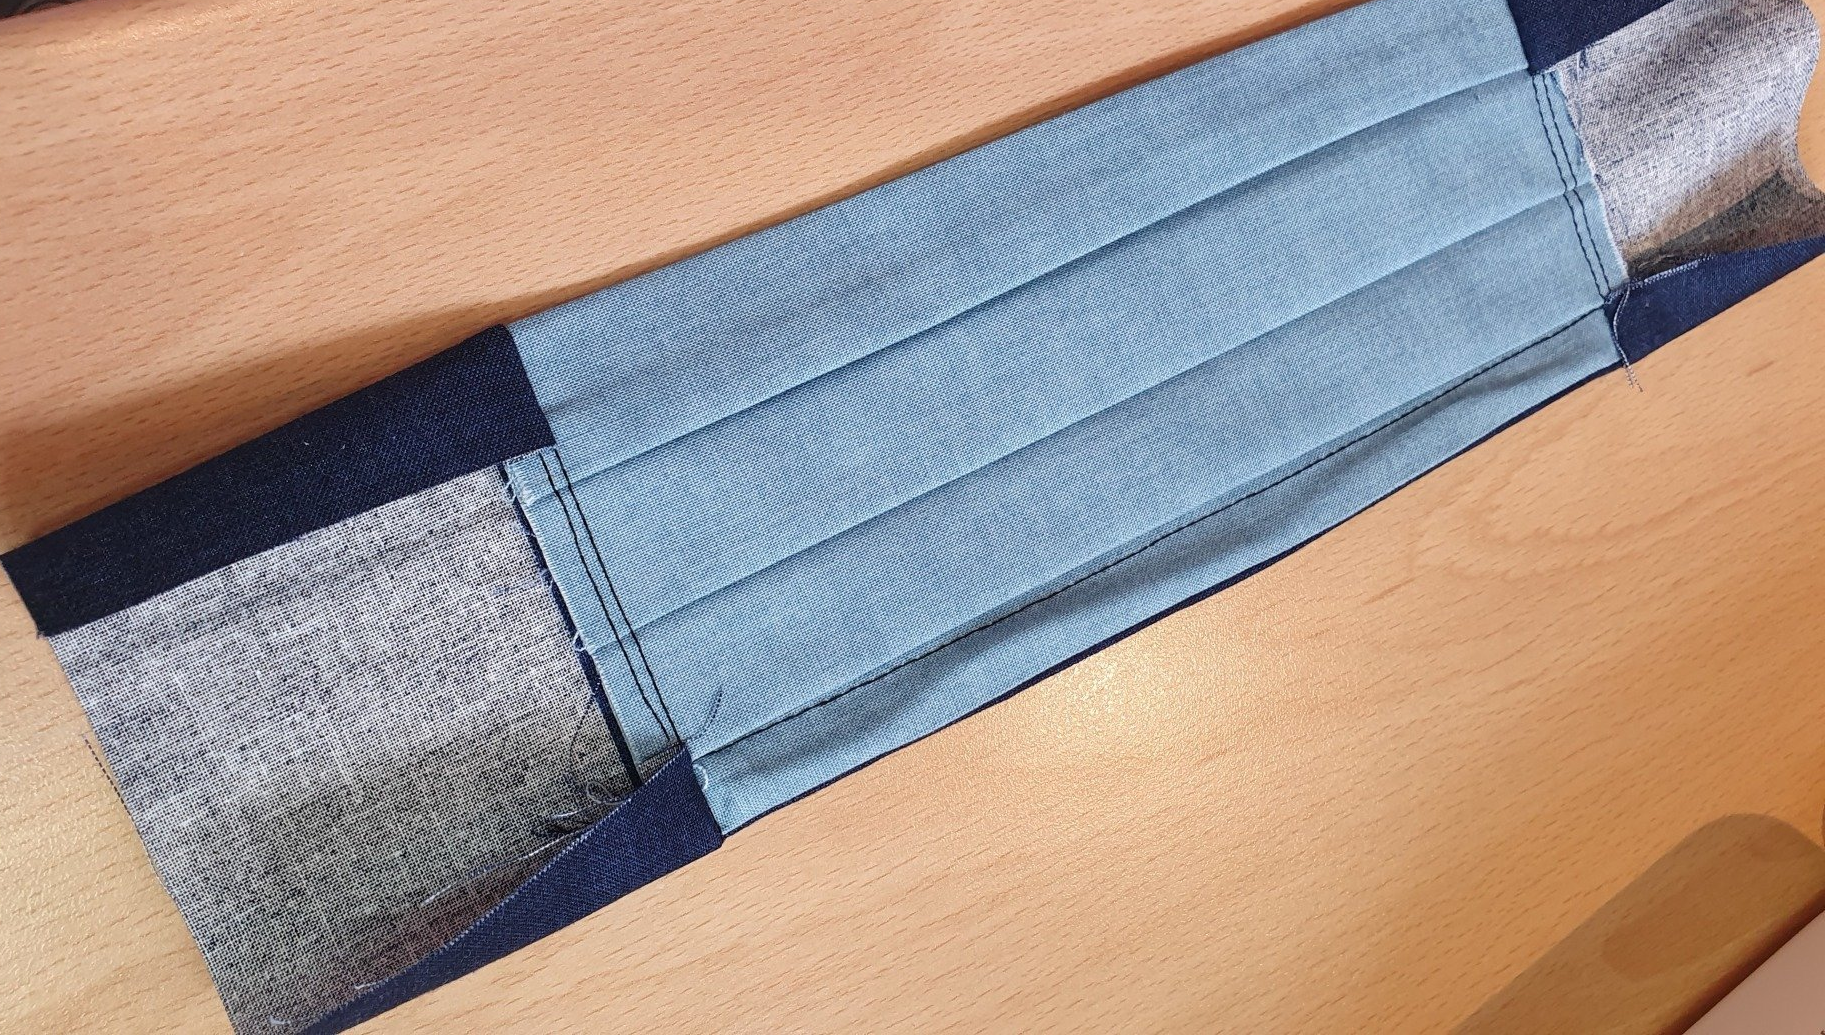
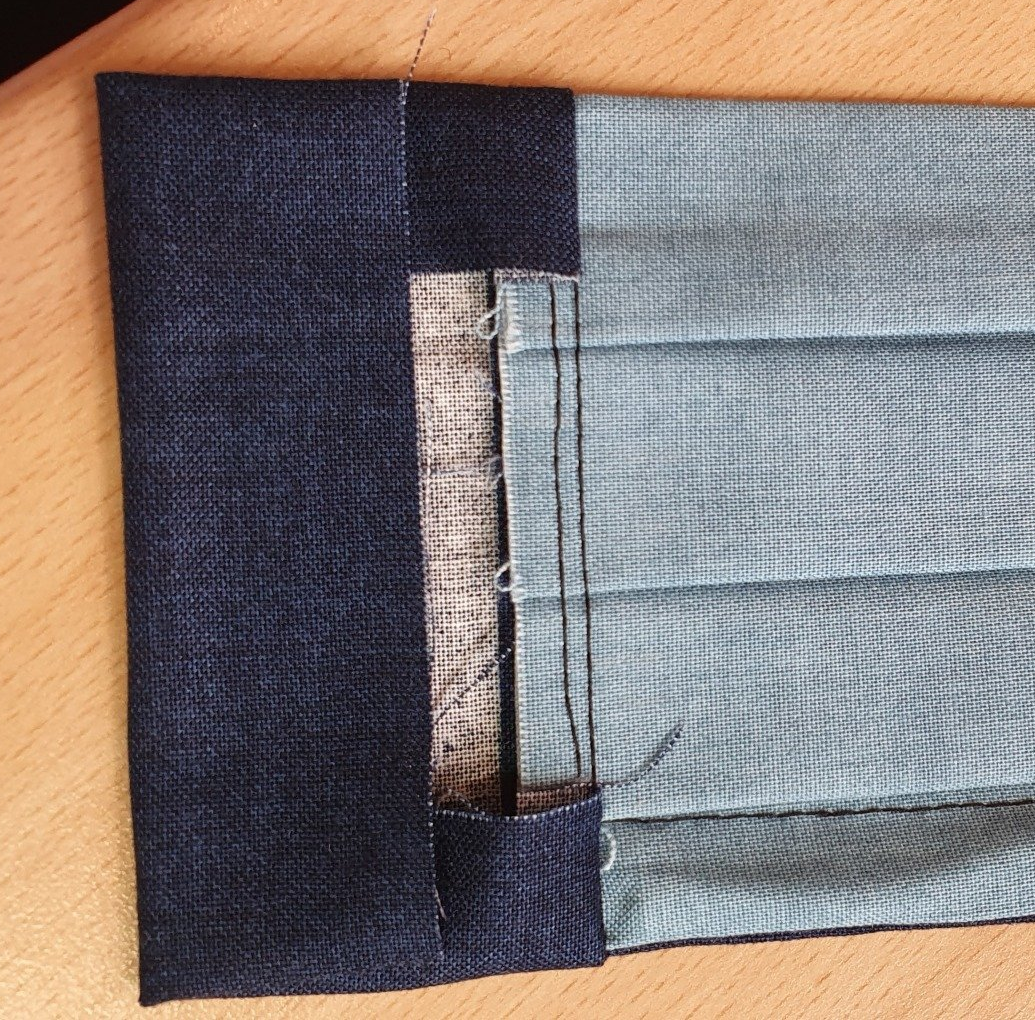
10. Sew along the raw edge of the mask. Once you've sewn both pieces on, pull them outwards, ready to make the channels for the elastic. Press.
11. Fold the tab edge inwards so all the raw edges are enclosed.
12. Fold over onto the main body of the mask just over your stitch line. This will create a channel for the elastic.
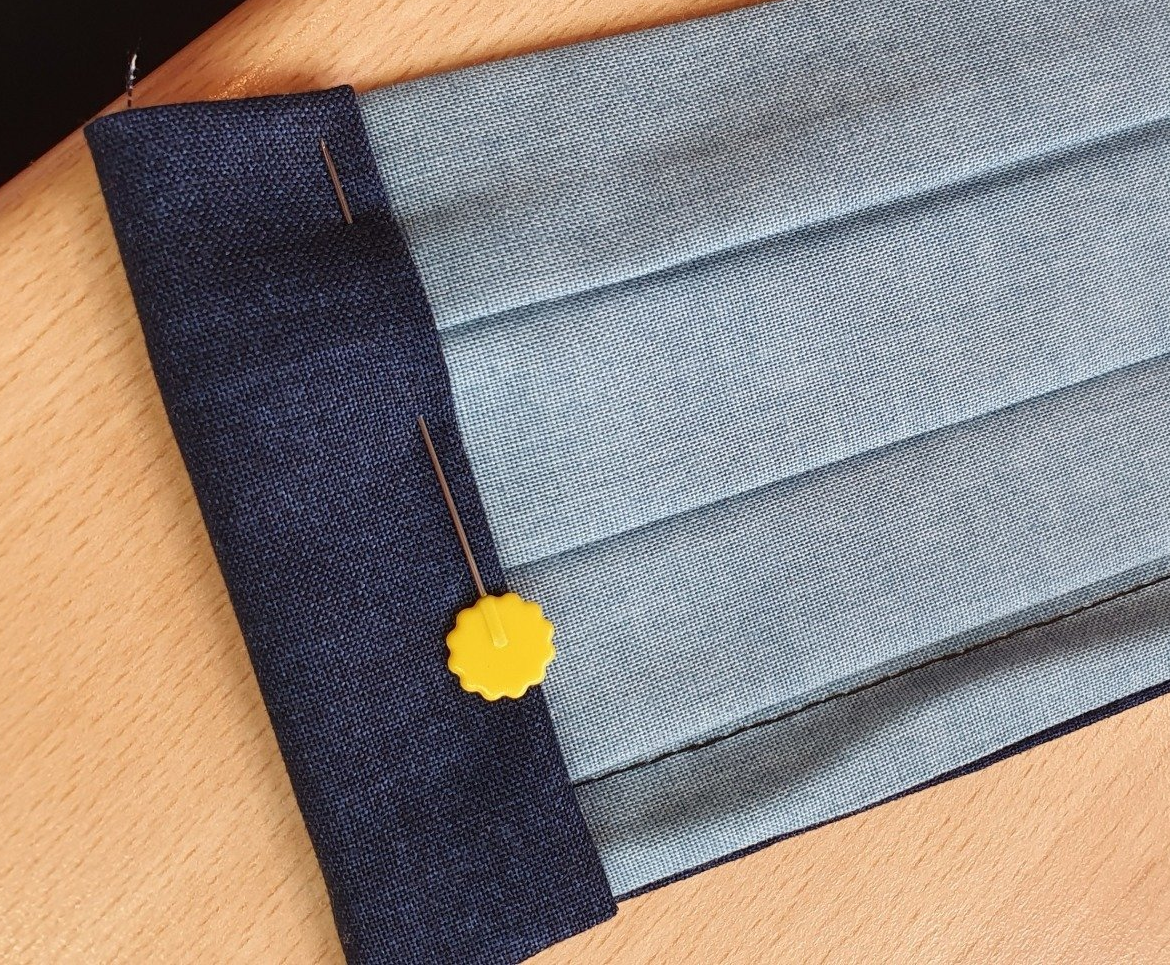
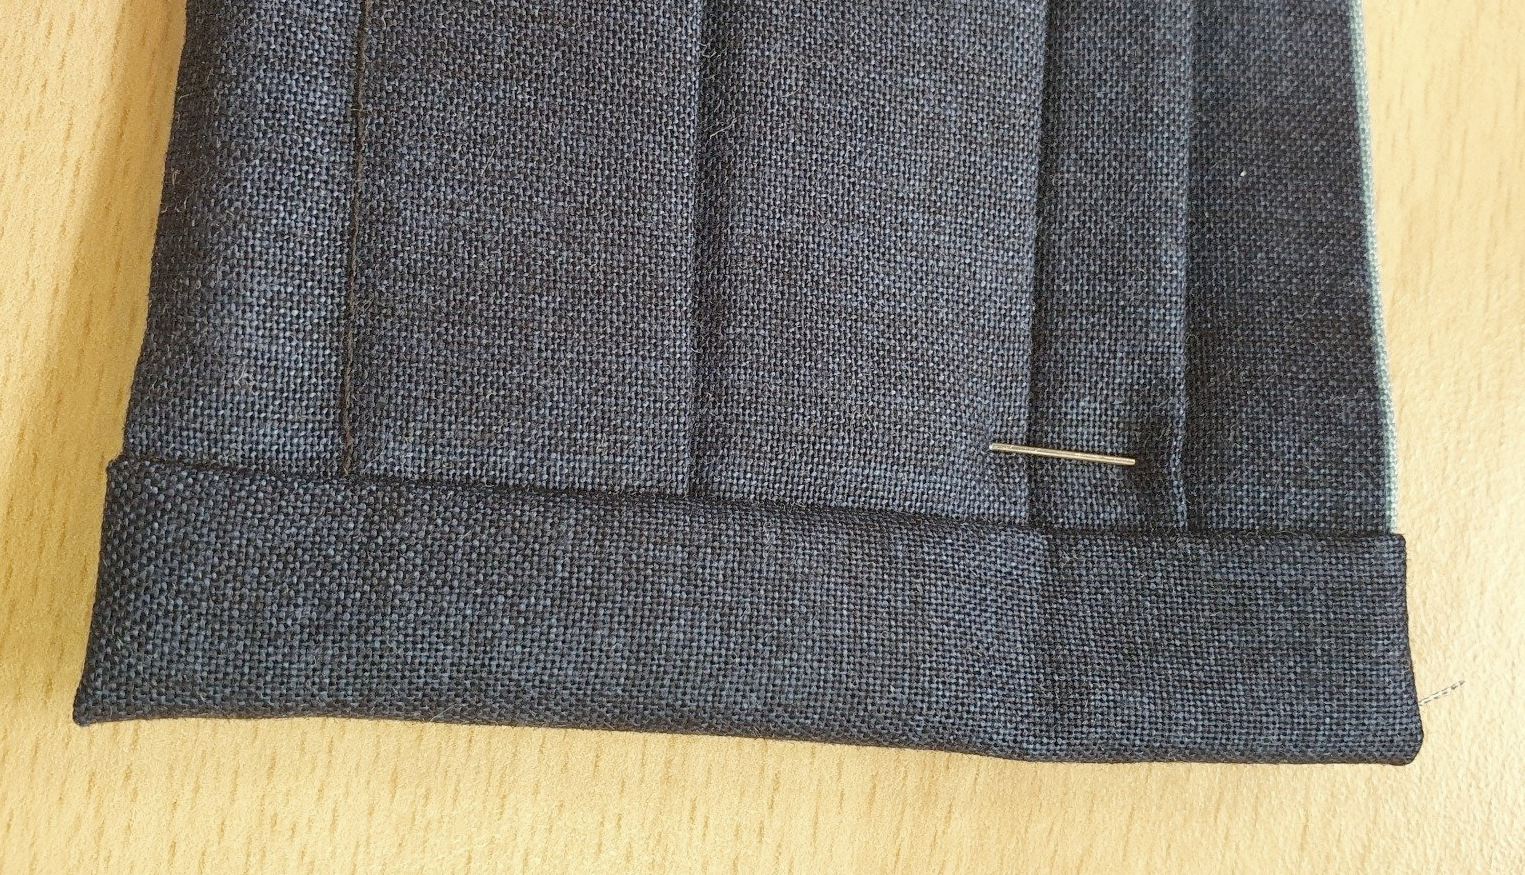
13. On the front of the mask, stitch in the ditch (in the dip where the seam is) to catch the flap on the rear side. Again don't worry if it's not dead neat on the back, no-one will see it!

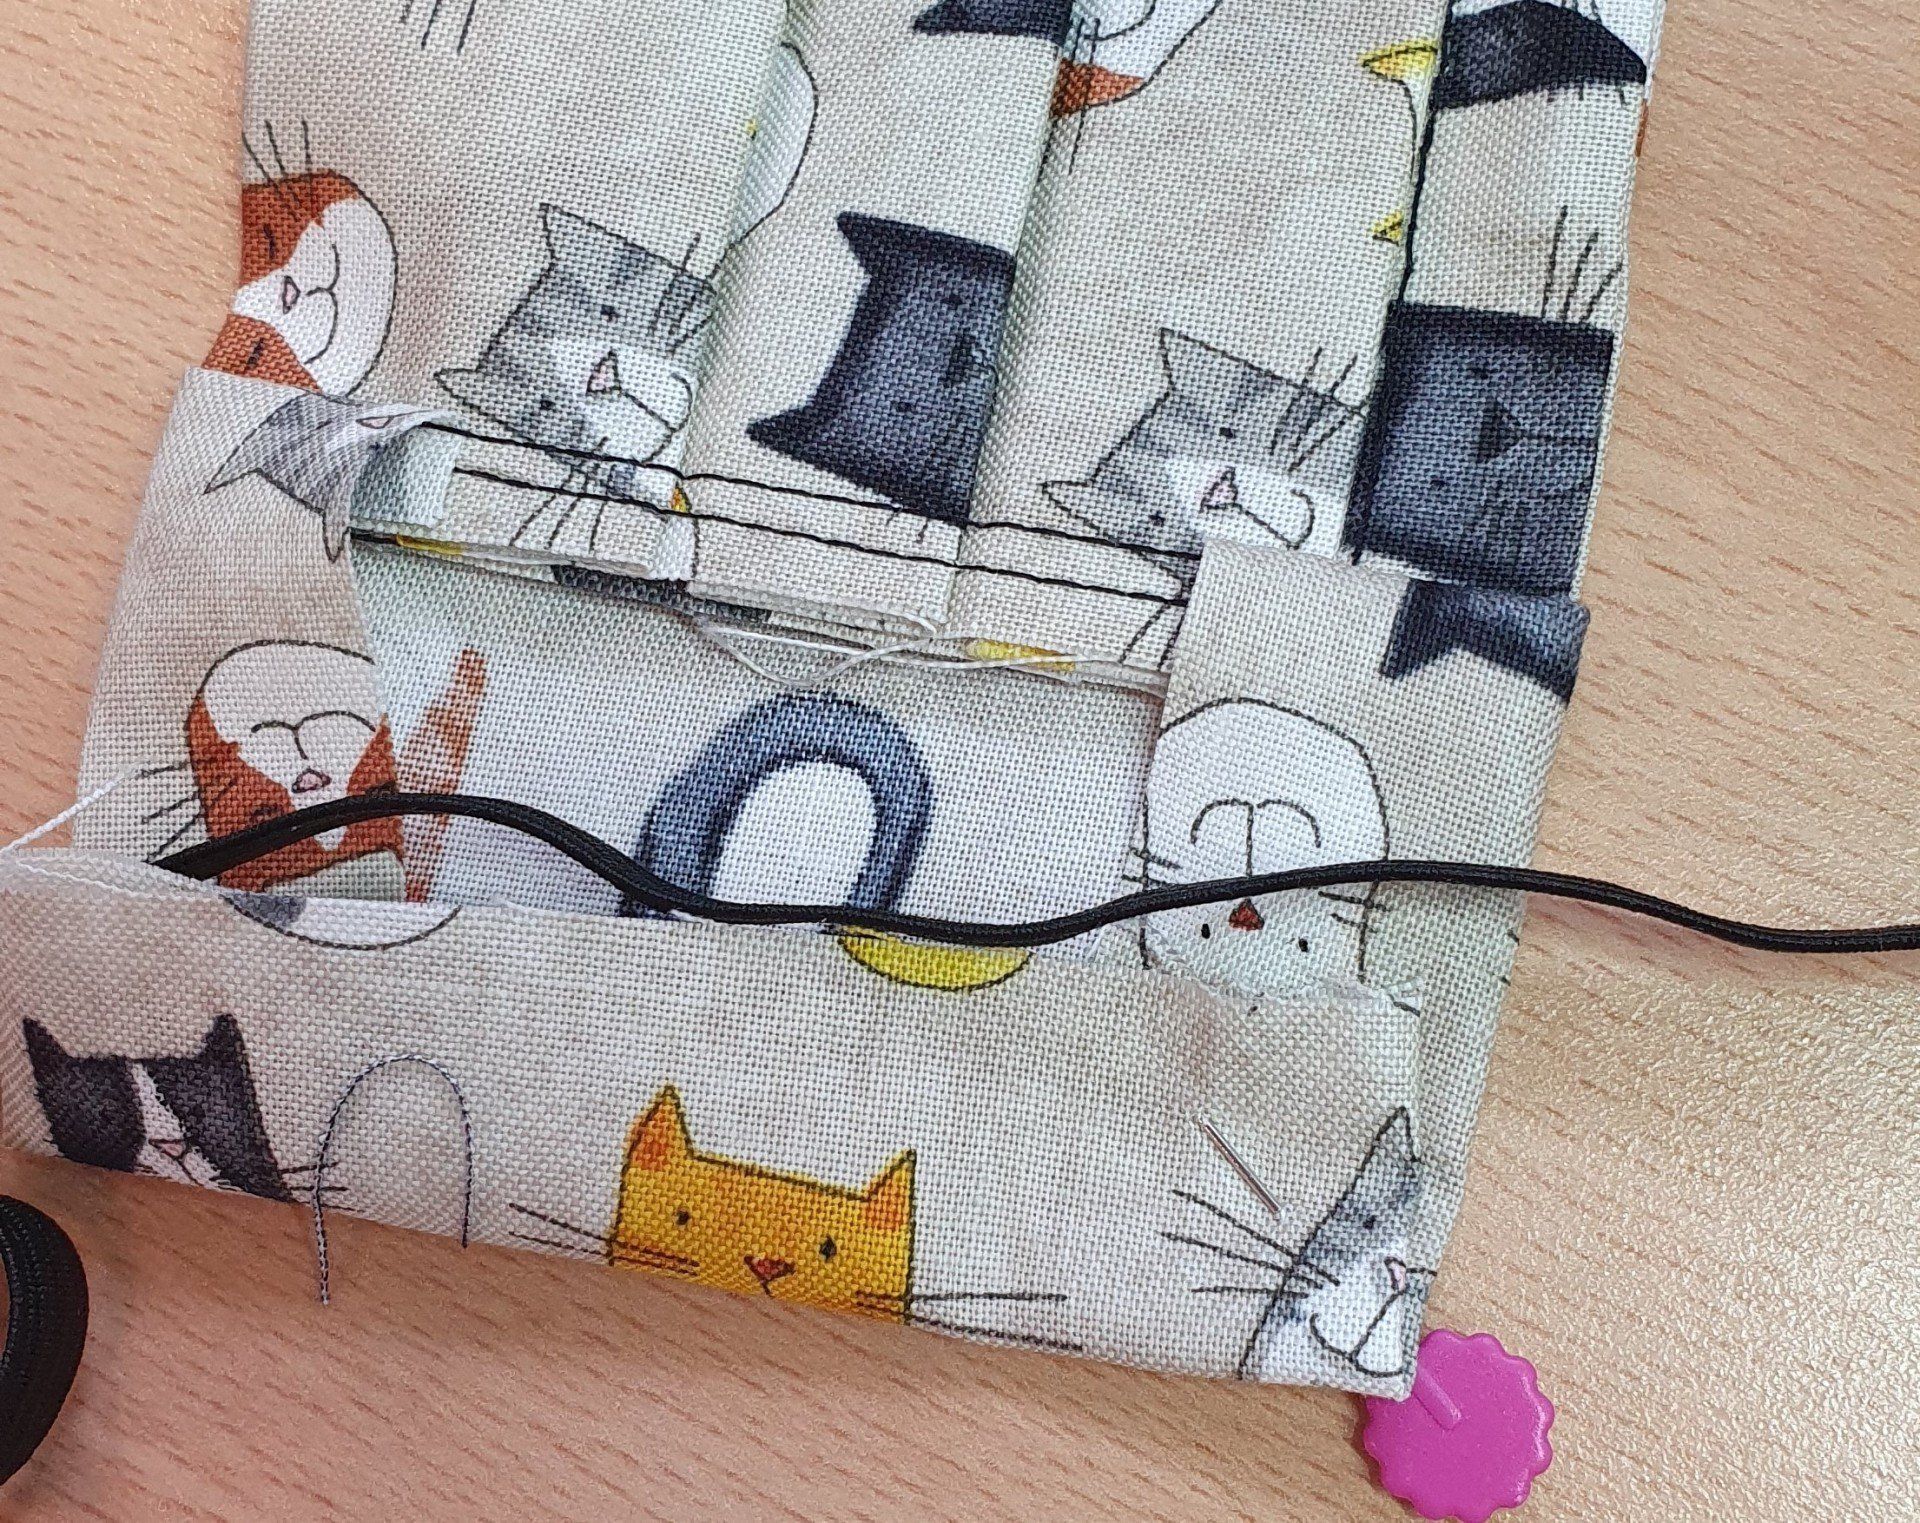
14. Use a safety pin, bodkin or a large paper clip, to thread the elastic through the channels. If you prefer the elastic to go around the back of your head, you'll need about 32" Thread through one, then the other to make a continuous loop.
You can also make this an over the ears mask with elastic threaded through each side separately, You'll need 11" per side.
As you get more adept with the construction you may be able to sew the channels whilst trapping the elastic inside. just lie the elastic next to the raw edges and fold the flap over it. This saves the threading stage and speeds things up a bit if you're making them for your family and friends too.
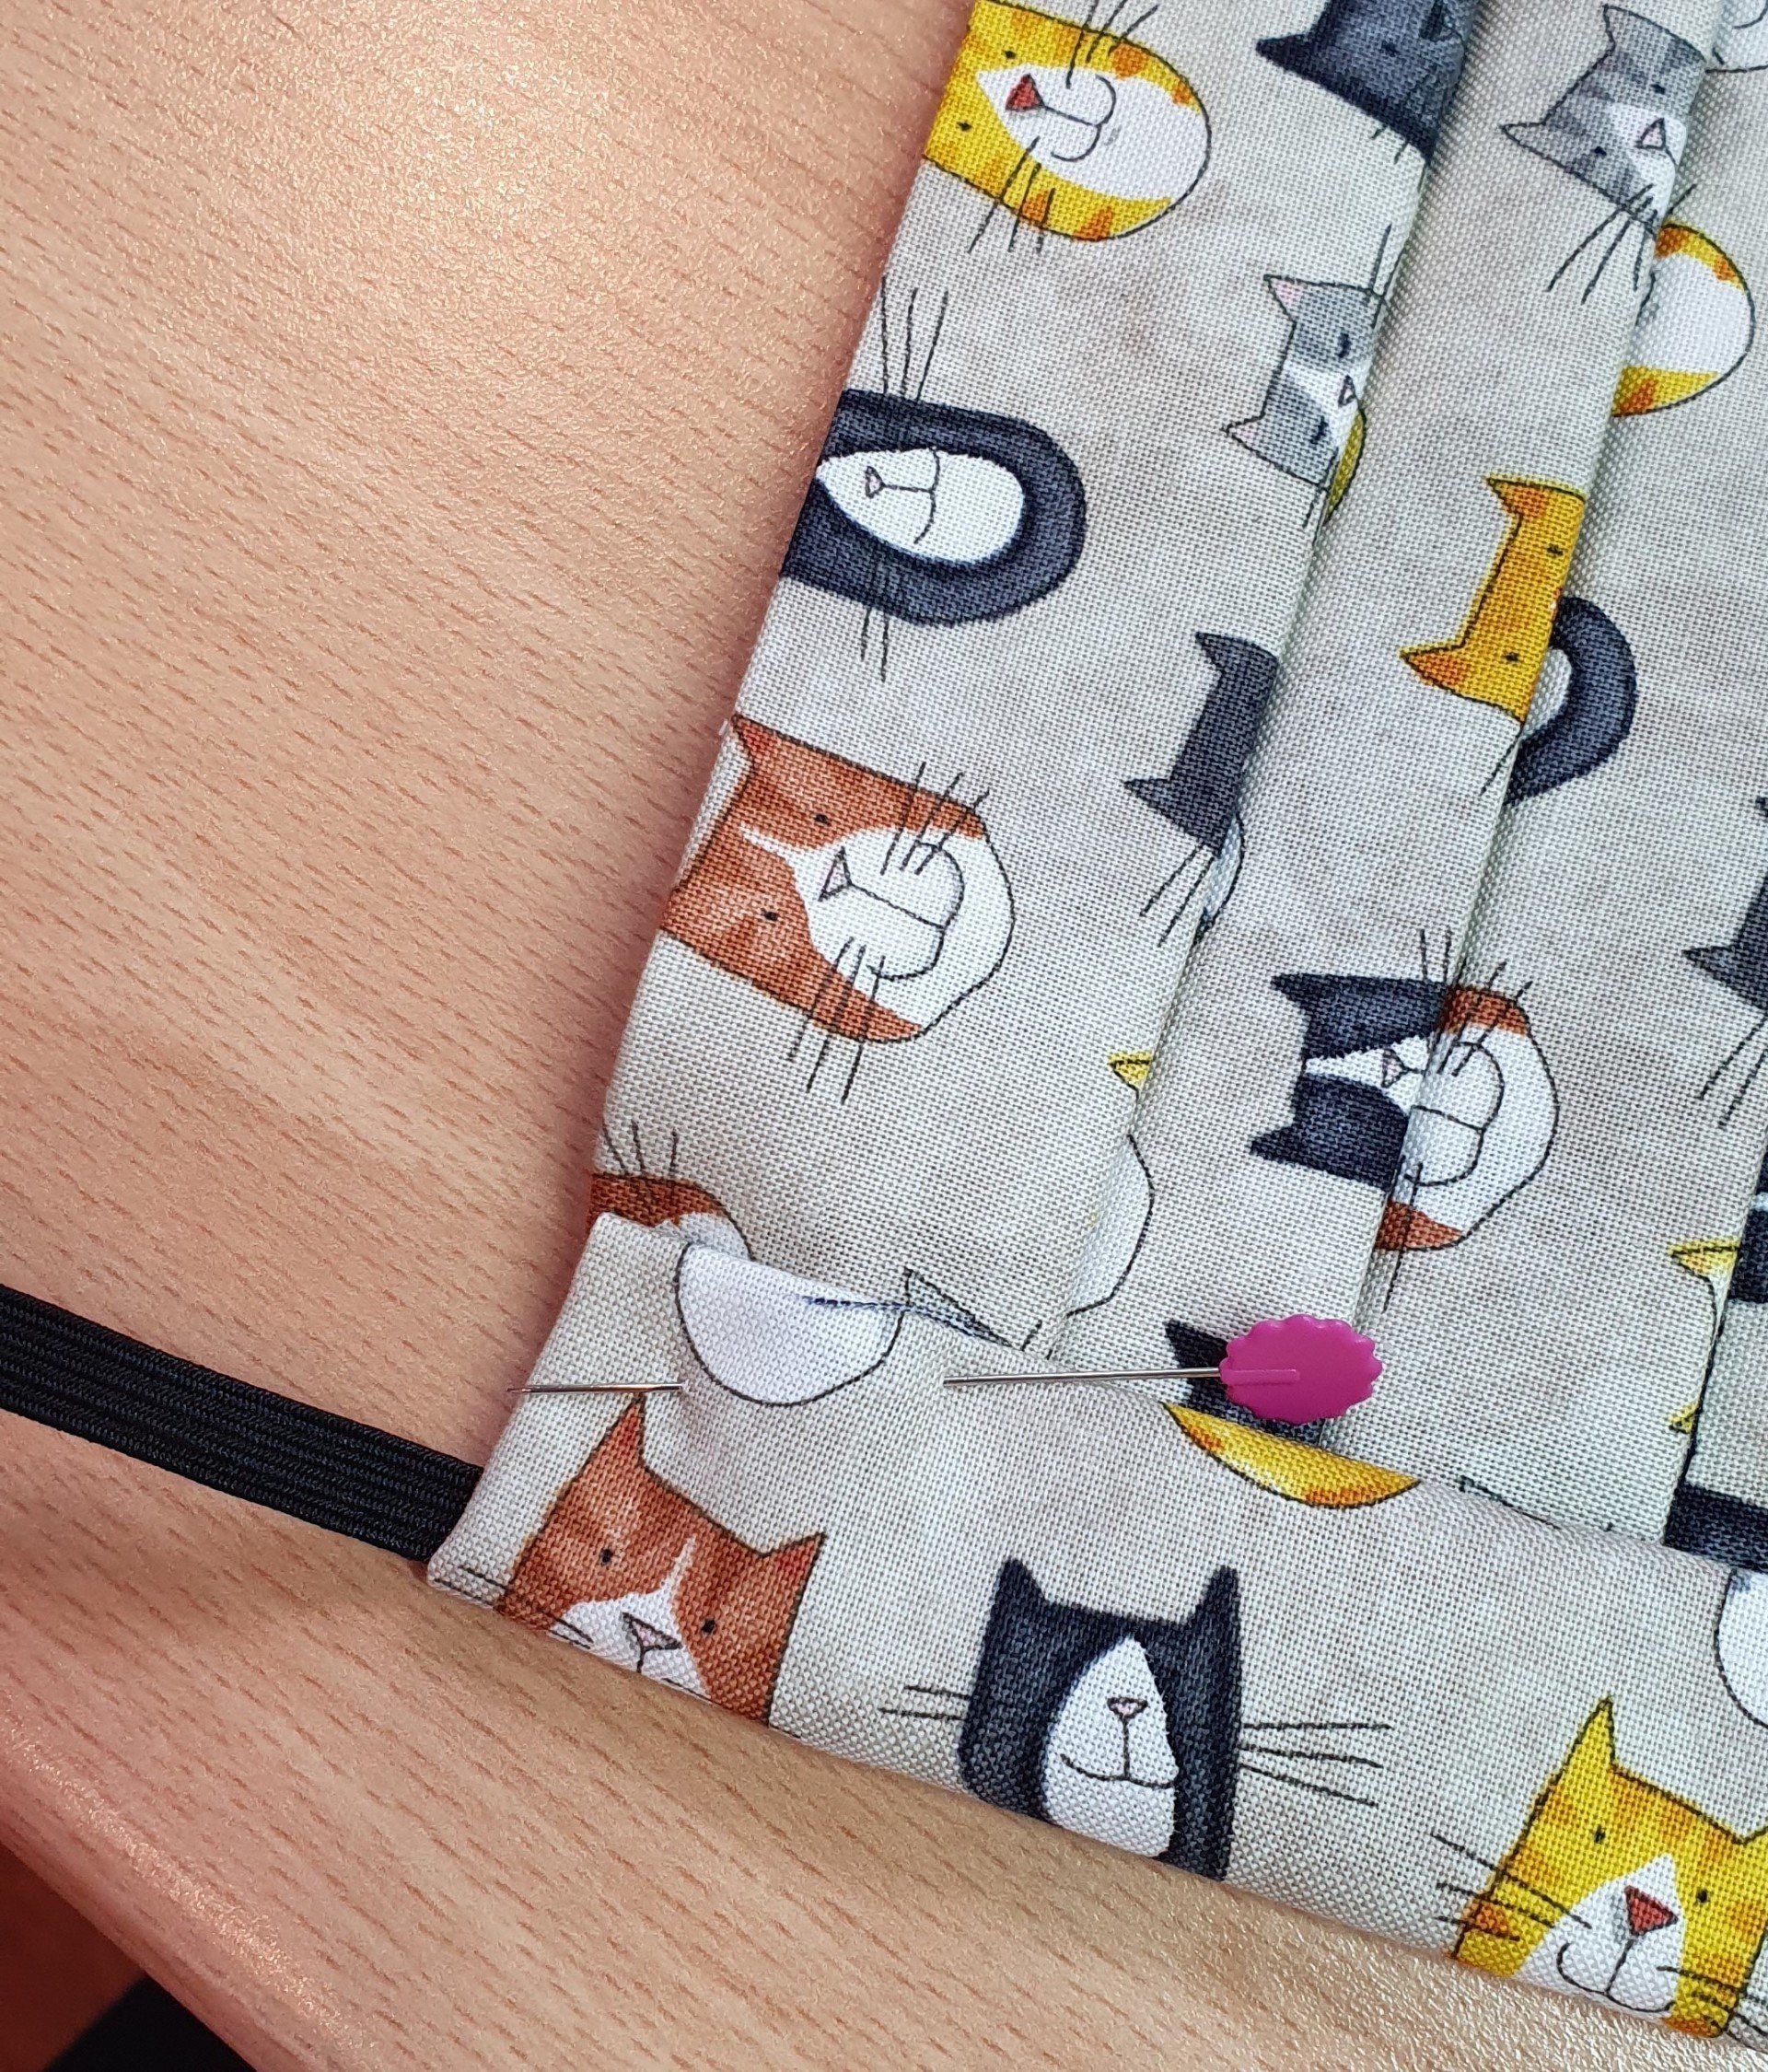
15. Make a knot in the elastic then swivel it so that the knot is hidden inside one of the channels.
Place the wired edge over your nose and adjust the wire to be snug against your face, the wire also helps with preventing your glasses from steaming up!
Pull the bottom edge under your chin so that your mouth and nose are covered.
The mask should, ideally, only be worn once before washing on 40 degrees.
If there is no time for washing before you need your face covering again, iron with plenty of steam to sterilise it.
link to the science on the efficacy of homemade face coverings if you like this sort of stuff!
Taken from Gov.uk issued 11/5/20
Wearing a face covering
A cloth face covering should cover your mouth and nose while allowing you to breathe comfortably. It can be as simple as a scarf or bandana that ties behind the head.
Wash your hands or use hand sanitiser before putting it on and after taking it off and after use. Avoid touching your eyes, nose, or mouth at all times and store used face coverings in a plastic bag until you have an opportunity to wash them.
Do not touch the front of the face covering, or the part of the face covering that has been in contact with your mouth and nose. Once removed, make sure you clean any surfaces the face covering has touched.
You should wash a face covering regularly. It can go in with other laundry, using your normal detergent.
When wearing a face covering, take care to tuck away any loose ends.